EasyManua.ls Logo

Aube Technologies TH147-P User Manual

Aube Technologies TH147-P
5 pages
To Next Page IconTo Next Page
Page #1 background imageLoading...
Page #1 background image
TH147-P and TH148LE-P 400-147-000-D 18/4/06 1/5
The TH147-P and TH148LE-P programmable thermostats can be
used to control:
a gas, fuel oil or electric furnace - 2 or 3 wires
a central air conditioner - 2 or 3 wires
a hot water system with or without pump - 2 wires
a millivolt system - 2 wires
a central heating and cooling system - 4 or 5 wires
Attention: These thermostats are not compatible with heat pumps
or multi-stage systems.
Note: The installation must be performed by an electrician or a qual-
ified installer.
2.1 Removing the Old Thermostat
IN ORDER TO AVOID ANY RISK OF ELECTRIC SHOCK, CUT
POWER TO THE HEATING/COOLING SYSTEM.
n Remove the old thermostat to access the wires.
Attention: If the old thermostat was mounted onto an electrical box,
it might have been powered by 120/240 volts. In this case, the
TH147-P or TH148LE-P thermostat cannot be used.
o Identify and label each wire (with the corresponding letter on
the wire terminal) and remove them from the terminals.
p If necessary, strip the end of each wire
(maximum of 6 mm).
q Wrap the wires around a pencil to prevent
them from falling into the wall.
r If the hole in the wall is too big, insulate it
using a non-flammable material in order to
avoid air draughts behind the thermostat.
2.2 Installing the New Baseplate
For a new installation, choose a location approximately 1.5 m
(5 feet) above the floor and on an inside wall. Avoid draughty
areas (top of staircase, air outlet, etc), dead air spots (behind
doors), direct sunlight or areas near concealed pipes or chim-
neys.
n Remove the thermostat faceplate.
o Loosen the locking screw in order to separate the thermostat
from its baseplate (the screw cannot be completely removed).
p Gently tilt the thermostat upwards.
q Mark and bore the appropriate mounting holes (or use the
existing holes). Insert the plastic anchors.
r Pass the wires through the opening of the baseplate and fix the
baseplate to the wall using the screws provided.
1. Introduction
Functions
TH147-P
TH148LE-P
Heating/cooling control X X
Fan control X X
7-day programming including:
- Pre-programmed energy-saving schedule
- Early Start
- Temporary bypass
- Time display (12 h or 24 h)
X
X
X
X
X
X
X
X
X
X
Programmable cycle lengths X X
Temperature display in °C or °F X X
Backlit display X X
Battery replacement indicator X X
Filter replacement indicator X X
Unoccupied mode activated remotely (requires Aube’s CT240) X
Interchangeable faceplates (titanium, charcoal & taupe) X
Automatic daylight savings changeover X
TH147-P & TH148LE-P
Programmable Thermostats
Installation
and User Guide
Adjustment
buttons
Display
System operating
mode selector
Fan operating
mode selector
Backlight
button
Programming
buttons
2. Installation
Question and Answer IconNeed help?

Do you have a question about the Aube Technologies TH147-P and is the answer not in the manual?

Aube Technologies TH147-P Specifications

General IconGeneral
TypeProgrammable Thermostat
DisplayLCD
CompatibilitySingle-stage heating and cooling systems
ProgrammableYes
Display BacklightYes
Temperature Range5°C to 30°C
Voltage24V
Load1.5A
Stages1
Control7-day programmable

Summary

Introduction to Aube Thermostats

Installation and Setup Guide

Removing the Old Thermostat

Steps to safely remove an existing thermostat and prepare for the new installation.

Installing the New Baseplate

Guidance on selecting a location and mounting the baseplate for the new thermostat.

Connecting the Thermostat Wiring

Instructions for wiring the thermostat to various heating and cooling systems.

Remote Control Input Setup

Connecting the TH148LE-P thermostat to remote control systems like CT240.

Setting the JP2 Jumper for Fan Operation

Configuration of the JP2 jumper to define fan operation in automatic mode.

Installing Thermostat Batteries

Procedure for inserting and replacing the AA batteries in the thermostat.

Completing the Thermostat Installation

Final steps to mount the thermostat onto the baseplate and apply power.

Basic Thermostat Functions and Features

System Operating Mode Selection

How to select heating, cooling, or off modes for the HVAC system.

Fan Operating Mode Control

Setting the fan to operate automatically or continuously.

Viewing and Setting Temperature

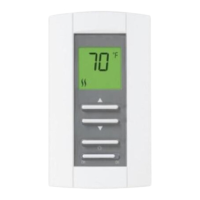
Procedure for viewing the current temperature and adjusting the setpoint.

Display Backlight Function

Information on how the display illumination is activated.

Thermostat Control Mode Options

Switching between manual, automatic, and unoccupied control modes.

Temporary Bypass Feature

How to temporarily override the current temperature schedule.

Filter Replacement Indicator

Understanding the icon that signals the need for filter replacement.

Battery Replacement Indicator

Recognizing the icon that alerts users to replace thermostat batteries.

Configuration and Programming Settings

Navigating the Configuration Menu

Steps to access and modify various thermostat configuration parameters.

Setting the Time and Day

Procedure for setting the current time and day on the thermostat.

Setting the Date for TH148LE-P

Instructions to set the date, used for daylight-saving changes.

Understanding the Pre-programmed Schedule

Overview of the default heating and cooling schedule settings.

Customizing the Thermostat Schedule

Guide to recording and setting personalized heating and cooling schedules.

Programming Specific Schedule Periods

Detailed steps for setting start times and temperatures for each program period.

Technical Specifications and Warranty

Technical Specifications Overview

Key technical details including power, load, ranges, and dimensions.

Product Warranty Information

Details on the one-year limited warranty, exclusions, and consumer rights.

Service and Support Contact

Contact information for installation, operation, or warranty inquiries.

Related product manuals