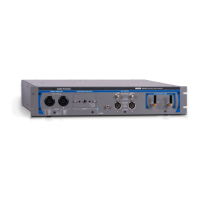
Installation
APx511 B Series Hearing Instrument Analyzer: Installation 3
Running the software with instrument hardware
attached
NOTE: You must have standard user rights or
administrator rights to operate APx500 software.
Guest users are not supported.
Connecting the instrument to your PC
Before connecting your APx511 instrument to your PC,
install the APx500 measurement software as described
above. Connecting the instrument prior to software installa-
tion may cause Windows to select an incorrect USB driver
for the instrument.
USB driver selection
The measurement software communicates with the APx511
using a USB 2.0 interconnection. Once the software is suc-
cessfully installed, connect one end of the USB cable to a
USB 2.0 port on the PC, and the other end to the PC
INTERFACE port on the rear of the APx511. We strongly
recommend that you use the USB cable included with your
instrument (AP part number CAB-APSI). We have tested
other USB cables that perform poorly.
Note: Some PCs have optional USB ports on the
front of the PC, or on extension brackets on the
rear. In many cases these convenience ports
have compromised performance due to the extra
cable length within the PC. We recommend using
USB ports directly connected to the PC mother-
board, typically at the rear of the PC.
Connect the APx511 mains power cord to the instrument
and to a source of ac mains power. See Setting up the
hardware below for more information about mains connec-
tions.
Turn the instrument on by rocking the mains power switch
up to ON ( | ). The mains power switch is located in the
power entry module on the rear of the APx511. Windows
will detect the presence of the APx511 on the USB port and
will open the Hardware Update Wizard to search for the
correct software driver. Select “Install the software automat-
ically.” Windows will find the Audio Precision driver soft-
ware installed with APx500 and connect to the APx511.
Launch APx500 by double-clicking on the installed short-
cut. With the APx511 connected, you may be asked to
update the instrument firmware during the first launch of
the measurement software. APx500 will start, and in a short
time you will be presented with the opening screen. Refer to
the APx500 User’s Manual for more information about
making measurements.
The APx500 User’s Manual is available as a PDF
on the APx500 Application Disc and online at
ap.com; a hard-copy version can be ordered from
Audio Precision or your local distributor.
Setting up the hardware
Connecting your instrument to the electrical
mains supply
The APx511 instrument must be connected to a 50–60 Hz
alternating current (ac) electrical mains supply, maximum
voltage 250 Vrms.
The instrument has been configured at the factory for the
expected voltage at its intended destination, as ordered. The
voltage setting and fusing arrangement will normally be
correct unless the instrument has been transported into
another area. The power entry module has a strip of indica-

 Loading...