8
Connections
INPUT CONNECTORS: The Reference 10 provides
seven pairs of BAL/SE input connectors: 1, 2, 3, 4,
5, 6, and Processor. The BALANCED/SINGLE ENDED
selector (touch screen) or BAL/SE (remote) should be
selected to match the type of connection used (BAL
or SE) on each input.
Connect either the BAL or SE connectors for each
input. Never connect the BAL and SE connectors
simultaneously for each input.
OUTPUT CONNECTORS: Two pairs of BAL/SE main
outputs are provided.
RECORD OUTPUT: The BAL/SE tape outputs should
be connected to your recorder’s ‘Record’ or ‘Line’
inputs. These outputs provide a xed-level two-
channel signal (L, R) to your recorder from whichever
input is selected. The non-variable output level will
be the same as the output of the selected source.
It is possible to dub or copy from one recorder to
another by connecting the output of the source
recorder to an unused set of stereo inputs (e.g. 5 or
6). The signal will then be routed to the Record Out
connectors when that input source is selected.
RS-232 Connection: The RS-232 connection allows
for remote control via systems such as Creston or
other automation systems.
12V IN/OUT REMOTE START JACKS: The +12V DC
input/output jacks provide the ability to remotely
turn on and off other linked components such as
power ampliers having similar capabilities.
Installation Instructions
While the Reference 10 does not dissipate an
unusual amount of heat, it is important that it be
provided with reasonable airow to assure long,
trouble-free operation. In addition, the following
installation guidelines will help insure maximum sonic
performance as well as reliable service:
1. Operate unit in upright and horizontal position,
prefer-ably on solid, non-metal shelving.
2. Do not stack the preamp on top of a power
amplier: not only could this cause overheating,
but hum may be introduced into the preamp
from the proximity of the amplier’s power
transformer. Do not stack components or other
objects directly on top of the Reference 10.
3. Do not place or operate your preamp on a soft
or irregular surface such as a rug. This will prevent
proper ventilation.
4. Do not operate your preamp without the top and
bottom covers installed. These are required both
for safety as well as shielding from interference
(except in service operations by qualied
personnel).
5. Ensure a minimum of 8-10” clearance above the
unit when placed on shelving.
General Operating Procedure
Start Up:
1. Secure all rear-panel connections between
Reference 10, power amplier(s) and input
sources.
2. Plug three-prong power cord from rear of chassis
into grounded A.C. wall outlet. The Power switch
defaults to ’off’ when the unit is plugged into a
power receptacle.
3. Press power switch (either remote or front panel).
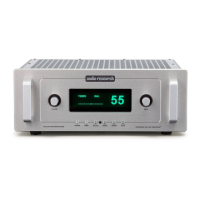
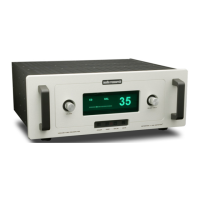
The screen will initially display ‘Now Loading’ for a
few seconds, after which it will display the Audio
Research logo followed by ‘Reference 10’ (g.
3 + 4). The main display screen will then appear
on the screen, and ‘MUTE’ will be ashing. Once
‘MUTE’ becomes solid, depress the front panel
MUTE button (right button) or touch the word
‘MUTE’ on the screen to initiate normal operation.
4. Select input source, then BAL or SE as necessary.
Shut Down:
1. Activate ‘Mute’ function.
2. Set Volume level to 0.
3. Turn off power amplier(s).
4. Press Power switch to ‘off’.
5. Turn off input sources.
g. 3
g. 4