4 | Page
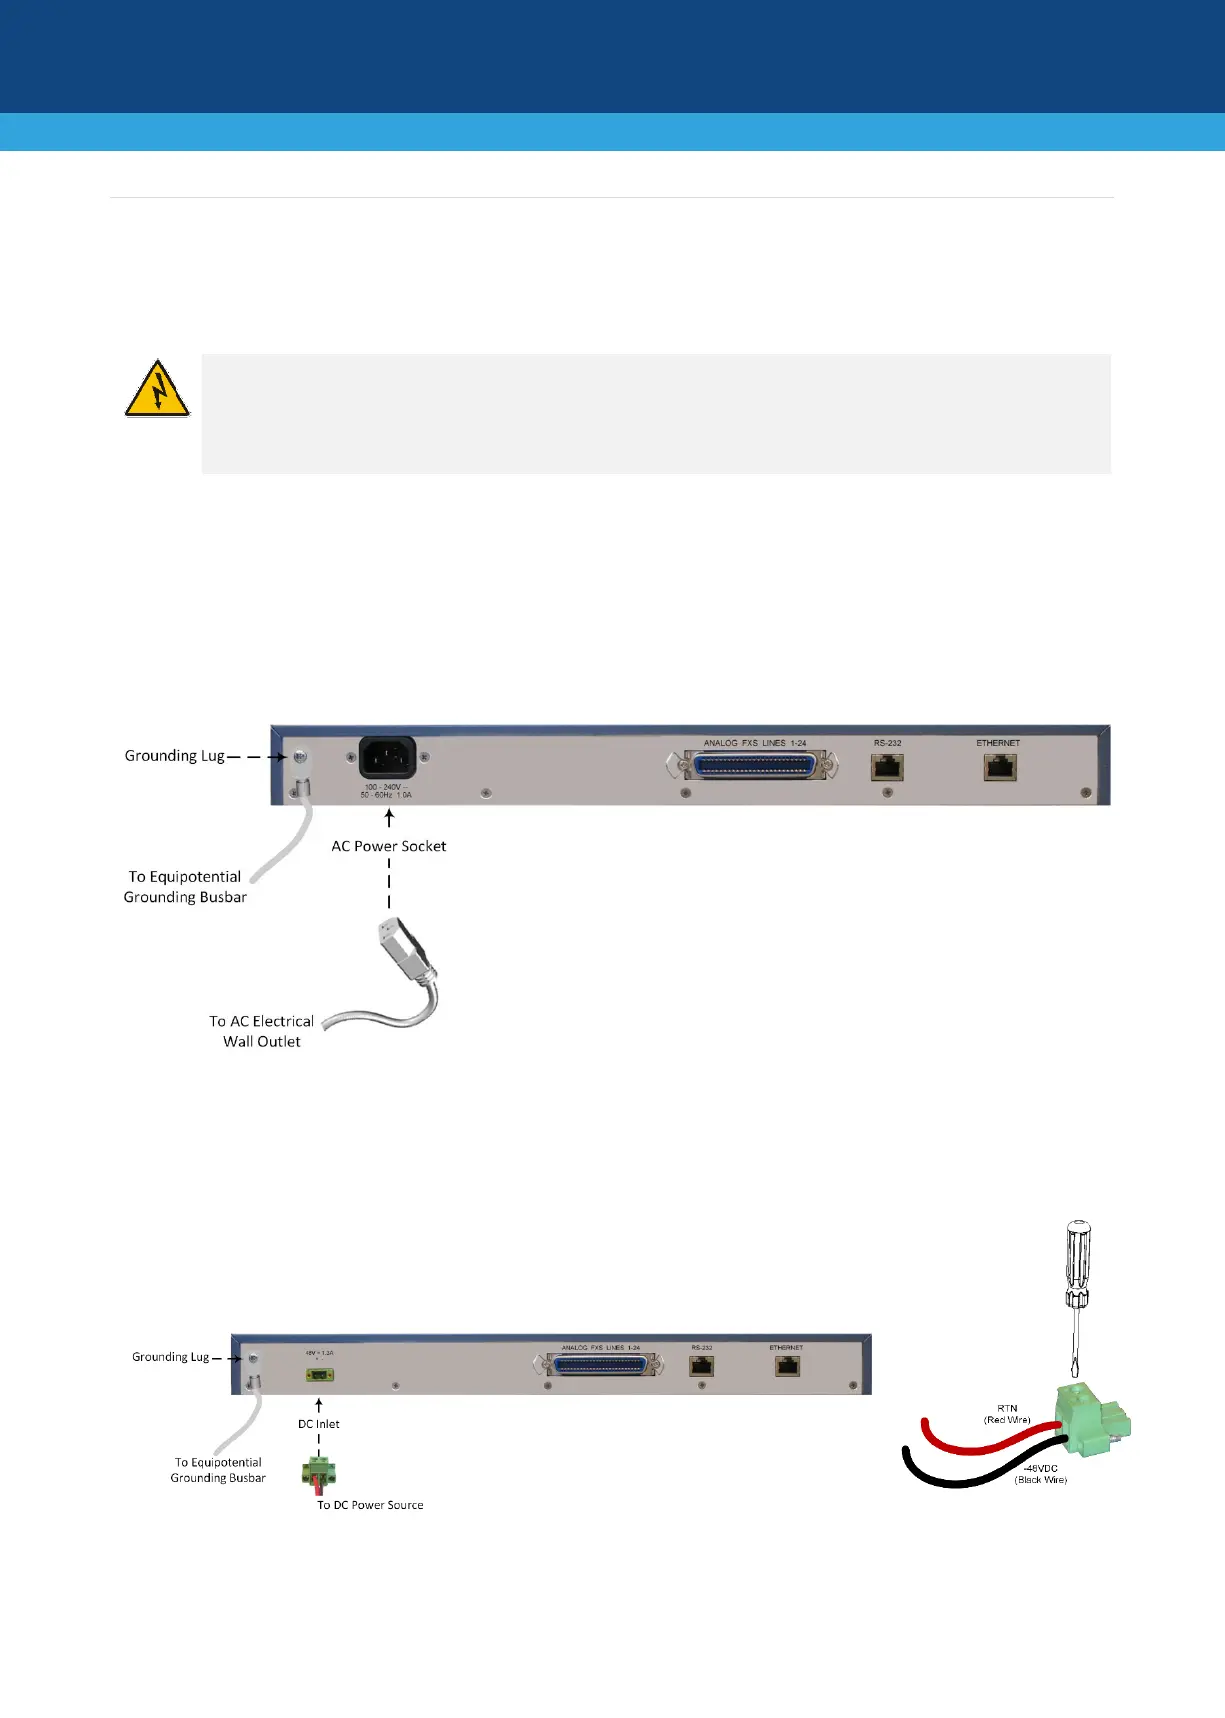
Cabling the Device for Power
Depending on ordered model, your device can be powered either from a standard alternating current (AC)
electrical wall outlet or a -48V DC power source.
• The device must always be grounded.
• If the FXS wires exit the building, they must be surge protected using gas discharge arrestors. For more
information, refer to the device's Hardware Installation Manual.
1. GROUNDING: Connect a grounding lug that is attached to your grounding wire to the device, using the
terminal screw located on the rear panel. Attach the grounding wire to the equipotential grounding
busbar. For more information, refer to the device's Hardware Installation Manual.
2. AC POWER: Insert the female connector that is located on one end of the AC power cord (supplied) into
the device's AC power socket, located on the rear panel. Insert the male plug that is located on the
other end of the AC power cord into a standard electrical wall outlet.
3. DC POWER: Connection to mains power of -48V must be made by trained or instructed service
personal. For connection to the device, use the supplied DC terminal block (supplied) in conjunction
with 18-AWG wires, paying attention to correct polarity (as indicated by the + and – labels on the
chassis, above the DC inlet). Secure the wires by fastening the screws located above them in the
terminal block. Insert the DC terminal block plug into the DC inlet, located on
the rear panel. Connect the DC power leads to a 48V DC power source. Use a
DC rated 5A circuit breaker in series with the -48V wire as a disconnect
device.
When power is received by the device, the Ready LED that is located on the front panel is lit green.
 Loading...