Owner’s Enjoyment Manual
®
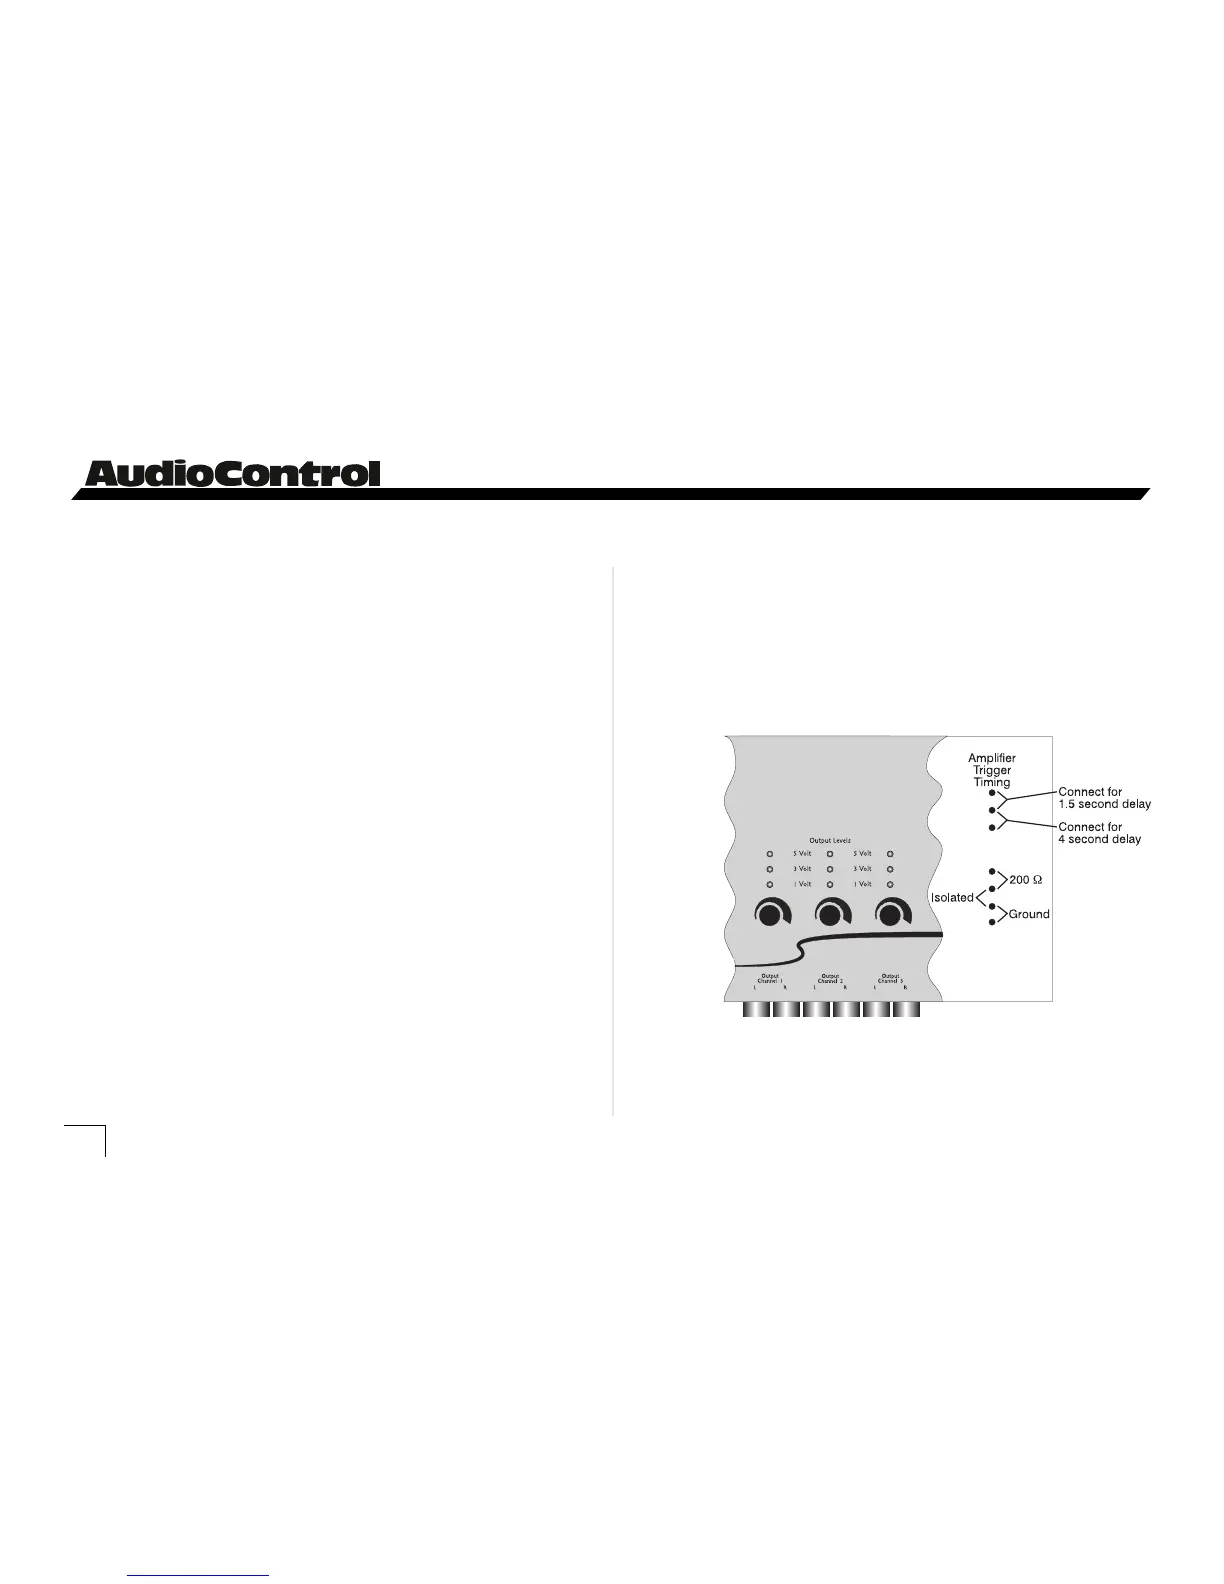
Figure 5 - Internal Jumper Connections On MVC
WARNING: Failure to disconnect the negative terminal
of your battery prior to the installation of your MVC can
result in a warm tingly feeling.
10
Up to this point everything you have read has served to
educate you on the operation of the MVC. We are sure that
you are chomping at the bit to install your MVC so we
recommend you read the following sections very carefully.
Placement & Mounting of the MVC
Placement: The MVC needs to be installed in the signal
path just prior to your amplifiers inputs. Hence, the closer
the MVC is to your amplifiers (physically not emotionally),
the better. Needless to say, in your efforts to mount the MVC
as close to the amplifiers as possible, be careful drilling holes.
You may put a hole in a gas tank or electrical wiring if you’re
not careful.
Mounting: Once you have selected a permanent
mounting location, position the unit and mark the appropri-
ate mounting holes with a felt-tip pin or scratch awl. After
drilling small pilot hole, secure your MVC with self tapping
screws.
INSTALLING YOUR MVC Master Volume Control
 Loading...