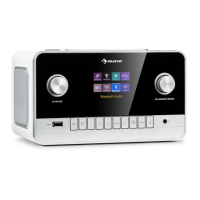
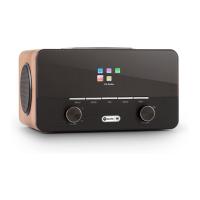
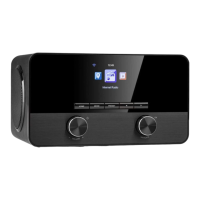
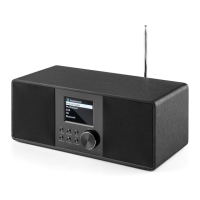
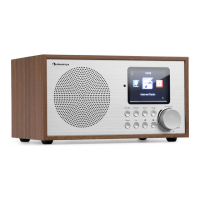
This document describes the Auna Connect 150 MKII, an internet radio with various audio functionalities.
Function Description
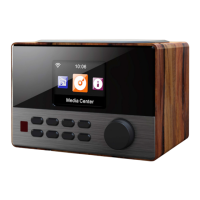
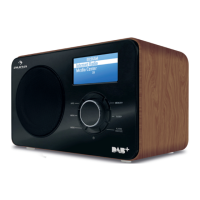
The Auna Connect 150 MKII is a versatile audio device that functions primarily as an internet radio. It allows users to access thousands of internet radio stations and podcasts from around the world by connecting to a Wi-Fi network. In addition to internet radio, it supports Digital Audio Broadcasting (DAB/DAB+) and FM radio with RDS. The device also features Bluetooth connectivity for streaming audio from mobile devices like phones or tablets, a USB port for media playback, and AUX IN/OUT jacks for connecting external audio sources or outputting audio to other devices. It includes an alarm function, a sleep timer, and an equalizer for sound customization. The device can be controlled directly via its front panel buttons and dials, or remotely using a dedicated remote control or the UNDOK app on a smartphone or tablet.
Important Technical Specifications
- Item Numbers: 10037493, 10037494, 10037495
- Radio Types: Digital (DAB/DAB+), FM, and Internet radio (via Wi-Fi).
- Frequencies:
- Digital Band III: 174–240 MHz
- FM: 87.5-108 MHz (with RDS)
- Bluetooth Frequency Range: 2402 – 2480 MHz
- Bluetooth Maximum Power: 3.5 dBm (EIRP)
- Display: 2.8", 320 x 240, TFT colour display
- WLAN Network:
- Wi-Fi: 802.11b, 802.11g, and 802.11n supported with WEP and WPA/WPA2 encryption.
- WPS: 2.412 GHz – 2.472 GHz (channels 1 to 13).
- Maximum Power: 16.00 dBm (EIRP). A 0.5 MB broadband connection is recommended.
- Media Streaming: Supported audio codecs include AAC, MP3, FLAC.
- Mains Power Adapter: 9 V DC, 3000 mA
- Output Connectors: 3.5mm stereo phone out socket
- Power Consumption: Standby mode: <1 W
- Dimensions: 240 mm x 138 mm x 176 mm
Usage Features
Getting Started
- Antenna: Unclip and fully extend the DAB/FM antenna.
- Power Connection: Insert the supplied mains adapter's jack into the DC IN socket on the rear of the radio and plug the mains adapter into a power outlet.
- Power On: Press the Standby button to turn on the device.
- Setup Wizard: On first power-on, the device will prompt to run a setup wizard to connect to Wi-Fi. Users can choose "Yes" to proceed with the on-screen instructions or "No" to set it up later.
Basic Operation
- Power On/Off: Press the Power button to turn on the internet radio. Press and hold the Power button for 2 seconds to enter standby mode.
- Volume Control: Turn the STANDBY/VOLUME dial on the front panel to adjust the volume.
- Navigation: Use the OK/NAVIGATE DIAL/SNOOZE button to navigate menus and confirm selections. The remote control also provides dedicated cursor and OK buttons.
- Home Button: Press the HOME button to display the 'function' menu, allowing selection between USB, DAB, FM, Internet Radio, BT, and AUX IN modes.
- Menu/Info Button: Press the MENU/INFO button to access main menus and view information.
- Back Button: Press the BACK button to return to the previous screen.
Internet Radio and Podcasts
- Access: From the 'function' menu, select 'Internet radio' or 'Podcasts'.
- Station List: Browse available stations or podcasts. Options include 'Last listened', 'Search' (by characters, origin, genre, language), 'Location' (by country or genre), 'Popular' stations, and 'Discover' (by origin, genre, or language).
- Selection: Use the NAVIGATE dial to select options and characters during search.
Bluetooth Audio Streaming
- Pairing: Press the Home button and select 'Bluetooth'. The Bluetooth input display will appear, and the Bluetooth icon will flash.
- Connect: On your mobile device, search for new Bluetooth devices and select 'Connect 150'. The device will automatically connect once paired.
- Playback: After selecting a song on your mobile device, use the PLAY/PAUSE button on the radio to control playback.
- Disconnect: Press and hold the BT PAIR button for 3 seconds, or disable Bluetooth on the connected mobile device.
DAB/FM Radio
- Mode Selection: From the Home screen, select 'DAB radio' or 'FM radio'.
- Scanning: The device will automatically scan for available stations.
- Station List: Access the 'station list' from the menu to view found stations.
- Manual Tuning: For DAB, select 'Manual Tuning' from the menu. For FM, press and hold the Select button to enter manual tuning mode and use the NAVIGATE dial to adjust frequency in 0.05 MHz steps.
- DRC (Dynamic Range Compression): Adjust DRC settings (high/low/off) from the menu to compress audio dynamic range in noisy environments.
- Prune Invalid (DAB): Remove unavailable DAB stations from the list via the menu.
Radio Presets
- Store (1-4): Tune to a desired DAB, FM, or internet radio station. Press and hold one of the numbered Preset buttons (1-4) on the remote control for two seconds.
- Store (5-20): Tune to a desired station. Hold the 5+ button to view the numerical list of presets, then use the NAVIGATE dial to select a preset number (5-20) and press OK to store. Existing presets can be overwritten.
- Recall: Press the corresponding numbered button (1-4) on the front panel or remote. For presets 5-20, press the 5+ button, then use the Select dial to scroll and select the desired preset.
Settings
- Alarm: Set up to two alarms with options for repeat (Off, Daily, Once, Weekends, Weekdays), time, mode (Buzz, Internet radio, DAB, FM), and volume. Use the NAVIGATE dial to adjust settings and save.
- Sleep Timer: Tap the SLEEP button on the remote repeatedly to select a sleep time (15, 30, 45, 60 minutes) after which the unit will enter standby. Tap repeatedly until "OFF" to cancel.
- Time and Date: The clock automatically sets via Network, digital, or FM radio signal. Manual setting options are available for time, date, time format (12/24 hour), time zone, and daylight saving time.
- Language: Select the preferred menu language from 'System settings' > 'Language'.
- Backlight: Adjust screen illumination duration ('Timeout') and brightness levels ('On level' for operation, 'Standby Level' for standby) from 'System settings' > 'Backlight'.
- Factory Reset: Resetting the device removes all presets, stored stations, alarms, and reverts all other options to default settings. Access from 'System settings' > 'Factory Reset'.
- Network Settings: Connect to Wi-Fi using the 'Network wizard' under 'System settings' > 'Network'. Enter the SSID and password (case-sensitive).
Maintenance Features
- Cleaning: Regularly clean the remote control transmitter and the sensor on the unit with a soft cloth.
- Battery Replacement (Remote Control): Replace the LR03 (AAA) battery in the remote control if the operating distance decreases or operation becomes erratic. Ensure correct polarity.
- Battery Disposal: Batteries should not be disposed of with household waste. Follow local regulations for battery disposal to protect the environment and human health.
- Power Cord: Unplug the power cord if the device will not be used for a long period to prevent potential damage.
- Ventilation: Maintain a minimum distance of 8 cm around the device for adequate ventilation. Do not obstruct ventilation openings with items like newspapers or curtains.
- Environmental Conditions: The device should not be exposed to water, rain, moisture, excessive heat (sunshine, fire), dripping or splashing liquids. Do not place objects filled with liquids on the apparatus.
- Servicing: Do not attempt to service the device beyond what is described in the manual. Refer servicing to qualified personnel if the power cord is damaged, objects have fallen into the apparatus, liquid has been spilled, the device has been exposed to rain, or if it malfunctions without external changes.
- UNDOK App: The UNDOK app allows remote control via smartphone or tablet. Ensure the mobile device is on the same Wi-Fi network as the radio. If another device with the app connects, the original connection will be cut off.