40/83
IT EN FR DE ES
WARNINGS AND ASSEMBLY INSTRUCTIONS
1
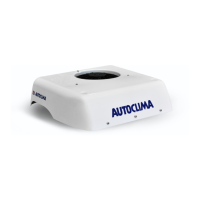
Before lifting the cooling unit on top of the vehicle’s roof, remove the outer cover unscrewing the relative securing
screws.
3
After having made the openings, carefully check in the roof cavity that the passages for outgoing cool air (2) and
internal air intake (1) (corresponding to the cut openings) are completely separate (g. 04).
If this is not the case, carefully seal these areas.
4
Glue the parts of gasket B to the base of the cooling unit, following the instructions as show in g. 05.
Coat the surface of the gaskets with a suitable sealing agent where they connect with the vehicle’s roof, and
repeat with the edge of the holes for securing the unit (g. 05).
5
6 rubber spacers C (Ø44) are supplied for the installation, which must be inserted between the cooling unit’s base
and the vehicle’s roof (g. 05 - 06).
When positioning the rubber spacers above the 6 Ø8mm holes previously cut, we suggest coating the
contact surfaces of the roof and their outside edge with a suitable sealing agent.
2
In order to secure the cooling unit, you will need to cut 2 openings in the vehicle’s roof (1 for outgoing cool air
and 1 for the intake of air from the cabin) + 6 holes for the securing points + any additional holes for the wiring
(g. 03).
Before cutting any part of the vehicle’s bodywork, disconnect its battery; check that the section of roof
you intend to cut does not house any electrical wiring.
Cut the openings between the roof’s supporting struts, without removing them.
Before commencing installation, check that the section of roof selected for securing the cooling unit is at and
horizontal.
Position the cooling unit in the central area with respect to the roof’s longitudinal axis.
The control for the cooling unit must be installed at a point which is easily accessible for the driver with respect to
his normal driving / manoeuvring position.
It is necessary for the vehicle on which the cooling unit is installed to be equipped with an alternator which can
meet the required electrical absorption. Otherwise, we suggest replacing it with one which can better meet the
required demands.
Check that the roof surface intended for installing the cooling unit is strong enough; if necessary reinforce the
structure with supporting crossbeams and struts.
This intervention will avoid the formation of concave areas in the area where the cooling unit is installed, which
could cause water to accumulate and to inltrate the vehicle.
Fig.
03
1 Opening for the intake of the cabin’s internal air
2 Opening for outgoing cool air
3 Holes for securing the unit to the vehicle’s roof