DL06 Micro PLC User Manual; 3rd Edition Rev. E
4–9
Chapter 4: System Design and Configuration
1
2
3
4
5
6
7
8
9
10
11
12
13
14
A
B
C
D
Connecting to MODBUS and DirectNET Networks
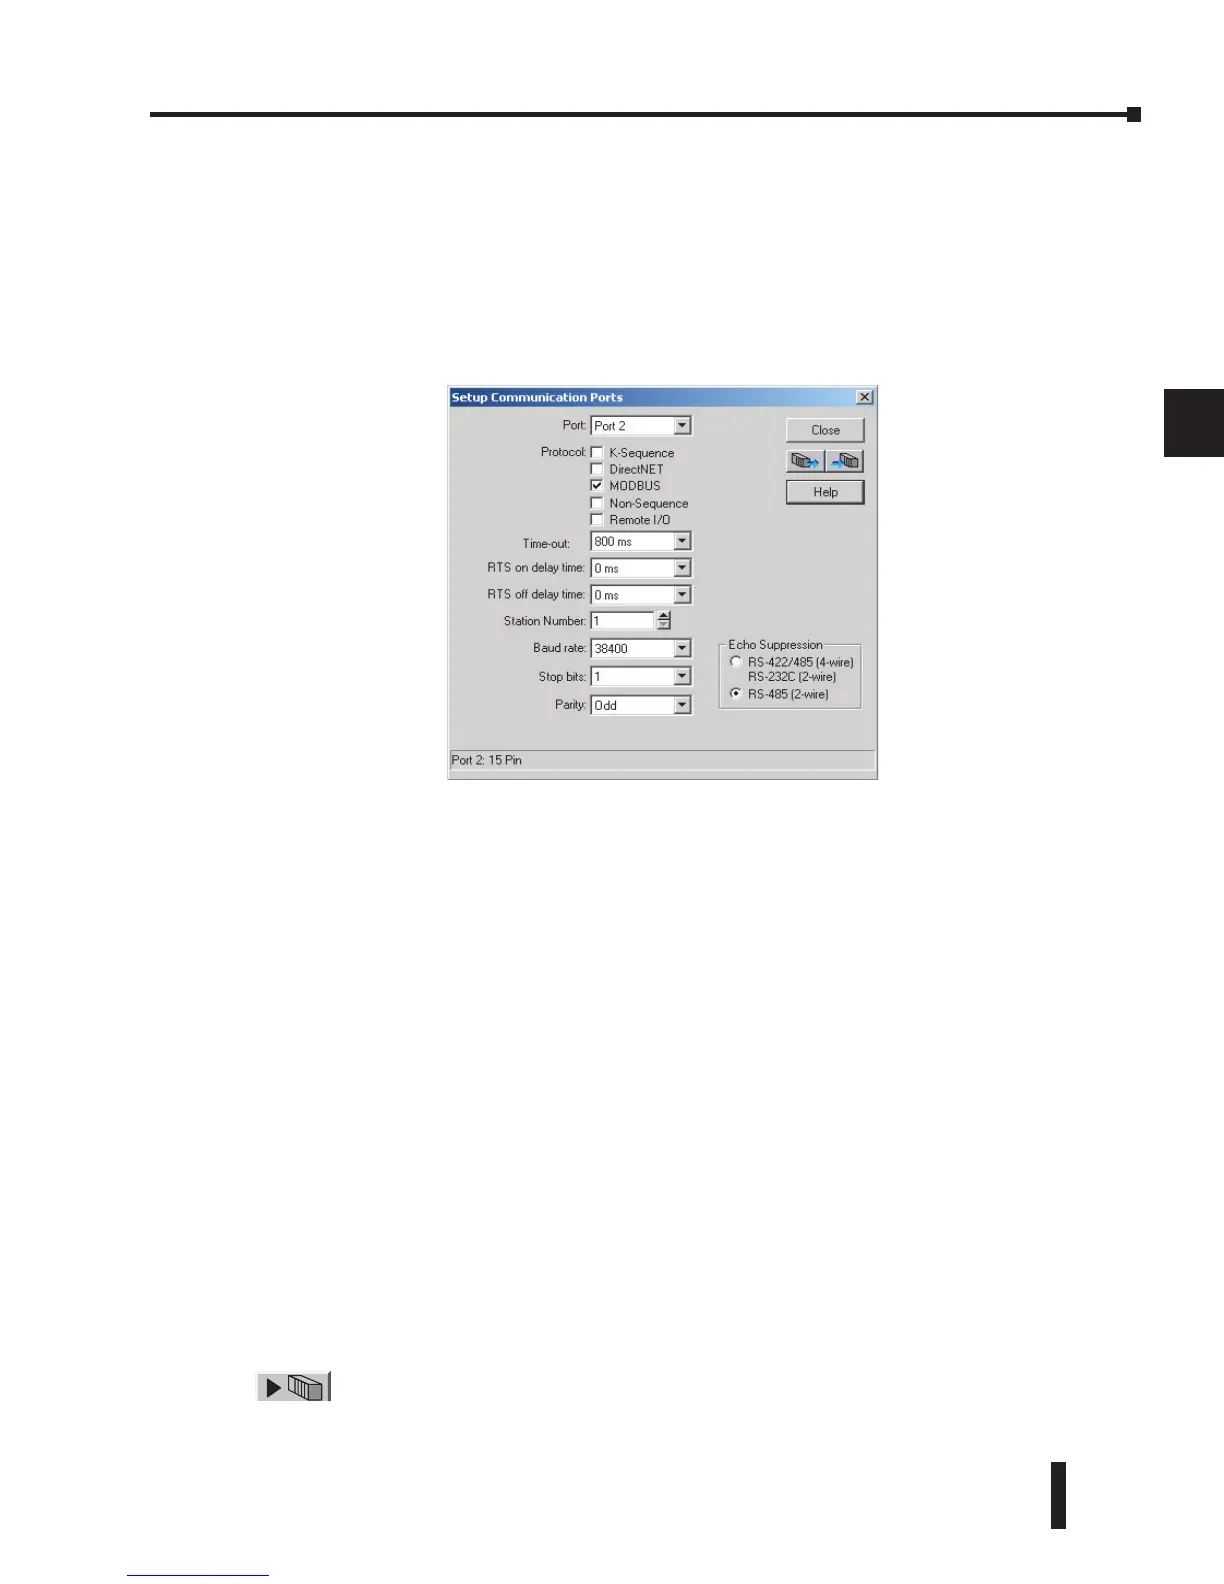
MODBUS Port Configuration
In DirectSOFT, choose the PLC menu, then Setup, then “Secondary Comm Port”.
• Port: From the port number list box at the top, choose “Port 2”.
• Protocol: Check the box to the left of “MODBUS” (use AUX 56 on the HPP, and select “MBUS”),
and then you’ll see the box below.
• Timeout: amount of time the port will wait after it sends a message to get a response before logging
an error.
• RTS ON / OFF Delay Time: The RTS ON Delay Time specifies the time the DL06 waits to send
the data after it has raised the RTS signal line. The RTS OFF Delay Time specifies the time the
DL06 waits to release the RTS signal line after the data has been sent. When using the DL06 on a
multi-drop network, the RTS ON Delay time must be set to 5ms or more and the RTS OFF Delay time
must be set to 2ms or more. If you encounter problems, the time can be increased.
• Station Number: For making the CPU port a MODBUS master, choose “1”. The possible range
for MODBUS slave numbers is from 1 to 247, but the DL06 network instructions used in Master
mode will access only slaves 1 to 99. Each slave must have a unique number. At powerup, the port
is automatically a slave, unless and until the DL06 executes ladder logic network instructions which
use the port as a master. Thereafter, the port reverts back to slave mode until ladder logic uses the
port again.
• Baud Rate: The available baud rates include 300, 600, 1200, 2400, 4800, 9600, 19200, and 38400
baud. Choose a higher baud rate initially, reverting to lower baud rates if you experience data errors
or noise problems on the network. Important: You must configure the baud rates of all devices on the
network to the same value. Refer to the appropriate product manual for details.
• Stop Bits: Choose 1 or 2 stop bits for use in the protocol.
• Parity: Choose none, even, or odd parity for error checking.
•Echo Suppression: Select the appropriate wiring configuration used on Port 2.
Then click the button indicated to send the Port configuration to the CPU, and click Close.