DL06 Micro PLC User Manual; 3rd Edition Rev. E
4–11
Chapter 4: System Design and Configuration
1
2
3
4
5
6
7
8
9
10
11
12
13
14
A
B
C
D
Non–Sequence Protocol (ASCII In/Out and PRINT)
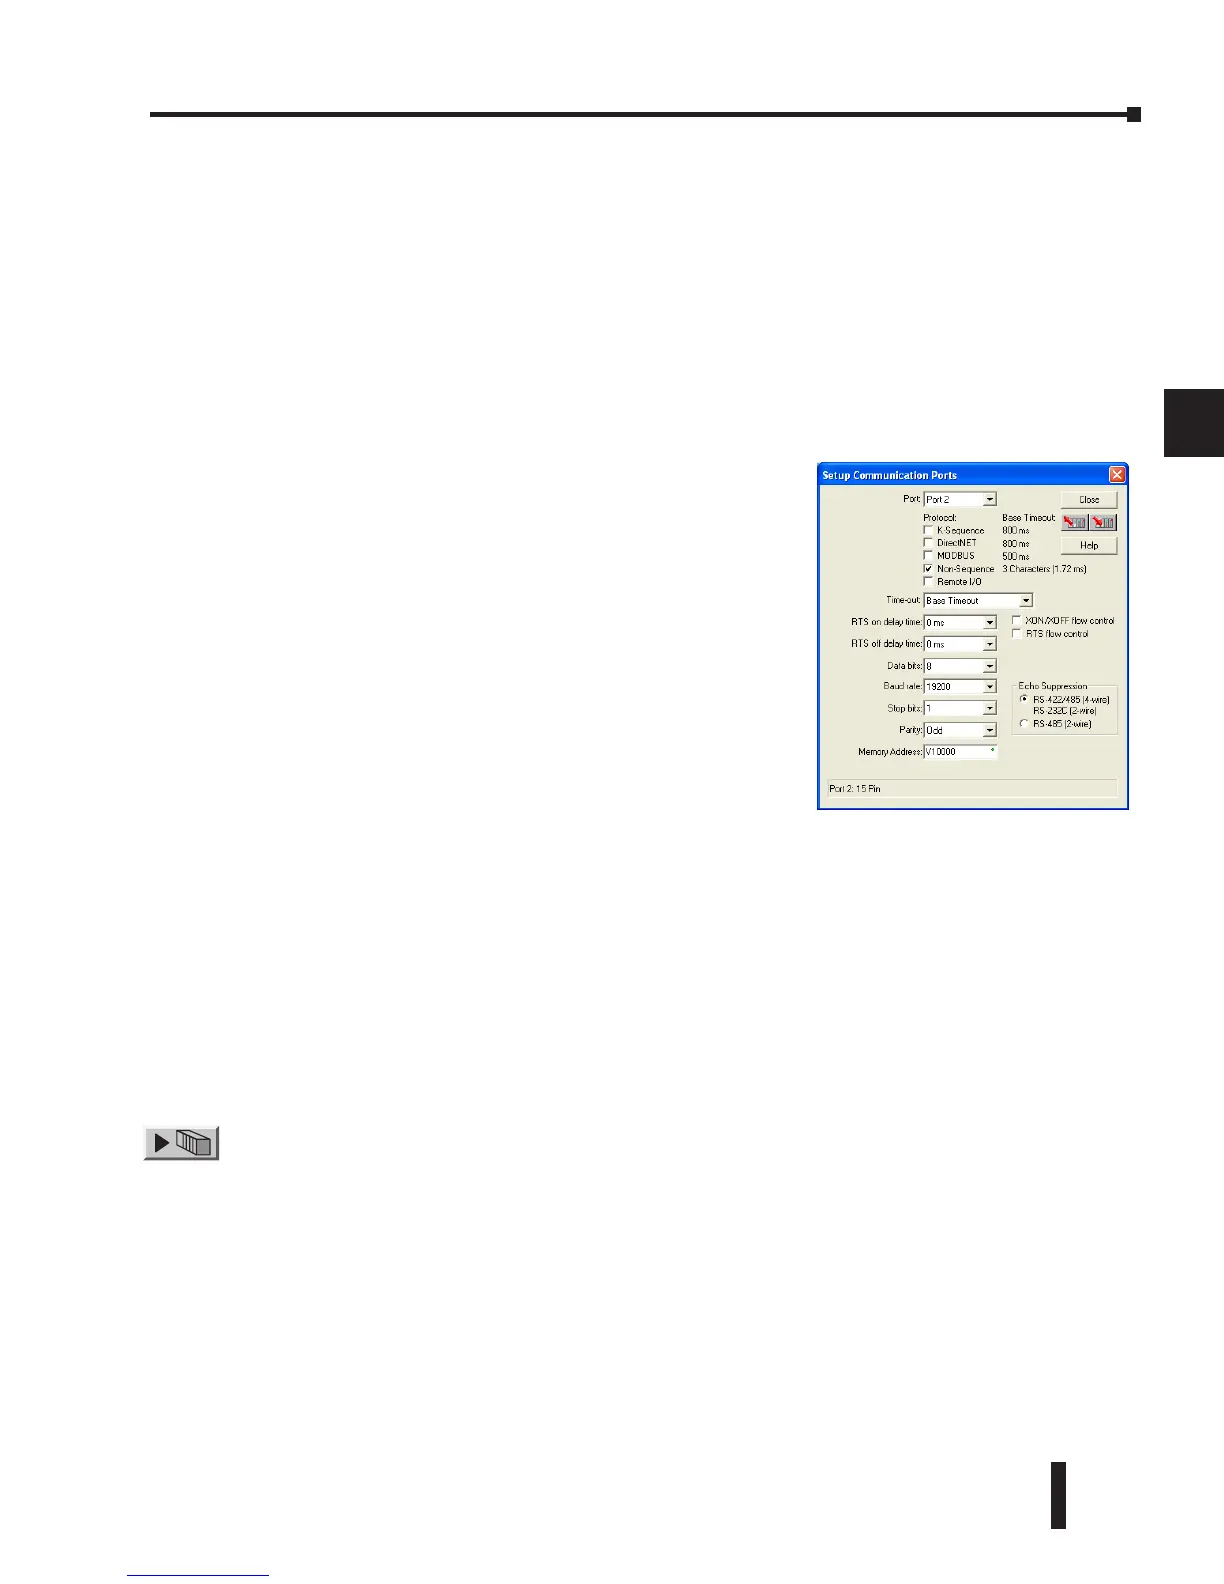
Non-Sequence Port Configuration
Configuring port 2 on the DL06 for Non–Sequence allows the CPU to use port 2 to either read
or write raw ASCII strings using the ASCII instructions. See the ASCII In/Out instructions
and the PRINT instruction in chapter 5.
In DirectSOFT, choose the PLC menu, then Setup, then “Secondary Comm Port”.
• Port: From the port number list box at the top, choose “Port 2”.
• Protocol: Check the box to the left of “Non–Sequence”.
• Stop Bits: Choose 1 or 2 stop bits to match the number of stop bits specified for the connected
devices.
• Parity: Choose none, even, or odd parity for error checking. Be sure to match the parity specified for
the connected devices.
• Echo Suppression: Select the appropriate radio button based on the wiring configuration used on
port 2.
• Xon/Xoff Flow Control: Choose this selection if you have Port 2 wired for Hardware Flow Control
(Xon/Xoff) with RTS and CTS signal connected between all devices.
• RTS Flow Control: Choose this selection if you have Port 2 RTS signal wired between all devices.
Click the button indicated to send the port configuration to the CPU, and click Close.
• Memory Address: Please choose a memory address with 64 words of contiguous free memory for use
by Non-Sequence Protocol.
• Timeout: Amount of time the port will wait after it sends a
message to get a response before logging an error.
• RTS On Delay Time: The amount of time between raising
the RTS line and sending the data.
• RTS Off Delay Time: The amount of time between resetting
the RTS line after sending the data.
• Data Bits: Select either 7–bits or 8–bits to match the number
of data bits specified for the connected devices.
• Baud Rate: The available baud rates include 300, 600,
900, 2400, 4800, 9600, 19200, and 38400 baud. Choose
a higher baud rate initially, reverting to lower baud rates if
you experience data errors or noise problems on the network.
Important: You must configure the baud rates of all devices
on the network to the same value. Refer to the appropriate
product manual for details.