Do you have a question about the Autopot 4Pot XL and is the answer not in the manual?
Verify AQUAvalve flooding and draining by checking silicon seal alignment at eye level.
Clean the AQUAvalve with soapy water, disassemble, and clear the nozzle carefully.
Insert the circular root control disc, gold face down, into the pot.
Remove collar, push pipe through, attach to AQUAvalve, and rescrew collar gently.
Fill the pot with medium, plant, water through, and allow to drain outside the tray.
Connect AQUAvalve to the tray, ensuring the 'half moon' is on the T section.
Ensure the tray is positioned correctly and is level for proper system operation.
Cut the 6mm or 16mm pipe to the required length for the setup.
Push the top hat grommet into the tank and then push pipe through it.
Inside the tank, push the 6mm filter into the 6mm pipe.
Place the pot into the tray, ensuring it is clean for proper function.
Place the lid over the valve onto the tray, securing the system.
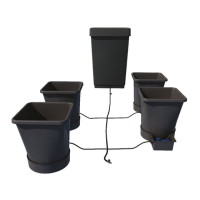
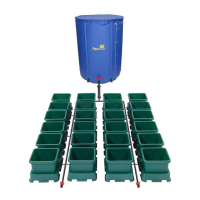
The AutoPot 4Pot XL system is an automatic plant watering system designed to provide consistent and controlled hydration to plants, promoting healthier growth with minimal manual intervention. The system utilizes gravity and a unique AQUAvalve mechanism to deliver water and nutrients to plants as needed, without the need for pumps or electricity.
The core function of the 4Pot XL system is to automate the watering process for up to four plants. It operates on a simple yet effective principle: a central reservoir (47-liter tank) supplies water and nutrient solution to individual plant trays via a network of 6mm pipes. Each tray contains an AQUAvalve, which is the intelligent heart of the system. The AQUAvalve senses when the water level in the tray drops below a certain point and then opens to allow more solution to flow in from the reservoir. Once the desired water level is reached, the AQUAvalve closes, preventing overwatering and ensuring that plants have access to water only when they need it. This wet/dry cycle encourages robust root development and prevents waterlogging. The system is designed to allow plants to establish themselves for 7-10 days after potting before the automatic watering is initiated, which helps in developing a stronger and healthier root system.
| Brand | Autopot |
|---|---|
| Model | 4Pot XL |
| Category | Irrigation System |
| Language | English |