EasyManua.ls Logo

Autopot easy2grow 100 User Manual

Autopot easy2grow 100
2 pages
To Next Page IconTo Next Page
Page #1 background imageLoading...
Page #1 background image
Your easy2grow 100
set-up guidelines
mail@autopot.co.uk I www.autopot.co.uk I +44 (0)844 8581520
plants
Allow
your
to
establish
before turning your
system
on
.
Ensuring that the AQUAvalve floods
and drains correctly
Care and maintenance
Making sure your AQUAvalve floods and
drains correctly is simply achieved and
only takes a few seconds.
Hold the AQUAvalve at eye level so that
you can see the silicon fitted to the top float
resting on the hole below it.
The silicon must create a tight seal when
touching the hole.
If it looks like it is not sitting parallel on the
hole below, simply lift the top float and
apply pressure to one side of the silicon,
drop the float and hold at eye level again.
Repeat the procedure if necessary.
At the end of your growing season, clean
the AQUAvalve using warm soapy water.
Using an old tooth brush will help.
The AQUAvalve is easily disassembled.
The top float will slide all the way across
and the bottom float is unclipped from its
pivoting position. The circular discs fitted to
the top float can also be removed by using
pliers to grip the raised point.
At this point is it advisable to remove the
silicones to avoid them being lost.
It is also handy to have a paper clip or
pipe cleaner to hand so that you can push
it through the AQUAvalve nozzle, this will
remove any lime scale build up that may
have occurred during the growing season.
Blowing through the AQUAvalve nozzle will
also help to remove any build up. Do not
under any circumstances use a drill & drill
bit to clear the AQUAvalve nozzle.
This will potentially damage the
AQUAvalve beyond repair.
Simple care
guidelines
11
2
2
3
4
Ensure the silicon is sitting parallel on
the hole below it. Hold at eye level
to check the position is correct
100100
Trays & Pots
available in
green or black
Question and Answer IconNeed help?

Do you have a question about the Autopot easy2grow 100 and is the answer not in the manual?

Autopot easy2grow 100 Specifications

General IconGeneral
MaterialPlastic
System TypeAutomatic irrigation system
Water Reservoir Capacity47 L
Valve TypeAquavalve
Water EfficiencyHigh

Summary

Ensuring Correct AQUAvalve Flooding and Draining

AQUAvalve Alignment and Seal Check

Verify the AQUAvalve silicon creates a tight seal at eye level for proper function.

Adjusting AQUAvalve Position

Procedure to correct misalignment for proper sealing by applying pressure to the silicon.

AQUAvalve Care and Maintenance

Seasonal Cleaning of AQUAvalve

Clean with warm soapy water and a toothbrush at season's end.

AQUAvalve Disassembly and Nozzle Clearing

Disassemble and clear lime scale from nozzle using non-abrasive methods to avoid damage.

easy2grow 100 Setup Guide

Prepare Pots with Marix Discs

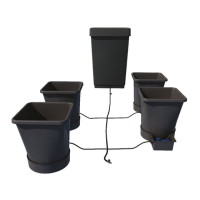
Place black marix discs into pots before potting plants.

Potting and Initial Watering

Fill pots with medium, pot plants, and water until drainage occurs.

Connect 6mm Pipe to AQUAvalve

Remove collar, push pipe through, and securely re-attach collar without overtightening.

Fit PotSock Squares and Pipe Sections

Place PotSock Squares over pot bases and cut pipe to appropriate length.

Place Pots and Lid onto Tray

Position pots in tray and place lid over valve for drainage.

Connect Pipe to Tank and Fittings

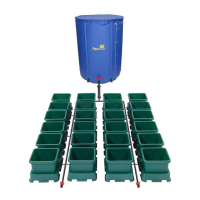
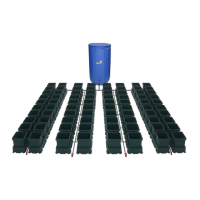
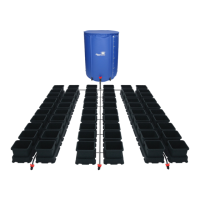
Connect 6mm/16mm pipe to the tank adapter and other system fittings.

Related product manuals