FIGURE 24 FIGURE 25
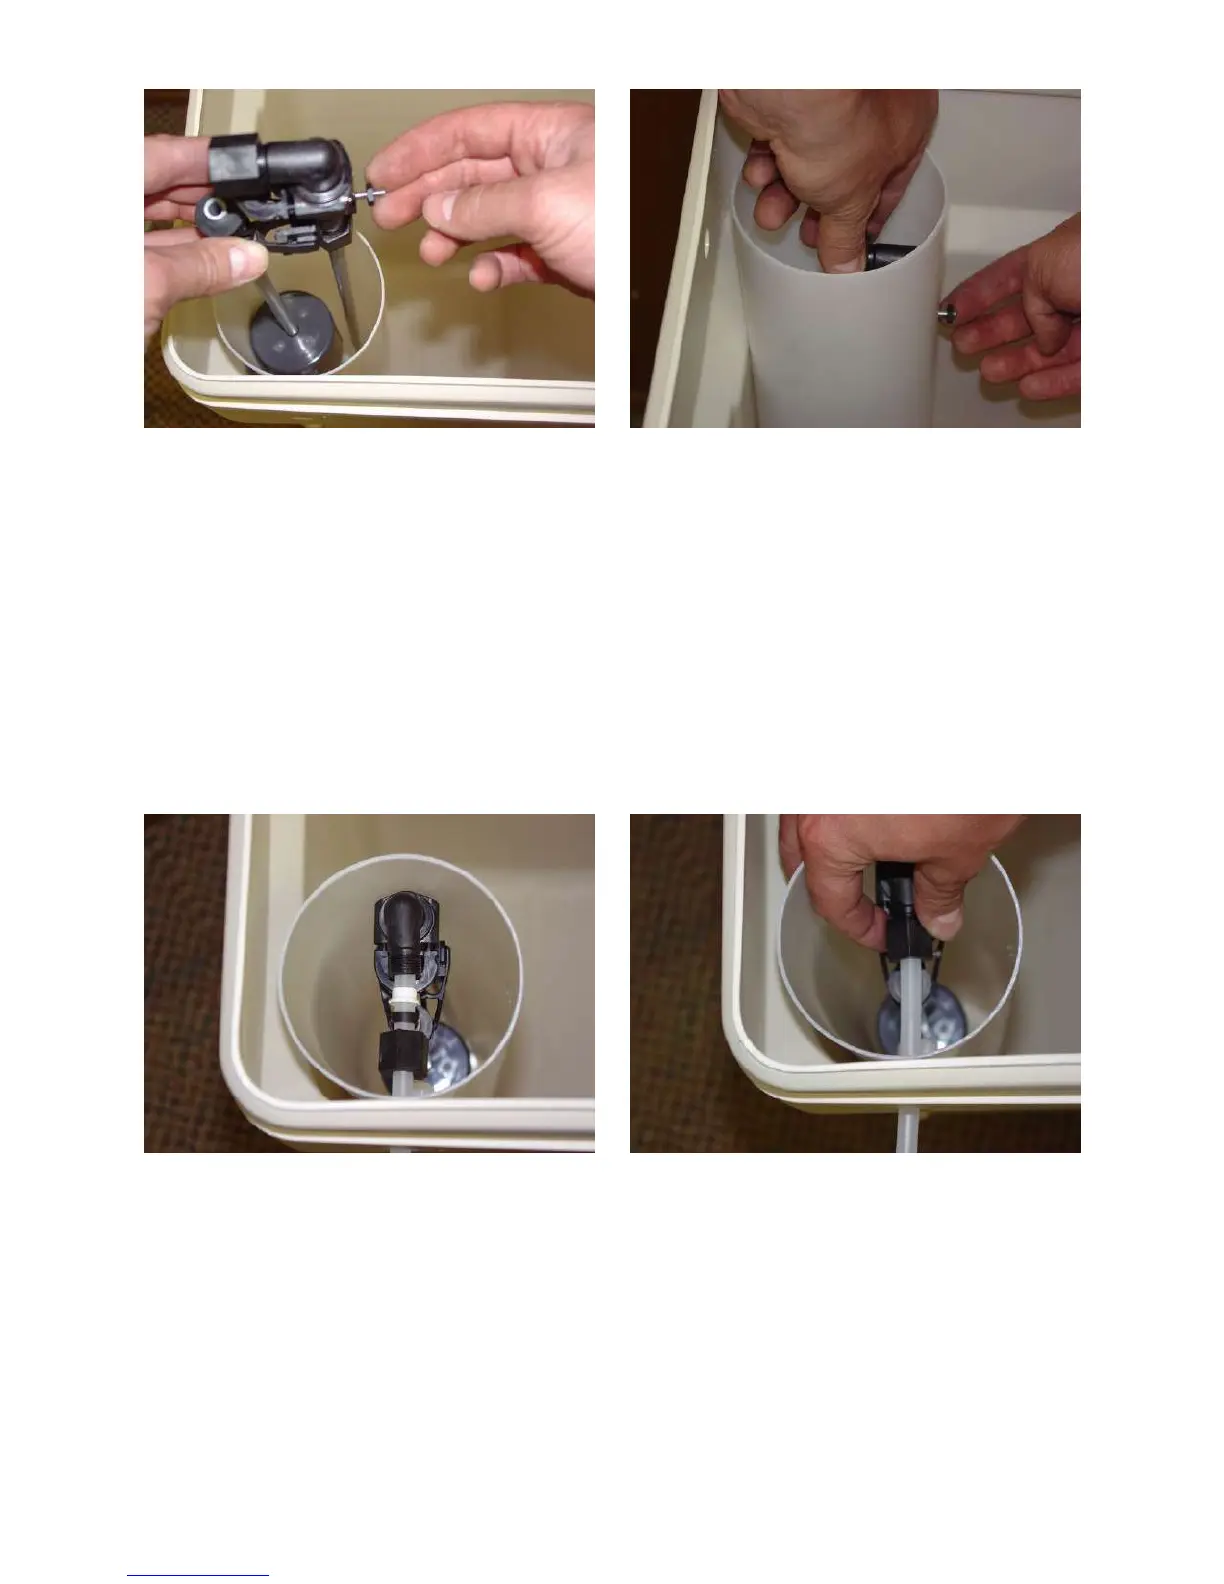
• Take the other end of your brine line tube and insert the tube through the small
hole drilled through the brine tank, and brine well. Loosely unscrew the hex nut
on the 2310 brine float assembly. Insert the tubing end firmly into the hex nut on
the 2310 brine float assembly.
• Next back-off the hex nut and ferrule assembly so they are securely onto the
tubing as shown in Figure 26 below. NOTE: Please be sure to assemble the nut
in the fashion described to prevent system malfunction and possible brine
tank overflow!
• Hand-tighten the hex nut snugly onto the 2310 brine float assembly as shown in
Figure 27 below.
•
FIGURE 26 FIGURE 27
• Finally, use ½” I.D. tubing to connect the drain bard fitting on the brine tank to a
floor drain as shown in Figure 28 on the following page. NOTE: This is not
necessary as the 2310 assembly is designed to prevent an overflow situation, ,
but is a good and recommended precaution for a proper installation.
© 1999-2007 QualityWaterForLess.com - 9 - info@qualitywaterforless.com
 Loading...