35 (40)
7.2 Cleaning the attachment
Clean the attachment regularly to prevent accumulation of dirt which is more difficult to remove. A pressure
washer and mild detergent can be used for cleaning. Do not use strong solvents, and do not spray directly at
the hydraulic components, or at the labels on the attachment.
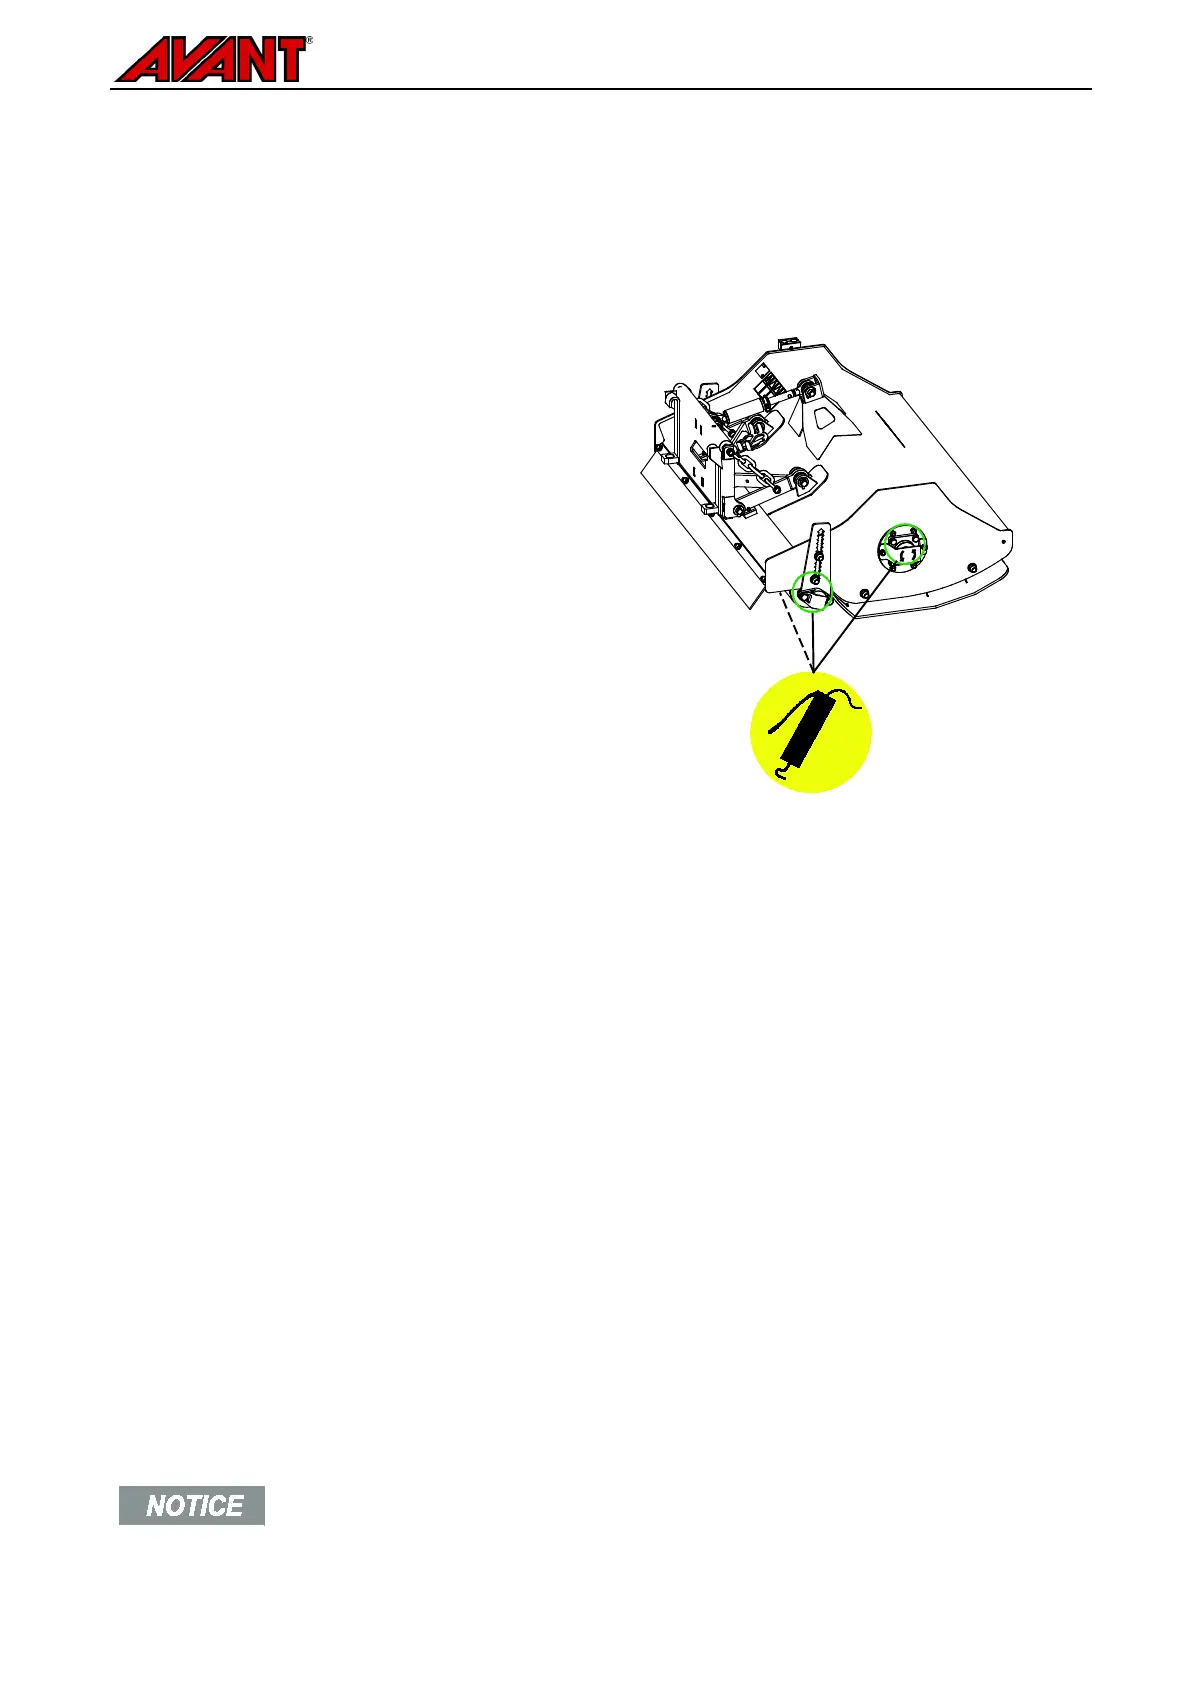
7.3 Lubrication
There are lubricating points at the bearings of the
roller and the flail shaft.
Appropriate lubrication interval depends heavily
on operating conditions, but lubricant must be
added at least after every 10 hours of use.
Adequate lubrication must be ensured, and if the
bearings are dirty, lubricant must be added; added
lubricant will push out dirt.
Clean the end of the nipple before greasing and
add only a small amount of grease at a time. All
lubrication nipples are standard R1/8" nipples.
Replace any damaged nipples.
7.4 Inspection of metal structures
Also the metal structures of the attachment must be inspected regularly. Check visually for damages and
inspect the quick coupling brackets and their surrounding area carefully. The attachment must not be used if it
is deformed, cracked, torn or damaged in any other way.
Welding repairs are only allowed to be carried out by professional welders. When welding, only methods and
additives suited for steel used in attachment must be used. For more information about repairs contact your
nearest service point.
7.5 Blade maintenance
The condition of the cutting blades should be checked at least after every few uses. The blades wear down in
normal use and can get damaged if hitting a rock or other obstacle. Increased vibration is a sign of blunt or
damaged blades.
If the cutting results have weakened from the original, the cutting blades have probably become blunt or some
of the blades have been damaged. Uneven cutting results, increased power requirement and increased
vibration level are signs of blunt or damaged blades.
To protect the blades and other components when hitting rocks or other obstacles, the blades are fitted to the
axle in a way that allows them to move. Check that all of the blades move freely and are not stuck. The Y- and
L-type blades are sharpened from the both sides and they can be installed the other way round. When
reinstalling the blades, make sure, that you fix them in the same manner as they were originally. Do not over
tighten the blade screws.
The fastening bolts and nuts must be replaced with new ones when replacing blades.
 Loading...