This document is a user manual for Avantco Commercial Refrigerators and Freezers, providing essential information for setup, operation, and maintenance of these units.
Function Description
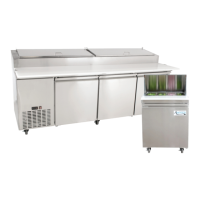
Avantco commercial refrigerators and freezers are designed for food storage in commercial settings. They are pre-programmed to maintain optimal temperatures for food safety, with refrigerators cycling between 33°F and 40°F, and freezers between -5°F and 2°F. The units feature automatic defrost cycles to prevent frost buildup, ensuring efficient operation. Some models offer field-convertible doors, allowing users to change the door hinge from right to left, providing flexibility in placement and accessibility.
Important Technical Specifications
The manual lists several models covered:
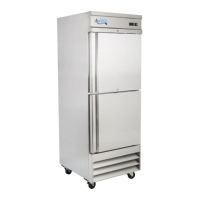
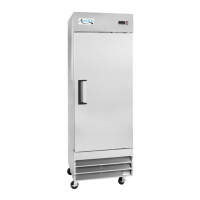
- Refrigerator models: 178A12RHC, 178A19RHC, 178A23RHC, 178A23RGHC, 178A35RHC, 178A49RHC, 178A49RGHC
- Freezer models: 178A12FHC, 178A19FHC, 178A23FHC, 178A35FHC, 178A49FHC
These units utilize flammable refrigerants, requiring service by trained personnel only. The manual emphasizes the importance of proper electrical connection, stating that units should be plugged into a grounded, properly-sized electrical outlet with appropriate over-current protection and a dedicated outlet. Extension cords are not recommended. After unplugging, a minimum 10-minute wait is required before plugging back in to prevent compressor damage.
Usage Features
Installation:
- Units should be installed on a strong, level surface in a well-ventilated indoor area.
- A minimum of 6 inches of clearance is required on both sides and the back for optimal performance.
- Direct sunlight, high humidity, and dusty areas should be avoided to prevent rust, decreased efficiency, and malfunction.
- Shelves with raised lips must be installed with the lip facing up towards the rear to promote proper airflow.
- If the unit has been transported on its side, it must stand upright for at least 24 hours before plugging in.
- All accessories (shelves, clips) should be installed, and the unit should reach the desired temperature before loading products.
Field Convertible Doors (for A-19R, A-19F, A-23R, A-23F models):
These models ship with right-hinged doors, but can be converted to left-hinged with the purchase of a separate bottom hinge (Avantco item #178AKITFR). The conversion process involves:
- Removing the bottom vent (4 Phillips head screws).
- Removing the top panel (2 small screws).
- Removing small Phillips head screws from the top and bottom door hinges.
- Taking off the top bracket (3 bolts).
- Removing the door, being careful not to lose the small round brass spacer on the bottom hinge.
- Removing the bottom bracket (3 bolts).
- Replacing the bottom hinge with the new left-hand bottom bracket (3 bolts).
- Adjusting top and bottom spring tensioners for proper door closure.
- Placing the door on the bottom hinge on the left side, reusing the brass spacer.
- Placing the top bracket on the door and bolting it to the unit (3 bolts).
- Replacing small screws on the top and bottom of the bracket and door spring.
- Reattaching the bottom vent and top panel.
Temperature Adjustment:
While factory-set for optimal performance, the minimum temperature can be adjusted on digital control units:
- Hold "SET" for 1 second; the display will flash the current minimum temperature.
- Use arrow buttons to adjust the desired minimum temperature.
- Press "SET" again to save settings.
Users are reminded to calculate the differential, as cabinet temperature can fluctuate up to +7 degrees above the set minimum.
Manual Defrost Cycle:
- Freezers: Press the defrost button ("def" and down arrow) for approximately 5 seconds to start or stop the cycle.
- Refrigerators: Press the defrost button (snowflake symbol and down arrow) for approximately 3 seconds to start or stop the cycle.
Loading Product:
- Avoid blocking the air duct/fan at the top of the unit; maintain a minimum of 4 inches of clearance between products and the fan.
- Ensure shelves are level and properly secured.
- Do not store flammable or explosive gases or liquids.
Maintenance Features
Condenser Coil Cleaning:
- For efficient operation, the condenser surface should be kept free of dust, dirt, and lint.
- Recommended cleaning frequency is at least once per month using a commercial condenser coil cleaner.
Fan Blades and Motor Cleaning:
- Clean fan blades and motor with a soft cloth as needed.
- If washing fan blades, cover the fan motor to prevent moisture damage.
Interior Cleaning:
- Clean the cabinet interior with warm water and mild soap.
- Avoid steel wool, caustic soap, abrasive cleaners, or bleach, which can damage the interior finish.
- Wash door gaskets weekly by removing them from the frame, soaking in warm water and soap for 30 minutes, then drying and replacing. Check for proper seal after replacement.
- Periodically remove and clean shelves and shelf brackets with mild soap and warm water.
Troubleshooting:
The manual provides a troubleshooting guide for common issues:
- Compressor Not Running: Check for tripped fuse/breaker, unplugged power cord, or thermostat set too high. If in defrost cycle, wait for it to finish.
- Cabinet Temperature Too Warm: Check thermostat setting, ensure airflow is not blocked (maintain 4 inches clearance from fan), or contact service for low refrigerant levels. Ensure the door is completely closed.
- Interior Light Not Working: Check light switch, bulb connection, or replace burned-out bulb.
- Condensation on Cabinet/Floor: Inspect and clean, repair, or replace the door gasket if not sealing properly.