MONTAGE DES FUSSRAHMENS ATTACHING THE SPEAKER STAND
⑦ Optional: in order to increase the inclination of the sys-
tem, position 1—2 plastic spacers ❶ each on top of the
two threads facing to the front of the speaker.
⑧ Screw the speaker stand with the supplied M8 screws
❷ and washers ❸ onto the 4 x threads at the bottom-
side of the system by slowly turning them clockwise
until it obtains a tight fit. A good handtight force will
suffice, there is no need to use excessive force!
⑦ Optional: zum stärkeren Anwinkeln des Lautsprecher-
systems, je 1—2 x Kunststoff Distanzscheiben ❶ auf die
vorderen beiden Gewindebohrungen legen.
⑧ Mit den mitgelieferten M8 Schrauben ❷ den Fussrah-
men vorsichtig in die 4 x Innengewinde auf der Unter-
seite des Systems einschrauben. M8 Unterlegscheiben
❸ verwenden und Schrauben ❷ im Uhrzeigersinn ein-
schrauben. Auf richtig festen Sitz achten. Dabei jedoch
keine übermäßige „Gewalt“ ausüben.
SYSTEM INSTALLATION SYSTEM INSTALLATION
AUFRICHTEN DES SYSTEMS TILTING THE SYSTEM
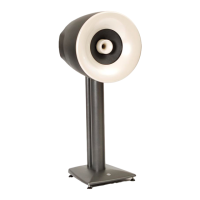
⑨ After the installation of the speaker stand, carefully lay
the speaker on its front.
⑩ Carefully lift up the system onto its speaker stand.
⑬ Remove upper styrofoam box.
SYSTEM INSTALLATION SYSTEM INSTALLATION
⑨ Das System mit montiertem Fussgestell vorsichtig nach
vorne auf die Vorderseite umlegen.
⑩ Das System vorsichtig aufrichten.
⑪ Obere Styrodur–Verpackung abheben.
Je nach Hörabstand und Höhe der Sitzposi-
tion ist die Neigung der Hornsysteme wich-
tig. Der Winkel kann durch Distanzscheiben
bei der Montage des Fussrahmens ange-
passt werden.
Lesen Sie deshalb vor der Montage des
Fussrahmens den Abschnitt „Neigung des
Systems“ auf der folgenden Seite.
Depending on the listening distance and the
height of your seat it might be important to
adjust the inclination of the system. The an-
gle can be adjusted by using plastic spacers
when attaching the speaker stand.
Thus read the chapter “Inclination of the
System” on the following page, before
screwing-on the speaker stand.
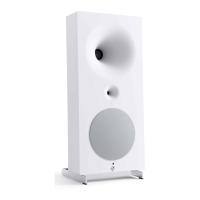
LINKER UND RECHTER KANAL LEFT AND RIGHT CHANNEL
• Bitte beachten Sie, dass die Kanalzuordnung (linker bzw.
rechter Kanal) ab Werk vorprogrammiert ist und nur mit der
speziellen Zero 1 Software und einem Windows PC geän-
dert werden kann. Die Zero 1 Software kann von der Avant-
garde Acoustic Webseite heruntergeladen werden.
• Bei der Positionierung des Lautsprechers darauf achten,
dass:
MASTER = LINKER Kanal
SLAVE = RECHTER Kanal
• The channel assignment of the speakers (left or right
channel) is preprogrammed in the factory and can only
be changed with the special Zero 1 software running on
a Windows PC. The software can be downloaded from the
Avantgarde Acoustic website.
• When positioning the speakers, please make sure that:
MASTER = LEFT channel
SLAVE = RIGHT channel
⑦
⑧
⑨
⑩
98
⑨
❶
❶
❷
❸
⑪