22
* refers to items included in the Avdel service kit. For complete list see page 21.
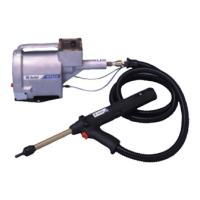
TAIL JAW CYLINDER
Using an Allen key*, slacken end cap fixing screws 53 and remove end cap 51.
Using an Allen key*, remove screw 2, protective cover 1 and sealing rings 3.
Using circlip pliers*, remove circlip 50 at rear of tool.
Push forward rear plug 4 against spring 7 and release quickly to allow rear plug 4 to fall away.
Extract air tail jaw components, comprising tail jaw piston assembly 8, spring 7, jaws 48 and jaw housing 47.
Remove turret plug 80 at rear of piston assembly using an Allen key* and a bar through the large slot in the turret.
Remove ‘O’ rings 49.
Using an Allen key*, remove all five handle moulding securing screws 54 & 55 from the tool handle.
Grip barrel 38 in a vice using soft jaws* to avoid damage.
Using a box spanner*, unscrew barrel plug 46, preventing barrel 38 turning by using an open ended spanner*.
Disconnect air tail jaw tube 5 from switch and trigger block 19 and pull tail jaw cylinder 45 from tool.
Remove ‘O’ rings 74, rubbing strip 9 and barrel return spring 77.
Free length of spring 77 should be 38.1mm (1.5”). Replace if necessary.
Clean out turret using a 4.7mm (
3
/16”) diameter drill and replace turret plug 80 using a non-hardening sealing compound,
e.g. Loctite Multi-gasket 574*.
Coat the tail jaws with Moly Lithium grease before assembling.
Assemble in reverse order of dismantling.
HYDRAULIC PISTON
Remove tail jaw cylinder 45 as described earlier.
Grip body 12 in vice using soft jaws* to avoid damage, undo stroke limiter 10.
Grip barrel 38 in soft jaw vice, pull body 12 from barrel 38 (a small quantity of hydraulic oil will be ejected from inside body).
Remove piston 11 carefully so as not to damage body bore.
Remove seal 75.
Seal 39 is difficult to remove without damaging, but can remain in place during cleaning (provided it is not affected by cleaning
process). If however, seal 39 requires renewing proceed as follows:
Using spatula*, prise out seal 39 from body, taking care not to damage body cavity and bores. The removed seal 39 MUST be
discarded.
To replace seal 39, unscrew hydraulic hose assembly 16 and fit a spare bleed plug assembly 40 screwing it in to bring inside face
level with internal bore.
Unscrew existing bleed plug until inside face is level with internal bore. This will provide a smooth passage for insertion of new
seal 39 through rear of body.
Ensure the seal is well greased and the correct way round with the open end of the seal facing the rear tail jaws.
Complete assembly in reverse order of dismantling.
■
■
■
■
■
■
■
■
■
■
■
■
■
■
■
■
■
■
■
■
■
■
■
■
■
■
■