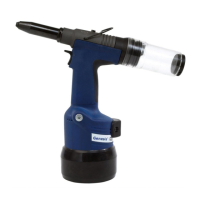
23
(INTERLOCK) VALVE & TRIGGER ASSEMBLY
The assembly has three functions, namely tool operating trigger, tail jaw on/off valve and tail jaw pressure non-return valve.
To dismantle/service assembly, remove covers from the tool as described earlier.
Disconnect all air hoses from assembly, taking care not to damage them.
Using an Allen key*, loosen screw 37 clamping assembly to barrel 38 and remove assembly.
Using a spanner*, unscrew and remove retainer 25 and spring 22.
Check length of spring 22 which must be 12.7mm (0.5”) free length - replace if necessary.
Assemble in reverse order of dismantling.
TAIL JAW ON/OFF VALVE
The unit is designed so that a minimum of servicing is required during life of tool.
If it is necessary to dismantle valve, proceed as follows:
Using a screwdriver, carefully remove washer 36 from air tool jaw spool 35 and discard washer.
Extract air tail jaw spool 35 from switch and trigger block 19.
Remove ‘O’ ring seals 21.
Use ‘O’ ring assembly bullet* to fit ‘O’ rings into switch and trigger block 19, noting orientation.
Fit new washer 36 by clamping in vice using soft jaws to prevent damage. DO NOT USE UNDUE FORCE.
Complete assembly in reverse order of dismantling.
TAIL JAW PRESSURE NON-RETURN VALVE
Using a screwdriver, unscrew seal retainer 30 and withdraw spring 20 and spool 27.
Extract ‘O’ ring seal 21 from body.
Assemble in reverse order of dismantling.
Apply a light film of non-hardening sealing compound, e.g. Loctite Multi-gasket 574*, on clamping face of seal retainer 30.
When refitting air hoses, ensure they make good connection on fitting barb. Trim a small amount from the hose if necessary.
HANDLE & END CAP
Clean and inspect mouldings for cracks or other damage.
CURSOR
When fitted the correct way round, the cursor will easily slide out of the barrel when a mandrel is pushed into its centre then pulled
back.
Clean and oil cursor 76 ensuring correct orientation when refitting into the front of barrel 38. If incorrectly fitted follow the
procedure on page 7.
■
■
■
■
■
■
■
■
■
■
■
■
■
■
■
■
■
■
■
■
■
■
■
* refers to items included in the Avdel service kit. For complete list see page 21.
I M P O R T A N T
Check the tool against daily and weekly servicing.
Priming is ALWAYS necessary after the tool has been dismantled and prior to operating.