3
Installation
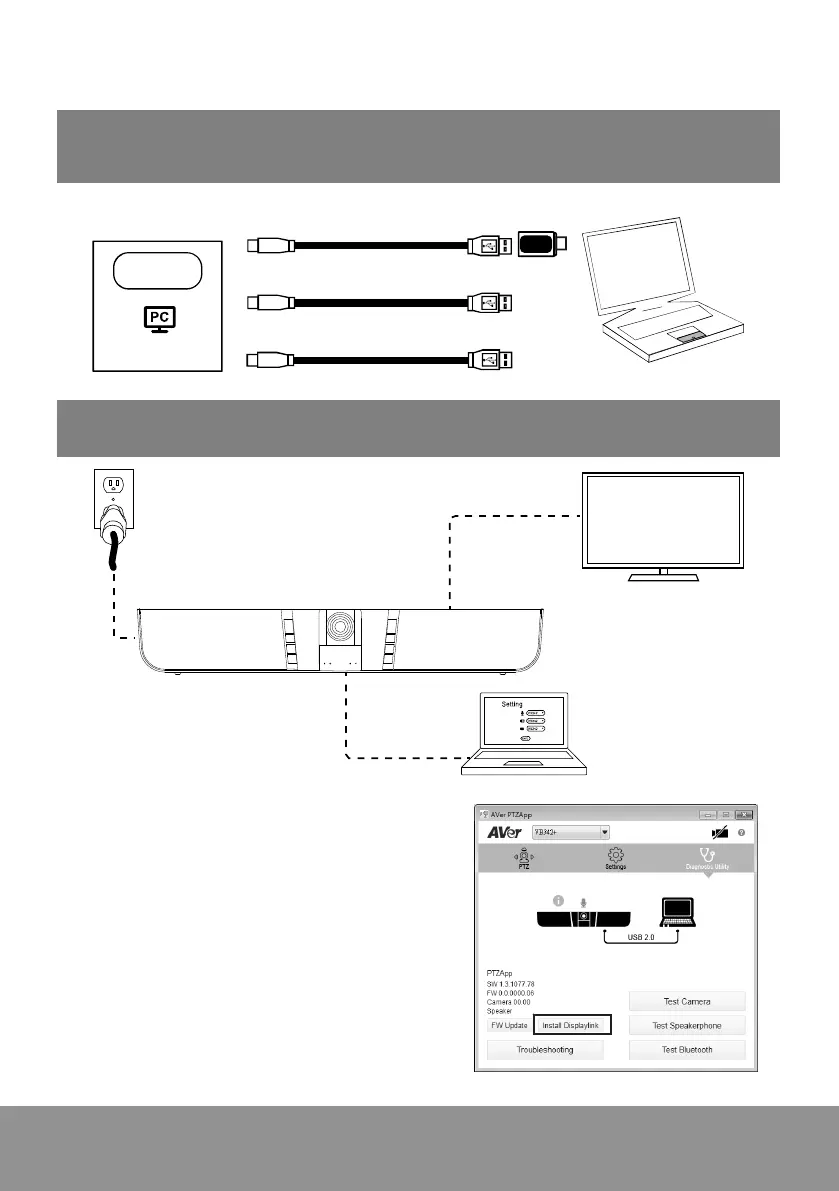
1. Connect VB342+ to laptop with provided USB cable. If you like to use type-C connector
on newer PC, connect your adapter to USB cable, and then connect type-C side of
adapter to PC. For 4K output, please use USB 3.0 cable.
Laptop
USB 2.0
USB 3.0
USB 3.0
USB type-A to
type-C adapter
or
or
USB port
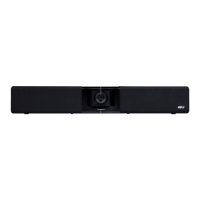
2. Connect the TV/HDMI monitor to VB342+ and connect the power to wall outlet and
VB342+. Set the VB342+ as primary camera, speakerphone, and microphone in your app.
USB cable
TV/Monitor
HDMI cable
(not inculded)
Power cable
A Displaylink driver is required for connection.
Please install AVer PTZApp on your laptop and run the
AVer PTZApp. In AVer PTZApp, select “Diagnotics
Utility” > “Install Displaylink”. Follow the on-screen
instruction to complete the installation.
[Note] Maximum output is1080p resolution.