Do you have a question about the Avery Dennison Monarch FreshMarx 9417 and is the answer not in the manual?
Provides a summary of the manual's chapters and content.
Identifies the intended reader and their responsibilities.
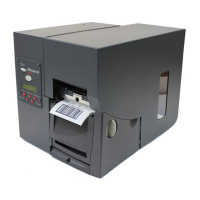
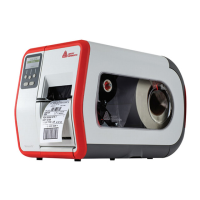
Details the printer's physical attributes, capabilities, and configuration options.
Steps to set and format the system time and date on the printer.
Configures time/date formats, time zone, and daylight saving settings.
Adjusts print position, contrast, and selects label formats.
Adjusts the printer screen's brightness level from 0 to 100 percent.
Guides on changing the administrator password for security access.
Configures options like label recreation and expiration modes (e.g., End of Day).
Manages network configuration, including IP address and DHCP settings.
Configures automatic clock synchronization with a network time server.
Instructions on how to access and initiate the printer's edit mode.
Detailed steps to add new product buttons or remove existing ones.
Modifies descriptive text for product buttons.
Customizes the 'Use First' button for specific label printing scenarios.
Renames category buttons, selects formats, and assigns printers.
Procedures for safely exiting the edit mode and returning to the product screen.
Lists the minimum PC specifications for installing and running the Edit Utility.
Step-by-step guide to download and install the Edit Utility software.
Guides on creating a new data file from scratch using the Edit Utility.
Sets up network communication by entering the printer's IP address in the utility.
Selects whether the printer is a single or dual unit within the utility.
Retrieves existing product data from the printer to the computer via Ethernet.
Customizes tabs, category buttons, Use First button, and product buttons in the data file.
Adds new product buttons or edits existing ones within the data file.
Transfers updated product data files from the computer to the printer via Ethernet.
Installs the latest application software onto the printer via Ethernet.
Transfers updated product data files from a USB drive to the printer.
Installs updated application software onto the printer using a USB drive.
Prints various labels for diagnosing printer status and performance.
Prints labels showing printer model, application, and software versions.
Prints labels detailing IP address, subnet, gateway, and MAC address.
Prints a gray scale test pattern to check print uniformity and quality.
Prints a checkerboard pattern to verify printhead strobe functionality.
Copies the product data file from the printer to a USB flash drive.
Guides the user through calibrating the touch screen for accurate input.
Resets the printer to its original factory default settings, clearing all data.
Details label size and data fields for Format 1 (1.2" x 1.1").
Details label size and data fields for Format 2 (2.2" x 1.1").
Details label size and data fields for Format 3 (2.2" x 1.5").
Details label size and data fields for Format 4 (2.2" x 2.0").
Details label size and data fields for Format 5 (2.2" x 3.0").
Details label size and data fields for Format 6 (2.2" x 4.0").
Details label size and data fields for Format 7 (2.2" x 3.0").
Details label size and data fields for Format 8 (1.2" x 1.1").
| Print Resolution | 203 dpi |
|---|---|
| Print Technology | Direct Thermal |
| Connectivity | Ethernet, USB, Serial |
| Operating System Compatibility | Windows |
| Maximum Print Length | 39 inches (991 mm) |
| Supported Barcode Types | Code 39, Code 128, Codabar, Interleaved 2 of 5, Data Matrix, PDF417, QR Code |
| Supported Media Types | Labels, Tags |
| Media Width | 19 mm |
| Operating Temperature | 41°F to 104°F (5°C to 40°C) |
| Storage Temperature | 140°F (-20°C to 60°C) |
| Dimensions | 221 mm |