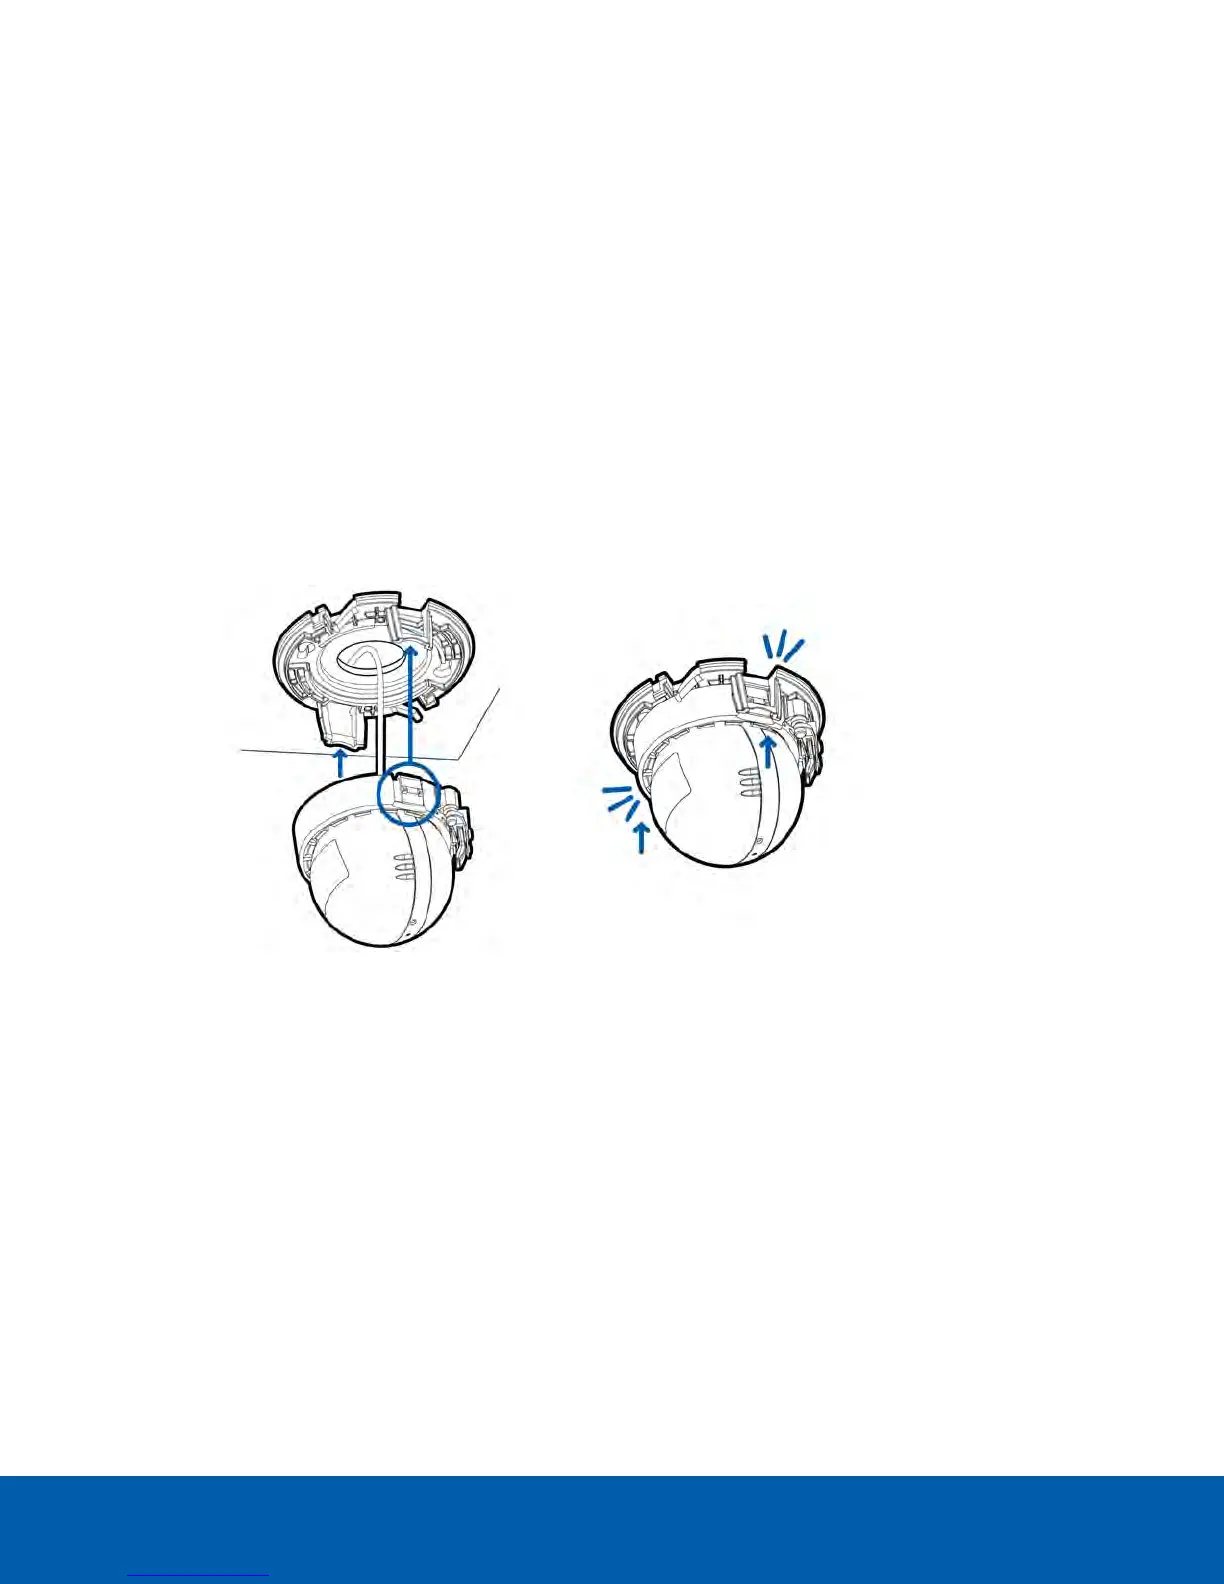
Installing the Camera Base to the Mounting Adapter
NOTE: Be careful not to scratch or touch the dome bubble. The resulting marks or fingerprints may affect the
overall image quality. Keep the protective covers on the outside of the dome bubble until the installation is
complete.
After you install the mounting adapter, mount the camera base to the adapter, using the following steps:
1. Connect the Ethernet port attached to the camera to the Ethernet cable that was pulled through the cable
entry hole.
The connection status LED indicator will turn on once a network link has been established.
2. Position the camera in the mounting adapter, reinserting the connected cable through the cable entry
hole.
3. Align the camera housing clips on the camera base to the camera attachment retainers on the mounting
adapter. Press the camera base into the mounting adapter. The camera base clicks into place and is held
securely.
Assigning an IP Address
The device automatically obtains an IP address when it is connected to a network.
NOTE: If the camera cannot obtain an IP address from a DHCP server, it will use Zero Configuration Networking
(Zeroconf) to choose an IP address. When set using Zeroconf, the IP address is in the 169.254.0.0/16 subnet.
The IP address settings can be changed using one of the following methods:
l Device's web browser interface: http://<camera IP address>/.
l Network Video Management software application (for example, the Avigilon Control Center™ software).
l ARP/Ping method. For more information, see Setting the IP Address Using the ARP/Ping Method on
page19.
NOTE: The default device username is administrator with no password.
Installing the Camera Base to the Mounting Adapter 12
 Loading...