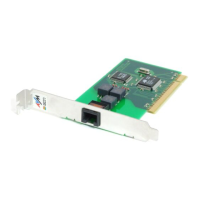
2 Installing FRITZ!Card PCI
11
• Reply to the message “Windows has finished installing the
software that your new hardware device requires” by clicking
FiniFini
FiniFini
Fini
shsh
shsh
sh.
• Next the welcome window of the installation program for the
AVM ISDN-Controller FRITZ!Card PCI appears automatically.
• Enter the folder in which the driver software is to be installed
on your computer.
• In the following window, enter the D-channel protocol used
on your ISDN line (DSS1, NI-1 or 5ESS Custom).
As a final step of the driver software installation, an information
window with the settings of the ISDN-Controller FRITZ!Card PCI
is displayed.
Upon completion, a message appears reporting that the FRITZ!
communications software can be installed. Continue from
section 2.5.
2.4.2 First Installation Steps in Windows 95
Before starting installation, find out which version of Windows
95 is installed on your computer (with “Start / Settings / Control
Panel / System / General”). The first steps of the driver software
installation for the version 4.00.950 of Windows 95 are diffe-
rent from those for the versions 4.00.950B/C or later.
Once the ISDN-Controller FRITZ!Card PCI has been physically
installed, switch your computer back on. The Plug & Play
mechanism of Windows 95 recognizes the ISDN-Controller
automatically.
Insert the FRITZ!Card CD and follow the instructions on the screen.
Note the following:
•
WW
WW
W
indoindo
indoindo
indo
ww
ww
w
ss
ss
s
95 4. 95 4.
95 4. 95 4.
95 4.
0000
0000
00
..
..
.
950950
950950
950: When prompted to install a new
hardware driver, select the entry “Driver from disk provided
by hardware manufacturer ”.
 Loading...