18.5 CONFIGURING THE WOLF
1. Connect the 9-pole Male/Female Pin-to-Pin cable (for connection to the Wolf device) to the COM(x) port of your
computer. This cable comes supplied with the Wolf Network device and can be found inside the box.
2. Connect the aforesaid cable to the Wolf device via the RS232-1 port, or the Wolf COM number 1 port, which is
also the only one enabled for operation of Wolf Address Manager.
3. Launch the previously installed Wolf Address Manager program using the icon on your PC‟s desktop or another
link.
4. Press the Connect to Target button in the top central section
of the screen.
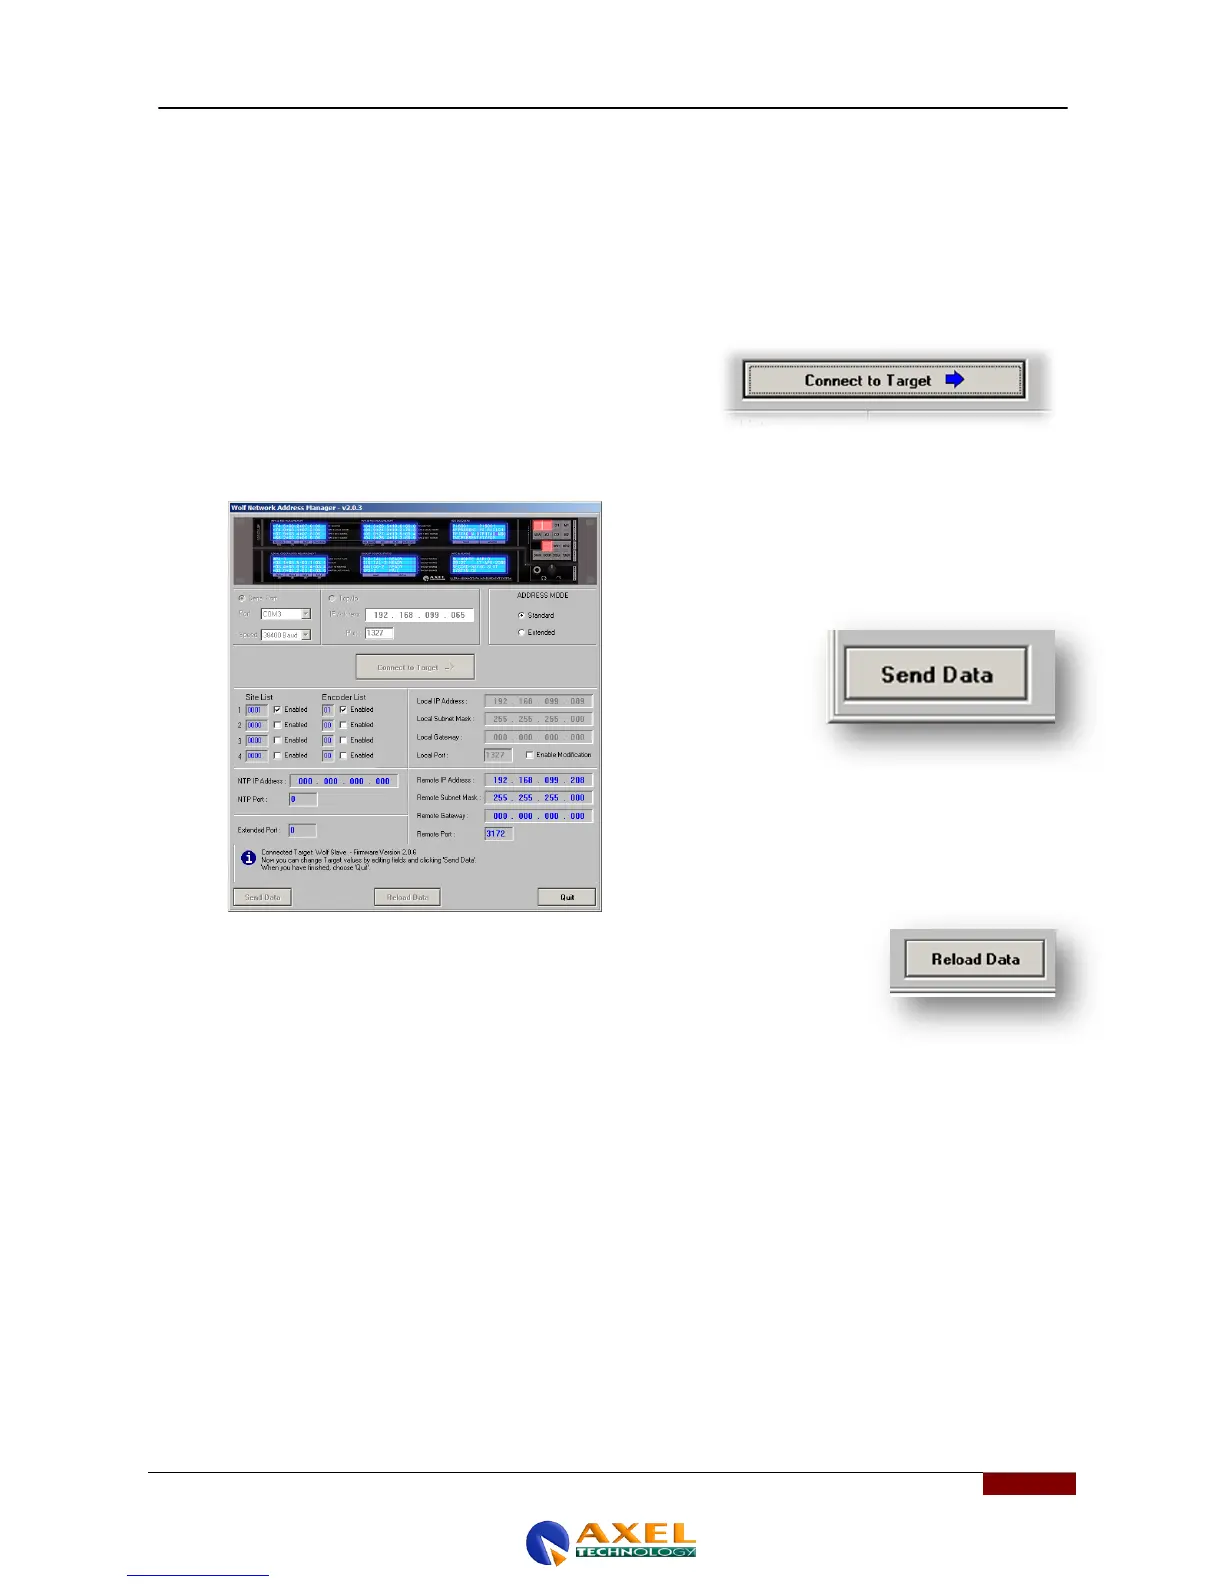
5. Once the Connect to Target button has been pressed, the data stored inside the device will appear. More
specifically, the figure below shows a Wolf Network device with some of the data programmed. To edit the
default manufacturer‟s settings configured by Axel
Technology, simply position the cursor on the field and
change the data. Once you have changed the settings to
the desired values, enter the data in the Wolf Network
device by clicking the Send Data button in the bottom right-
hand corner of the
software panel.
6. Once the data has been sent successfully to the device, the Send Data button will
go back to its original grey colour. To read the settings stored in the device, press
the "Reload Data" button in the central section of the screen. This operation is
used to recall the settings stored in the Wolf Network.
7. Once these settings have been configured you can use the Axel Wolf Network Remoter application for device
management. See the next section.
N.B: With regards to speed on the RS232-1 port, the factory default setting is 38,400 bps, and Wolf Address
Manager has this at its default setting after installation on your computer. This setting can also be edited, but
since this is the preferred port for communication and the Wolf Network device configuration, we strongly advise
you NOT to alter this port value. For port speed editing, see the appendix at the end of the manual.