Basic Installation
AXIS 700 User’s Guide
8
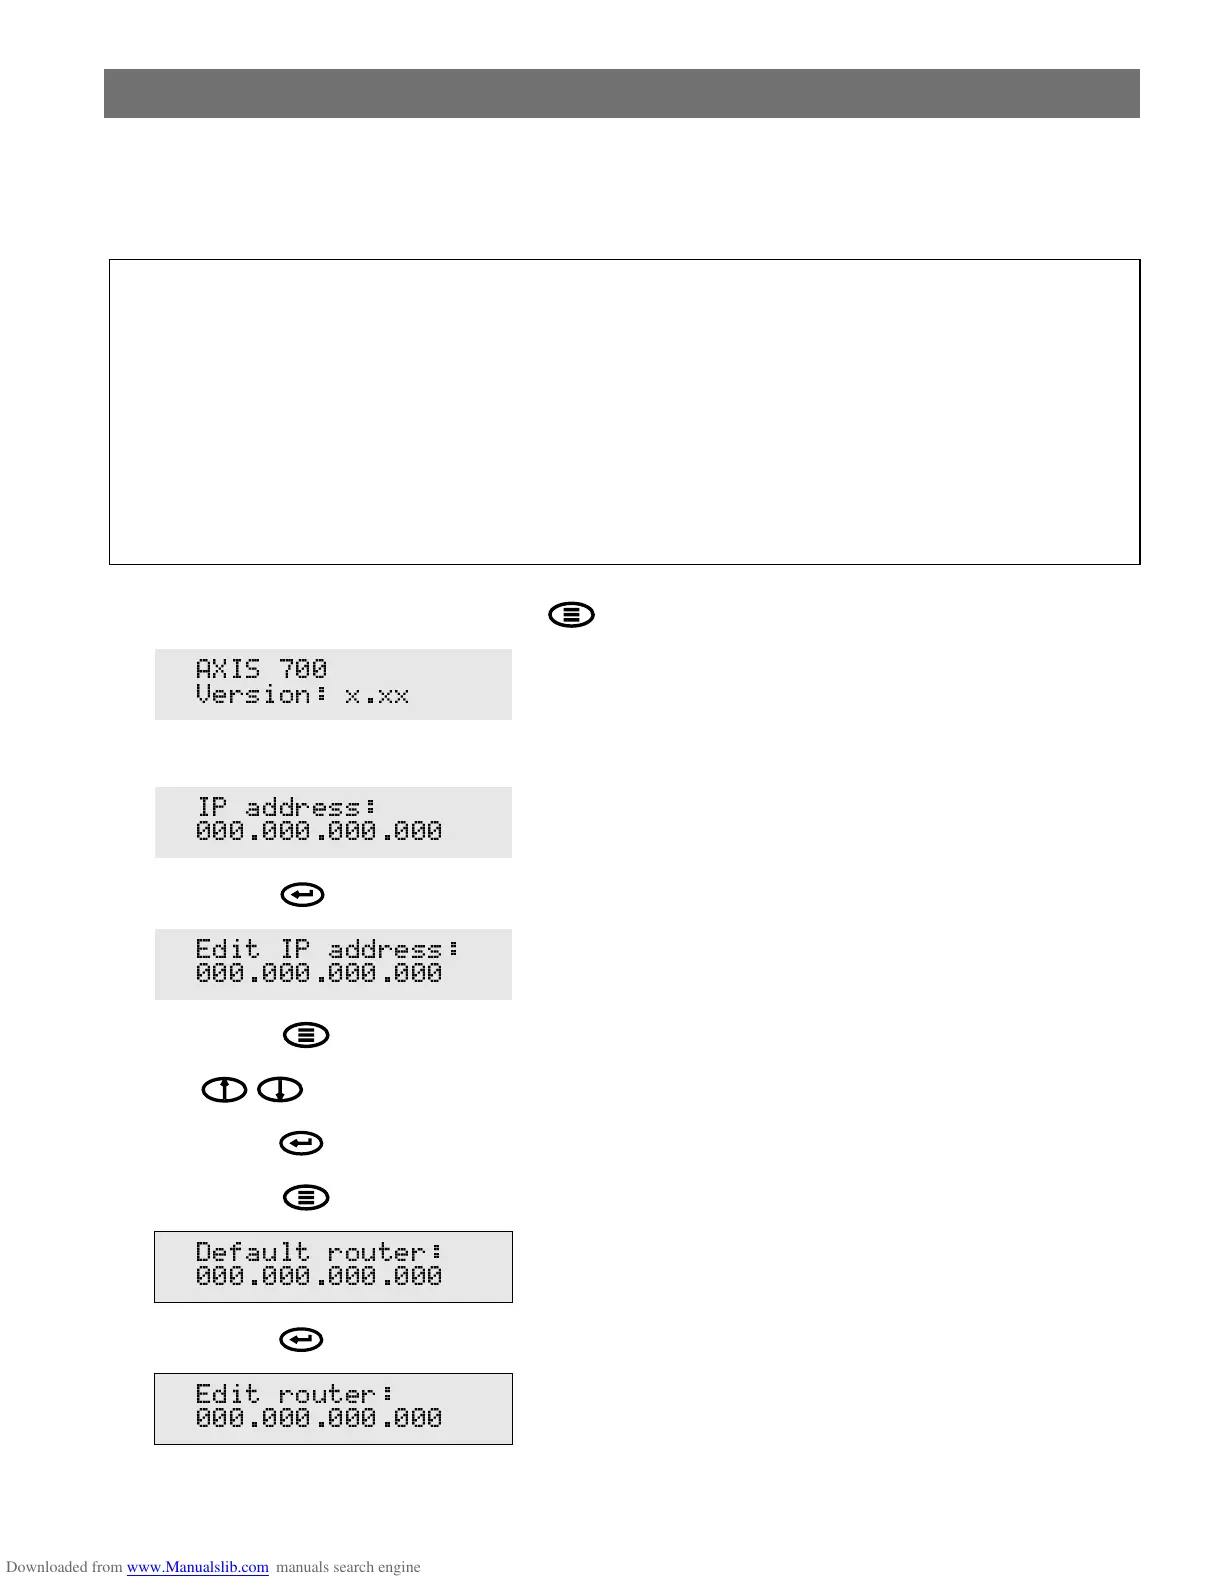
Assigning an Internet Address to the AXIS 700
Important!
1. Power up the AXIS 700. Press Menu when this display appears:
2. After a few seconds this display will be shown:
3. Press Enter to edit the Internet address:
4. Press Menu to move through the digits and highlight each digit, one at a time.
5. Use to increase or decrease each highlighted digit, as required.
6. Press Enter to confirm the changes.
7. Press Menu to display the default router address setting:
8. Press Enter to edit the default router address:
9. To change the value, repeat steps 4 - 6 above.
• You must acquire a valid and unused Internet address for your AXIS 700 from the Network
Administrator.
• You can set the Internet address from the AXIS 700 control panel or use one of the methods
DHCP, ARP, RARP or BOOTP. Refer to the AXIS 700 User’s Manual on how to use the lat-
ter methods.
• If you are using DHCP, RARP or BOOTP, the Internet address will be set automatically. On
Windows NT networks, DHCP is the preferred method since it allows a number of parame-
ters to be set automatically, provided the DHCP server has been configured to do so.
$;,6
9HUVLRQ [[[
,3 DGGUHVV
(GLW ,3 DGGUHVV
'HIDXOW URXWHU
(GLW URXWHU