2
INSTALLATION
PRECAUTIONS
&KRRVHWKHPRXQWLQJORFDWLRQFDUHIXOO\VRWKDWWKHXQLWZLOOQRWLQWHUIHUHZLWKQRUPDOGULYLQJIXQFWLRQV
$YRLGLQVWDOOLQJWKHXQLWZKHUHLWZRXOGEHVXEMHFWWRKLJKWHPSHUDWXUHVGLUHFWVXQOLJKWGXVWGLUWRU
H[FHVVLYHYLEUDWLRQ
8VHRQO\WKHVXSSOLHGPRXQWLQJKDUGZDUHIRUDVDIHDQGVHFXUHLQVWDOODWLRQ
%HVXUHWRUHPRYHWKHIURQWSDQHOEHIRUHLQVWDOOLQJWKHXQLW
Mounting angle adjustment
Adjust the mounting angle to less than 20°.
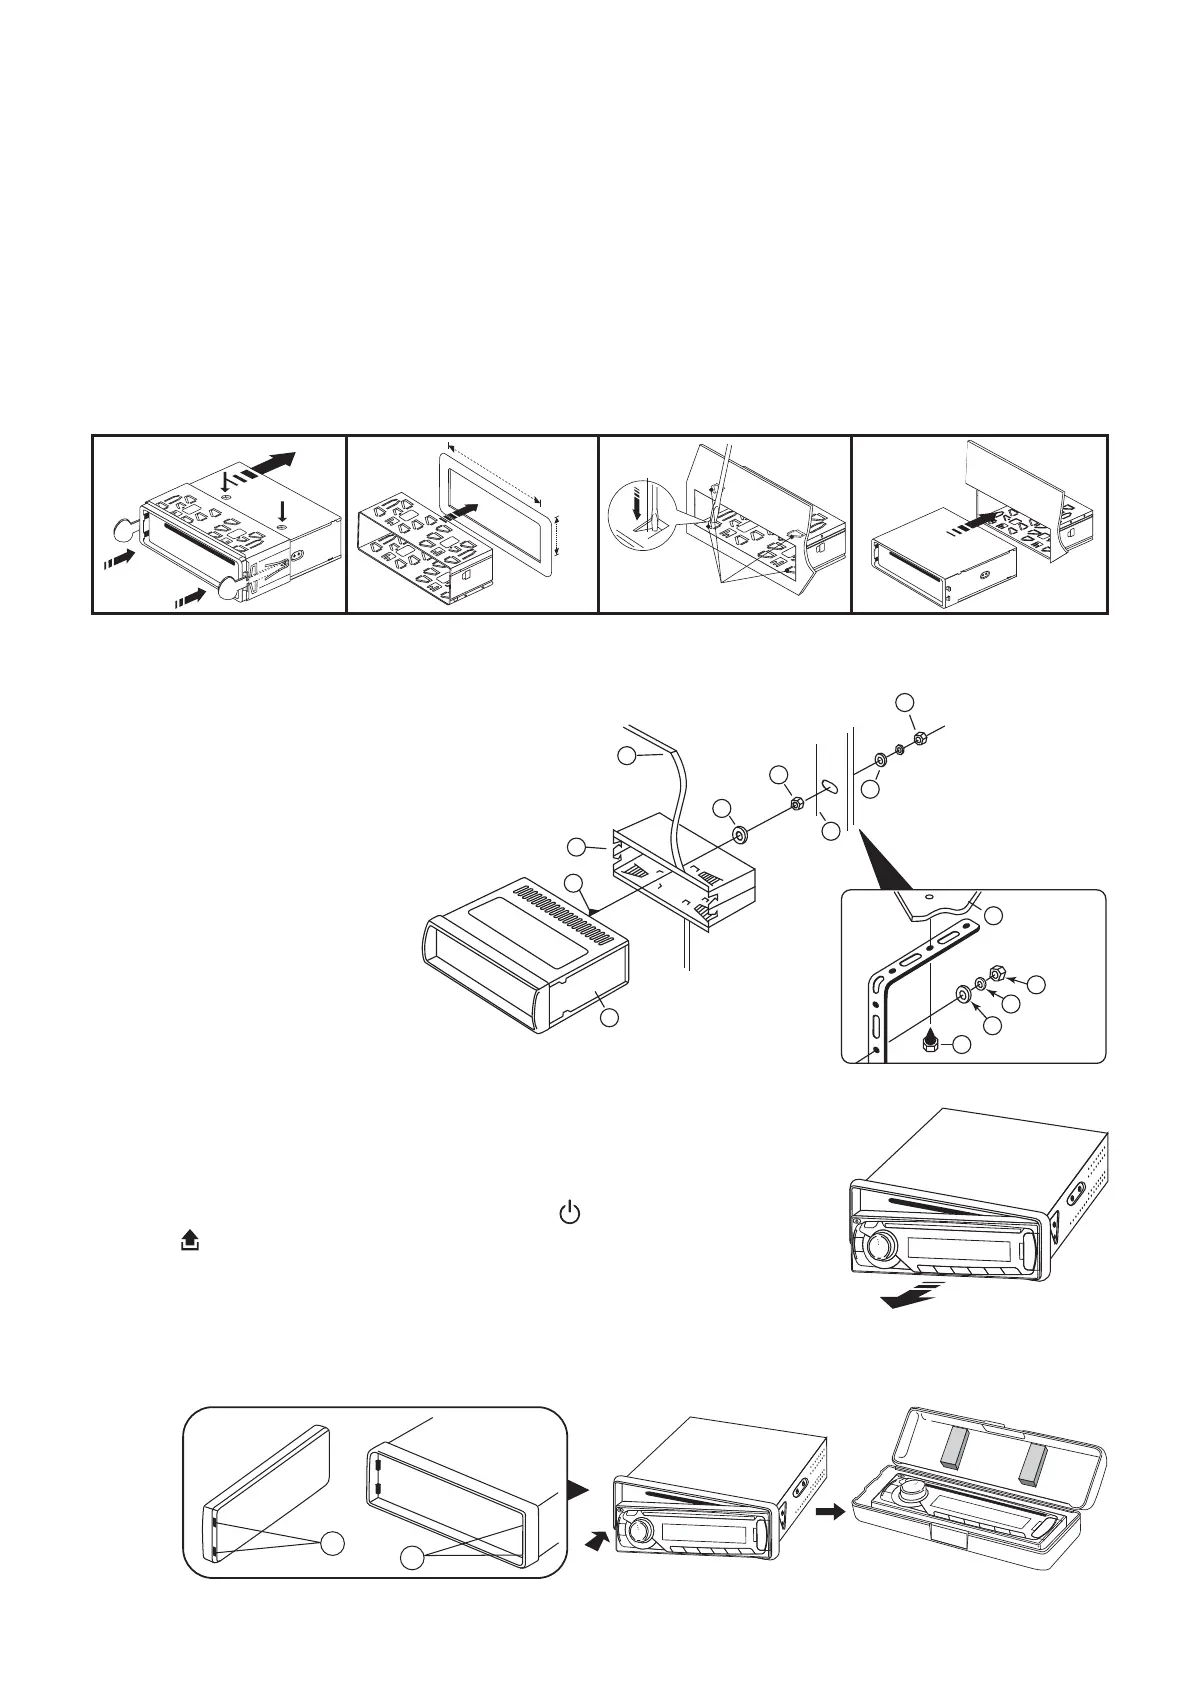
MOUNTING EXAMPLE
Installation in the dashboard
Note: Keep the release key in a safe place as you may need it in the future to remove the unit from the car.
TO SUPPORT THE UNIT
Detaching and attaching the front panel
The front panel of this unit can be detached in order to SUHYHQW WKHIW
DETACHING THE FRONT PANEL
%HIRUHGHWDFKLQJWKHIURQWSDQHOEHVXUHWRSUHVVWKH
WRSRZHURIIWKHXQLW
Press the
button to release front panel.
Pull the panel towards you in order to detach completelyfrom the
main unit.
ATTACHING THE FRONT PANEL
Make sure the front panel is in the FRUUHFW way up
Bring side B of panel to side A of main unit. Insert the panel and push until it clicks.
1. UNIT
2. RELEASE CASE
3. DASH BOARD
4. HEX NUT
5. LOCK WASHER
6. PLAIN WASHER
7. CAR BODY
8. REAR SUPPORT STRAP
9. TAPPING SCREW
10. M5 X 15 HEX BOLT
10
7
1
2
3
4
4
4
5
5
6
6
8
9
Dashboard
2
182mm
53mm
3
4
TAP
1
2
1
3
Bend these
FODZVLIQHFHVVDU\
Release screw and
bracket
B
A