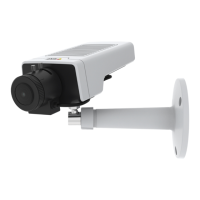
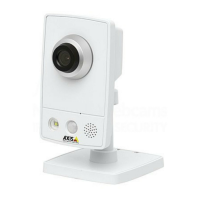
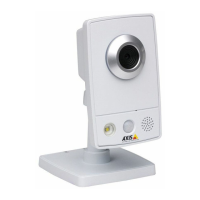
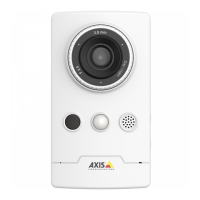
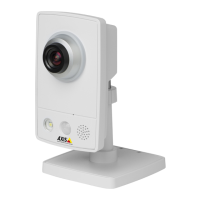
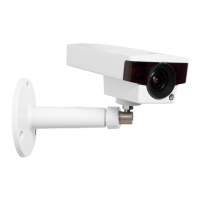
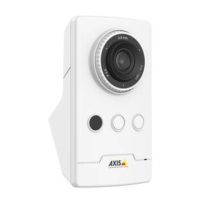
The AXIS M11 Network Camera Series, including the AXIS M1124 and AXIS M1125 models, is a range of network cameras designed for surveillance. This user manual describes multiple products, and some instructions may not be relevant for specific models.
Function Description
The AXIS M11 Network Camera Series offers advanced video surveillance capabilities. It can be used to monitor various environments, capture video streams, and trigger actions based on detected events. The cameras support both Motion JPEG and H.264 video compression formats, allowing for flexibility in balancing image quality, bandwidth, and storage needs. The H.264 format, a licensed technology, can significantly reduce digital video file size compared to Motion JPEG and MPEG-4, enabling higher video quality for a given bitrate. The device can be integrated with external devices via its I/O connector for enhanced functionality, such as motion detection, event triggering, and alarm notifications. It also supports the AXIS Camera Application Platform (ACAP), an open platform for third-party analytics and applications.
Important Technical Specifications
Connectors:
- Network connector: RJ45 Ethernet connector with Power over Ethernet (PoE).
- I/O connector: A 4-pin terminal block providing:
- DC ground (Pin 1): 0 V DC.
- DC output (Pin 2): 12 V DC, Max load = 25 mA. Can be used to power auxiliary equipment.
- Digital Input (Pin 3): 0 to max 30 V DC. For connecting devices that toggle between open and closed circuits (e.g., PIR sensors, door/window contacts). Connect to pin 1 to activate, or leave floating to deactivate.
- Digital Output (Pin 4): 0 to max 30 V DC, open drain, 100 mA. Internally connected to pin 1 (DC ground) when active, and floating when inactive. If used with an inductive load (e.g., a relay), a diode should be connected in parallel with the load to protect against voltage transients.
- Power connector: 2-pin terminal block for DC power input. Requires a Safety Extra Low Voltage (SELV) compliant limited power source (LPS) with a rated output power limited to ≤100 W or a rated output current limited to ≤5 A.
Storage:
- SD card slot: Supports microSD/microSDHC/microSDXC cards. Users are advised to use fingers for insertion/removal and to unmount the SD card from the product's webpage before removal to prevent data loss or corruption.
LED Indicators:
- Status LED:
- Green: Normal operation.
- Amber: Steady during startup; flashes when restoring settings. Can be configured to flash during events.
- Network LED:
- Green: Steady for 100 Mbit/s network connection; flashes for network activity.
- Amber: Steady for 10 Mbit/s network connection; flashes for network activity.
- Unlit: No network connection.
- Power LED:
- Green: Normal operation.
- Amber: Flashes green/amber during firmware upgrade.
Usage Features
Device Access and Security:
- Devices can be found on the network using AXIS IP Utility or AXIS Device Manager.
- Access is via a web browser, requiring a username and password. The default administrator username is
root.
- A new password for the
root account must be set upon first access.
- Secure passwords are recommended: at least 8 characters, preferably generated by a password generator, kept confidential, and changed annually. HTTPS connection is advised after the first login to protect the password sent in clear text.
- The device supports secure boot to ensure the integrity of the firmware.
Image Quality and Settings:
- Leveling Guide: Assists in mechanically adjusting the camera's view in relation to a reference area.
- Exposure Modes: Various options to adjust aperture, shutter speed, and gain for specific surveillance scenes.
- Night Mode: Automatically shifts to night mode in low-light conditions, using visible and near-infrared light for brighter, more detailed black-and-white images.
- Noise Reduction: Achieved by adjusting max shutter value (slower shutter speed) and reducing image sharpness.
- Motion Blur Reduction: Achieved by increasing shutter speed and gain, increasing scene light, or mounting the camera for objects to move toward/away from it.
- Wide Dynamic Range (WDR): Makes both dark and bright areas of an image visible in scenes with strong backlight.
- Corridor Format: Utilizes the full field of view in long, narrow areas (e.g., staircases, hallways) by rotating the camera or 3-axis lens 90° or 270°.
- Pixel Counter: Helps optimize pixel resolution for improved facial and license plate recognition by adjusting a rectangle around the area of interest in the live view.
Streaming and Storage:
- Video Compression: Supports Motion JPEG and H.264.
- Bandwidth Reduction: Features like Zipstream, dynamic GOP, increased compression, and dynamic FPS can be used to reduce bandwidth.
- Bitrate Control:
- Maximum Bitrate (MBR): Sets a target bitrate to manage system limitations, potentially affecting image quality or frame rate.
- Variable Bitrate (VBR): Bandwidth consumption varies with scene activity, guaranteeing constant image quality but requiring storage margins.
- Average Bitrate (ABR): Bitrate is automatically adjusted over time to meet a specified target and optimize video quality based on available storage and retention time.
- Network Storage: Allows recording to network locations by specifying host server IP, shared location name, and login credentials if required.
- Recording: Video can be recorded to an SD card or network storage.
Events and Actions:
- Rules and Alerts: Users can create rules with conditions (e.g., motion detection) and actions (e.g., start recording, send email, show overlay text).
- Overlay Text: Text (e.g., "Motion detected") can be superimposed over the video stream based on events.
- Privacy Masks: User-defined areas appearing as solid color blocks or blurred image elements in video streams and snapshots, preventing viewing of specific areas. Multiple privacy masks may affect performance.
- PTZ (Pan, Tilt, Zoom):
- Movement Limits: Pan, tilt, and zoom movements can be limited to protect privacy or focus monitoring.
- Above Horizon View: The upper tilt limit can be adjusted to look above the default horizon.
- Guard Tours: Displays video from different preset positions in a predetermined or random order for configurable periods.
Applications:
- AXIS Camera Application Platform (ACAP): An open platform for third-party analytics and applications. Multiple applications can run simultaneously, but compatibility and resource consumption should be verified.
Maintenance Features
Troubleshooting:
- A dedicated troubleshooting section is available in the manual and on axis.com/support.
- Firmware Management:
- Firmware Options: Axis offers active track (latest features) and long-term support (LTS) tracks (bug fixes, security updates). LTS is recommended for third-party integrations.
- Checking Firmware: Current firmware version can be checked via the product's webpage (Settings > About).
- Upgrading Firmware: Firmware files can be downloaded from axis.com/support/firmware. Upgrades are performed via Settings > System > Maintenance. Preconfigured settings are saved during upgrade. Power must remain connected during the process.
- Firmware Upgrade Failure: If an upgrade fails, the device reloads the previous firmware. This usually indicates an incorrect firmware file.
- IP Address Issues:
- Different Subnet: If the device and computer are on different subnets, the IP address cannot be set.
- IP Address in Use: Use the
ping command to check if an IP address is already in use.
- Static IP Conflict: A static IP address used by another device can cause access problems.
- Browser Access Issues:
- Cannot Log In: Ensure correct protocol (HTTP/HTTPS) is used. If the
root password is lost, a factory reset is required.
- Streaming Problems:
- Multicast H.264: Check router support for multicasting, router settings, and TTL value.
- No Multicast H.264 Displayed: Verify valid multicast addresses and firewall settings.
- Poor H.264 Rendering: Update graphics card drivers.
- Color Saturation Differences: Modify graphics adapter settings.
- Lower Frame Rate: Refer to performance considerations, reduce client applications, limit simultaneous viewers, check bandwidth, lower image resolution, and consider utility frequency.
Reset to Factory Default Settings:
- Procedure: Disconnect power, press and hold the control button while reconnecting power for 15-30 seconds until the status LED flashes amber, then release. The process is complete when the status LED turns green.
- Outcome: Resets all settings, including the IP address, to factory defaults (default IP: 192.168.0.90 if no DHCP server).
- Web Interface Reset: Parameters can also be reset via Settings > System > Maintenance > Default.
Control Button:
- Used for resetting the product to factory default settings.