AXIS Q19 Series Installation Guide Page 15
ENGLISH
Automatic discovery
1. Check that the network camera is connected to the network and that power has been applied.
2. Start AXIS IP Utility.
3. When the camera appears in the window, double-click it to open its home page.
4. See page 17 for instructions on how to assign the password.
Assign the IP address manually (optional)
1. Acquire an unused IP address on the same network segment as your computer.
2. Select the network camera in the list.
3. Click the Assign new IP address to the selected device button and enter the IP address.
4. Click Assign and follow the on-screen instructions. Note that the camera must be restarted
within 2 minutes for the new IP address to be set.
5. Click Home Page to access the camera’s web pages.
6. See page 17 for instructions on how to set the password.
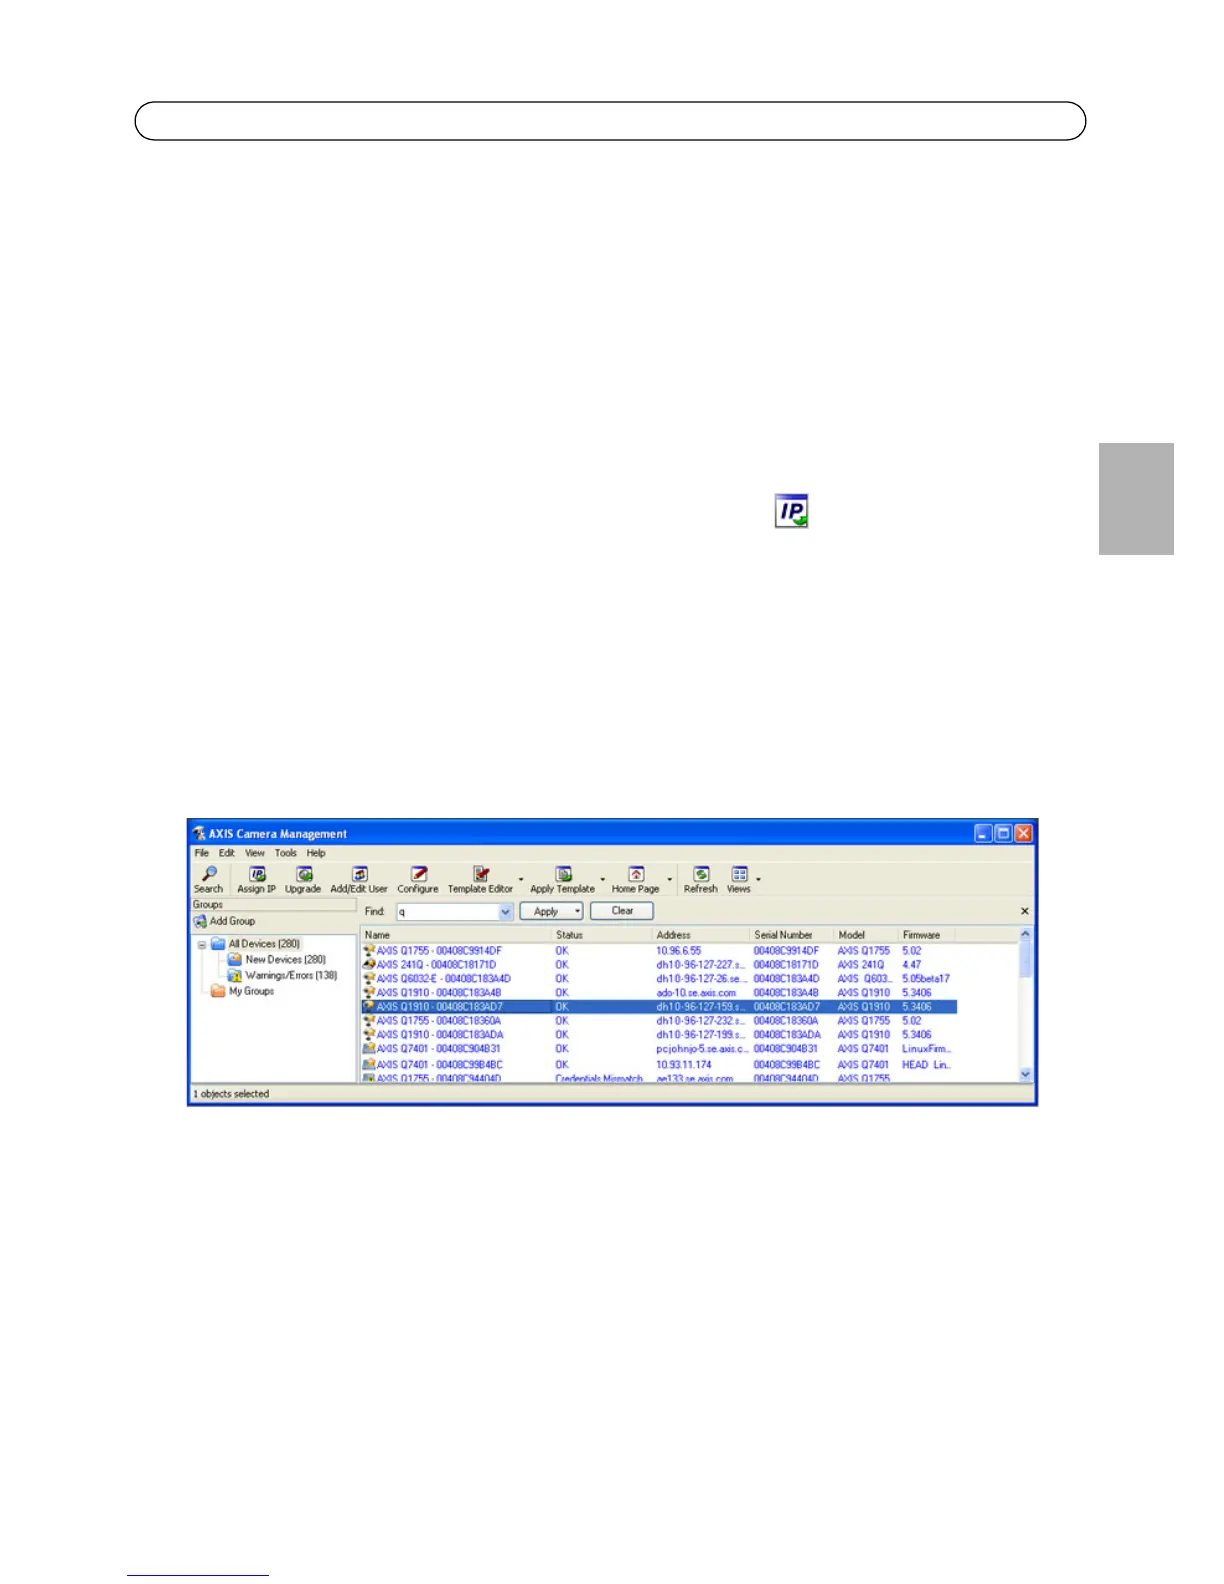
AXIS Camera Management - multiple cameras/large installations
AXIS Camera Management can automatically discover multiple Axis devices, show connection
status, manage firmware upgrades and set IP addresses.
Automatic discovery
1. Check that the camera is connected to the network and that power has been applied.
2. Start AXIS Camera Management. When the network camera appears in the window, right-click
the link and select Live View Home Page.
3. See page 17 for instructions on how to set the password.
 Loading...