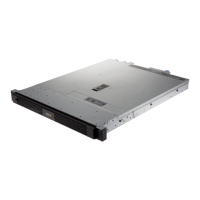
AXISCameraStationS1132Recorder
Manageyourdevice
3.1Enabled
3.2ClickOK.
ChangetheRAID
CAUTION
ChangingtheRAIDdeletesalldatafromyourdisks.
1.BootLifecycleController:
1.1Poweronyourdevice.
1.2WhenyouseetheAXISsplashscreen,pressF10.
2.IntheLifecycleController,gotoHardwareConguration>CongurationWizardsandselectRAIDConguration.
3.SelecttheRAIDControlleronwhichyouwanttohavetheRAIDcreated.Detailsofanyvirtualdisk(s)availableonthe
selectedcontrollerwillbeshowninthetabledisplayedonthepagebelowthecontrollerlist.ForeignCongurationwillbe
displayedifthereareanyforeignoruninitializedHDD(s)availableontheserver.
Note
•ClearforeigncongurationclearsalltheforeignHDDsavailableontheRAIDcontrollerselected.
•IgnoreforeignCongurationignorestheforeignHDDsavailableontheRAIDcontrollerwhilecreatingtheRAID.
4.ClearorignoreforeignHDDsanduninitializedHDDs.
Ifyouwant,youcaninitializetheuninitializeddisks:
4.1Inthelistofallnon-RAID(uninitialized)HDDs,selecttheHDDsyouwanttoconverttoRAIDcapable(initialize)
andclickNexttoinitializethem.
4.2SelectthecorrespondingoptionontheCongurationWizards:RAIDCongurationpage.
5.SelectaRAIDlevel.Thedefaultsettingsare:
-S114824TB:RAID5
-S114864TB:RAID5
-S1148140TB:RAID6
-S1132:RAID5
6.SelectthephysicaldisksfromthetableandclickNext.
Iftheyou’veselectedIgnoreforeignconguration,theforeignHDDsarenotdisplayedinthetable.
7.Enterthevirtualdiskattributes.
8.ClickNext.
9.ReviewthesettingsandclickFinish.
10.LifecycleControllerdisplaysamessagetoindicatethatallthecurrentdataaboutthevirtualdisksavailableonthe
controllerwillbelost.ClickOKtocontinue.
11.ClickOKandFinish.
12.Exitthewizardandrebootthesystem.
24
 Loading...