WHITE
AXMINSTER
W
14
Assembly Instructions...
Angle Fence Assembly (Kits: 700060, 718641)
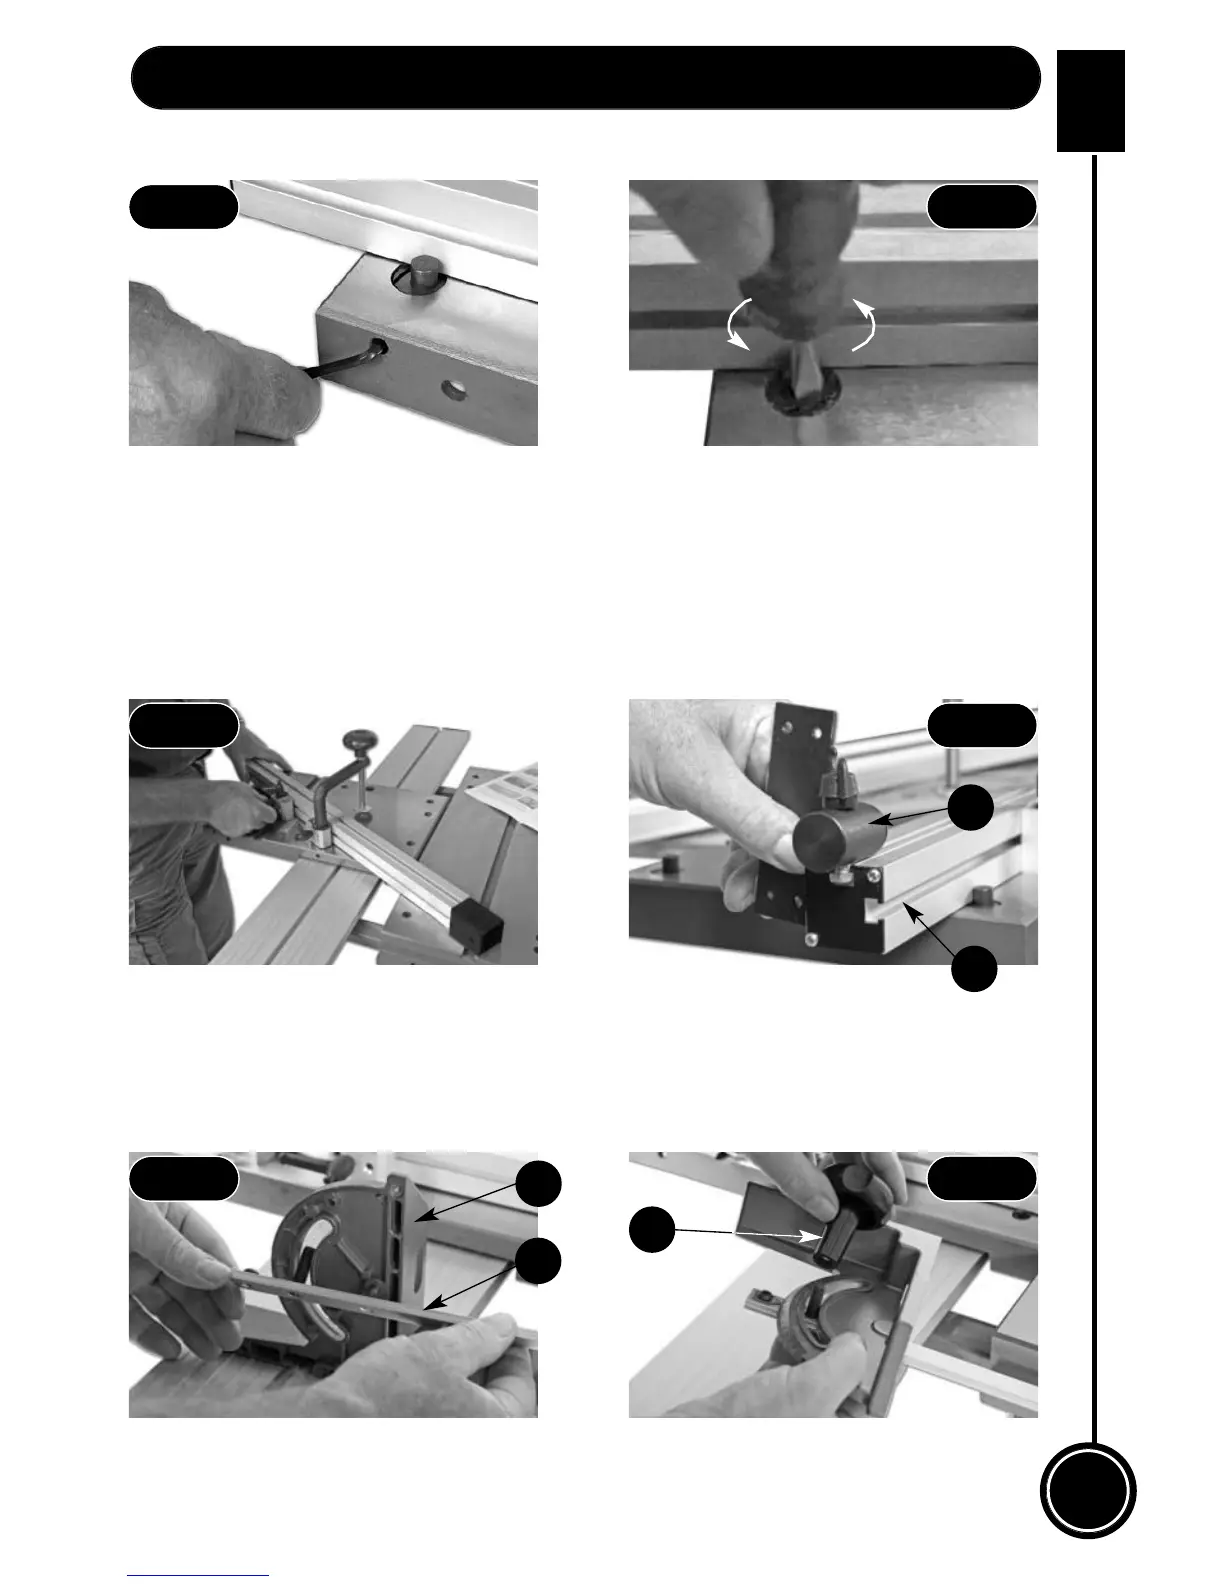
To set the angle fence (W) to angles between 45˚ and 90˚ loosen the three lift and shift
handles on the connecting & work clamp blocks (O) and the fence to the required angle on
the scale on the sliding carriage table (D). (See figs 22). Tighten the three lift & shift
handles to lock the angle fence in position. Note: The fence can also be used at the rear
of the sliding carriage table if you prefer to push the timber against the fence.
Locate the flip over stop (M) and slide it into the T-slot on top of the angle fence (W).
(See fig 23).
Locate the mitre fence steel bar (B2), mitre fence (E) and clamping knob (G). Slot the
threaded pin on the steel bar (B2) through the curved slot in the mitre fence (E) and screw
the clamping knob (G) to clamp the assembly together. (See figs 24 & 25). Slide the Mitre
fence assembly into the machined T-slot on the saw table. (See fig 26).
Fig 20
Fig 21
Fig 22
Fig 23
Fig 24
Fig 25
Mitre Fence Assembly (Kits: 950650, 718641)
M
W
B2
E
G
Continues on next page....



 To Next Page