19
WHITE
AXMINSTER
W
Assembly Instructions...
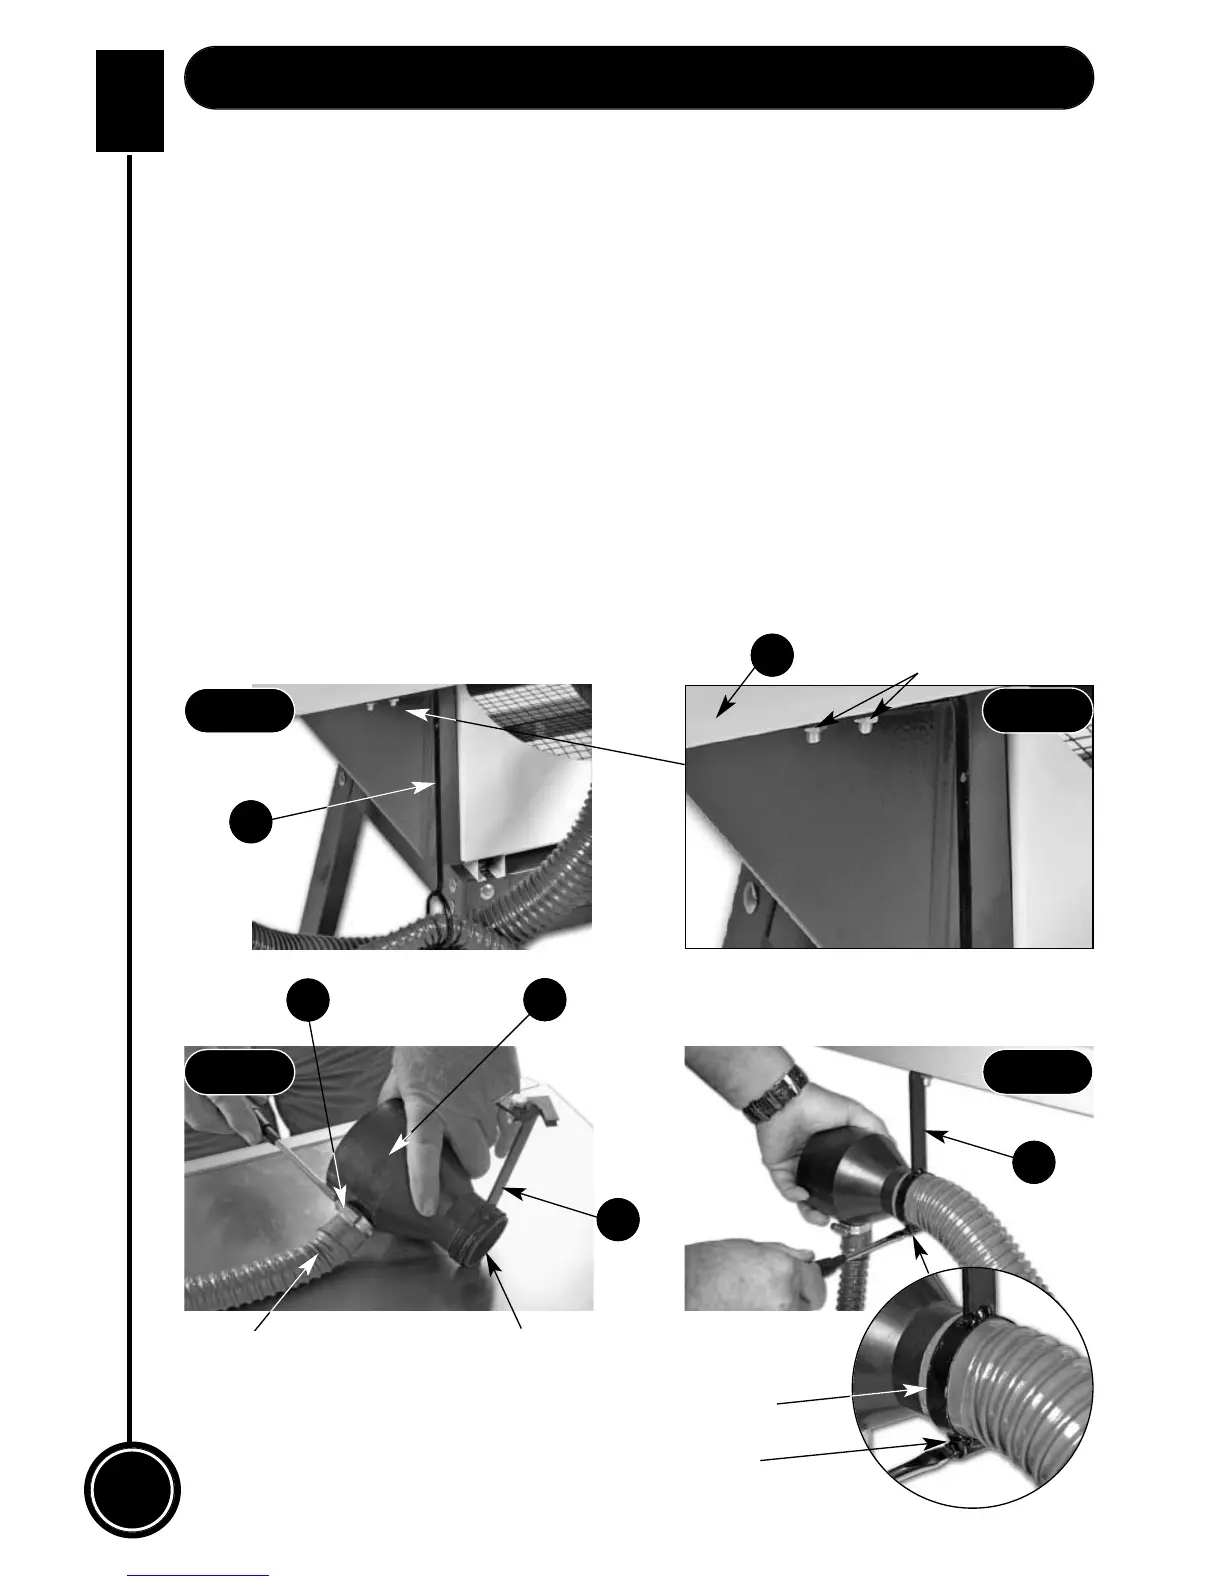
Dust Extraction Assembly (Kits: 718641, 700058)
Fig 50
Fig 51
Fig 52
Fig 53
(718641 Only) Remove the nuts, bolts & washers from the 30mm hose support bracket
(H), line up the pre-drilled holes to the underside of the rear extention support arm (X) &
secure using the nuts,bolts & washers you removed earlier. (See figs 50 & 51).
Locate the dust extraction moulding support bracket (I) & slot the bracket’s ring over the
end of the 50mm inlet on the dust extraction moulding (L) (718641 Only). Slot the 30mm
hose through the support bracket ring (H) (718641 Only), locate a jubilee clip (Z2), place
over the end of the hose & slot the hose onto the 30mm inlet on the dust extraction
moulding (L) & secure. (See fig 52).
Remove the nuts, bolts & washers from the support bracket (I), line up the pre-drilled hole
to the underside at the end of the extention support arm (X) & secure using the nut, bolt &
washer you removed earlier. (See fig 53).
Loosen the support bracket ring (I), by undoing the clamping screw, see fig 53, slot the
50mm hose through the ring and onto the 50mm inlet on the dust extraction moulding (L),
retighten the clamping screw. (See figs 52 & 53).
H
I
I
L
Z2
X
50mm inlet
Nuts, bolts & washers
30mm hose
Support bracket ring
Clamping screw
(718641 Only)



 To Next Page