Axon Fleet 2 Installation Manual
Axon Enterprise, Inc. Page 13 of 39
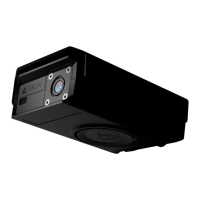
Installation
This section provides information on the tools needed and procedure for installing Axon
Fleet 2 hardware.
Upgrading from Axon Fleet to Axon Fleet 2
If you are performing an Axon Fleet 2 installation as upgrade to an existing Axon Fleet
system, it is not necessary to remove the existing power units or signal unit. The scope of
installation is limited to the cameras.
Only the following installation steps are required:
1. Remove the Axon Fleet front and rear cameras and mounts.
• Disconnect the Axon Fleet cables connecting the mounts to the Axon Fleet Power
Units from the power units.
Please note which power unit is connected to the front and rear cameras. It is
important that the power units connect to the new Axon Fleet 2 front and rear
cameras respectively.
2. Clean any remaining adhesive from the camera mounting surfaces using a commercially
available adhesive cleaner.
3. Follow the instructions under Axon Fleet Power Unit to Camera/Controller Mount
, using
the supplied 71085 cables to connect the Front Camera and Rear Camera Controller to
the respective power units.
Note: Axon recommends trimming the supplied 71085 cable to length. Do not create a
service loop or splice this cable assembly in anyway.
4. Follow the steps for determining the mounting locations and installing the
Front Camera
Mount and Rear Camera and Controller.
 Loading...
