AXONICS SNM SYSTEM® – Neurostimulator | Recharge-Free, Model 4101 Page 10
• The Neurostimulator implant site should be irrigated sterile saline or water, and it is
recommended that IV antibiotics be administered perioperatively. Do not soak the
Neurostimulator in antibiotic solution as this may affect lead connections.
• The Neurostimulator has been sterilized. The Neurostimulator should not be placed on any
non-sterile surface. The Neurostimulator should not be placed on skin. An infection may
require surgical removal of the implanted system.
2.
Use the tunneling tool to create a tunnel from the lead incision site to the neurostimulator pocket. Refer to the Tined
Lead Manual for detailed tunneling and lead implant instructions.
Connecting the Lead to the Neurostimulator
1.
The components should be wiped and dried to remove any fluids before making the connections. If necessary, use
sterile water or a non-ionic antibiotic solution, then wipe dry.
Failure to completely dry the components could lead to undesired stimulation,
intermittent stimulation, or loss of therapy.
2.
Ensure that the Neurostimulator connector block is dry and clean.
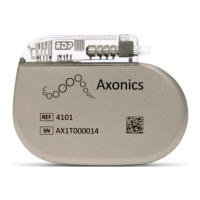
3.
Use the torque wrench to turn the setscrew counterclockwise to back up the setscrew. (Figure 4).
Figure 4: Use the Torque Wrench to Turn the Setscrew Counterclockwise to Back up the
Neurostimulator Setscrew and Allow for Insertion of the Lead.
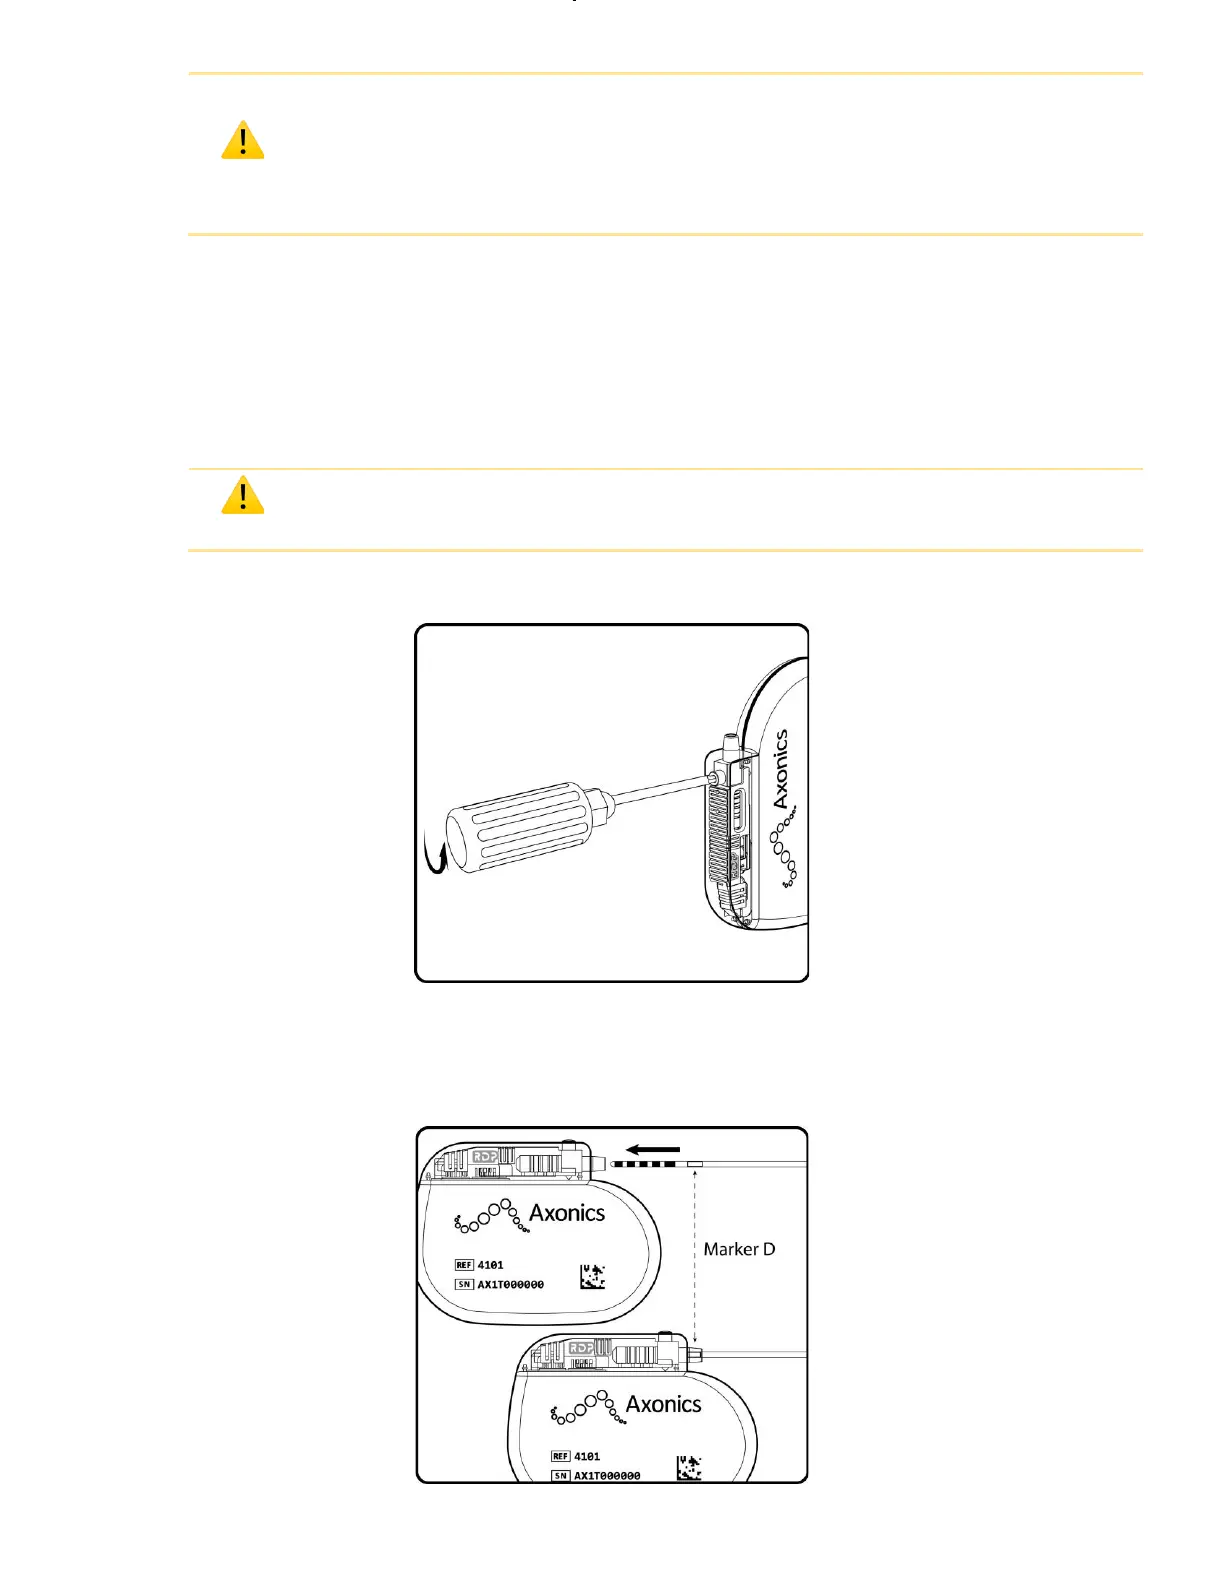
4.
Insert the lead into the Neurostimulator connector block until fully seated and the lead cannot be inserted further.
Marker D on the lead should be inside the Neurostimulator strain relief (Figure 5). The retention sleeve on the tined
lead should be positioned under the Neurostimulator setscrew.
Figure 5: Insert Lead Fully into the Neurostimulator Connector Block.
 Loading...