AXONICS SNM SYSTEM® – Neurostimulator | Recharge-Free, Model 4101 Page 9
NEUROSTIMULATOR IMPLANT PROCEDURE
The following section describes the procedure for implanting the Axonics Neurostimulator. This procedure should be performed
when an Axonics tined lead has already been implanted.
Procedure Supplies
In addition to the general surgical tools required by the physician, the following supplies are needed for the preparation,
implantation, programming, and Remote Control pairing of the Neurostimulator:
• Axonics Neurostimulator
• Axonics Clinician Programmer (CP)
• Axonics Remote Control
Neurostimulator Preparation
Before opening the sterile Neurostimulator package, the Clinician Programmer (CP) should be used to communicate with
the Neurostimulator to verify the ability to communicate and confirm the battery status of the Neurostimulator. Refer to
the CP Manual for further instructions.
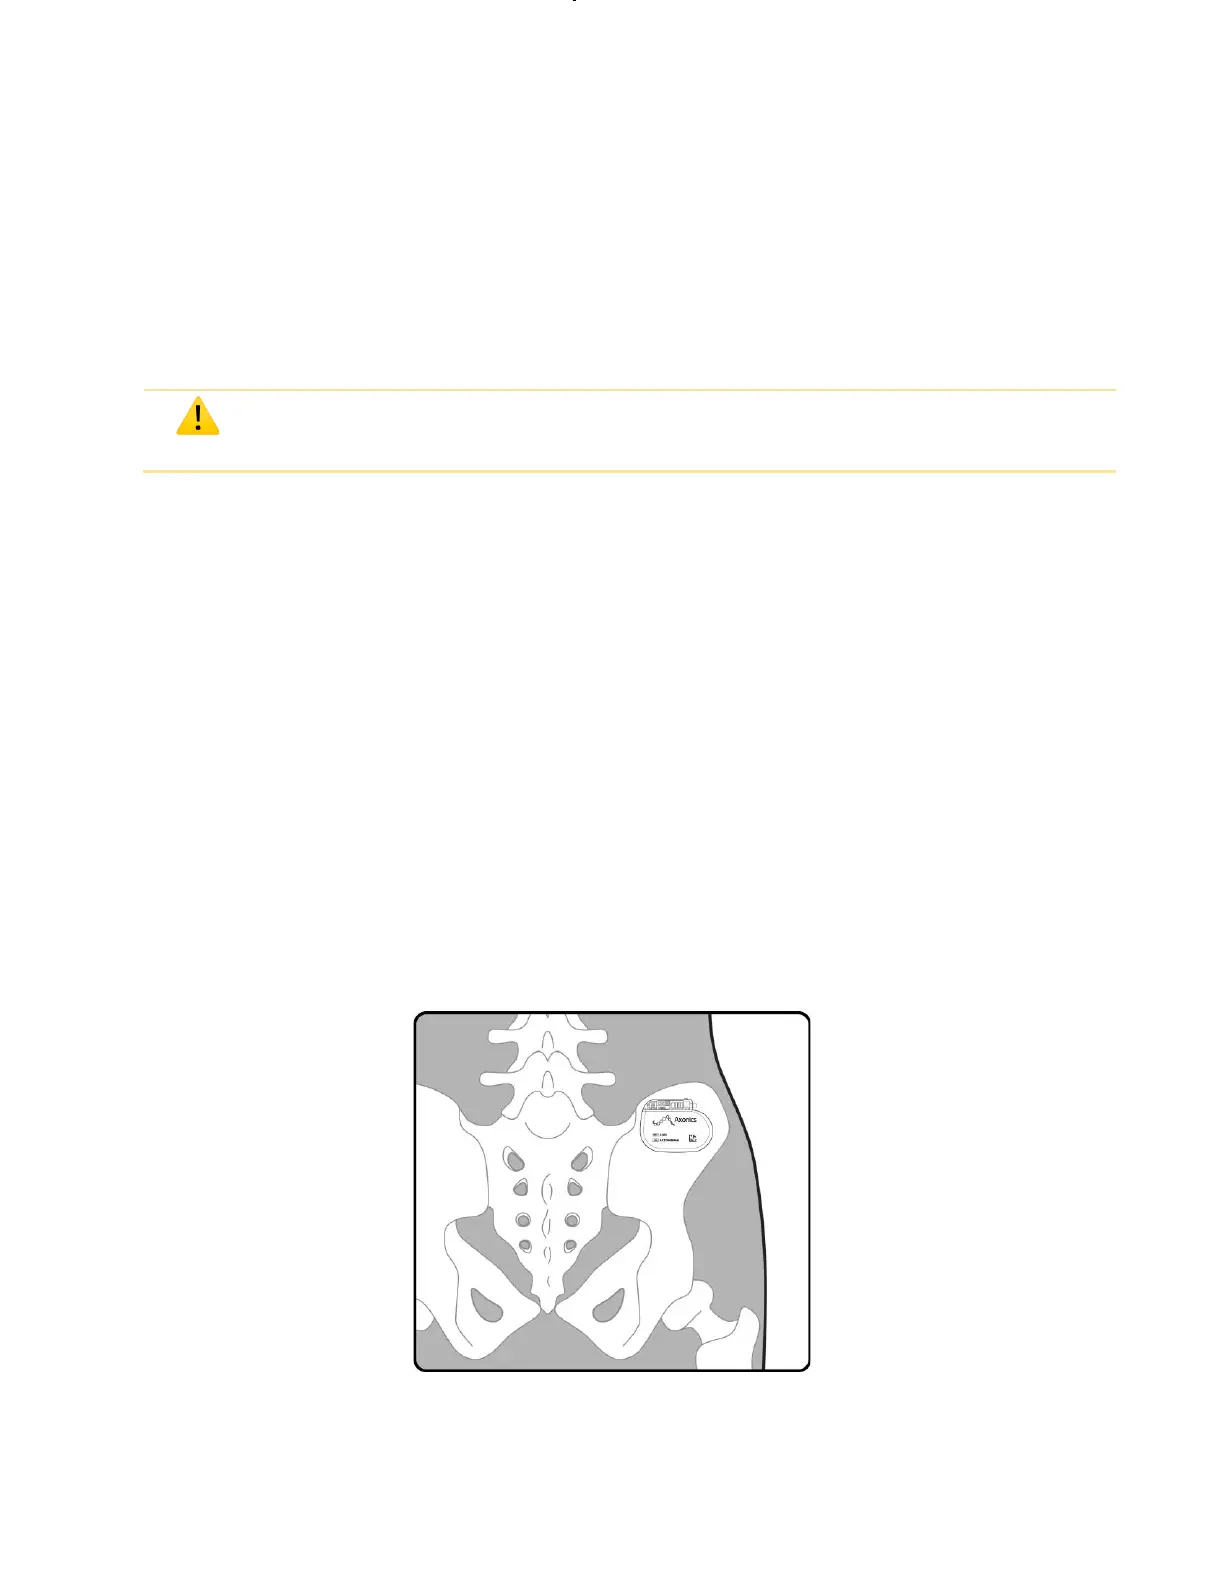
Creating the Neurostimulator Pocket
1.
The Neurostimulator will be placed in a subcutaneous pocket at the anterior surface of the muscle in the upper buttock
area. Create a small incision, approximately 4 cm in length which is slightly longer than the smaller dimension of the
Neurostimulator, and then bluntly dissect a subcutaneous pocket.
Notes:
• The Neurostimulator should be placed no deeper than 3.0 cm (about 1 in) below the skin and should be parallel to
the skin. If the Neurostimulator is too deep, programming the device may be unsuccessful.
• The Neurostimulator should be implanted horizontally (Error! Reference source not found.), preferably with the l
ead coming in laterally to avoid kinking of the lead. If the lead is not long enough to accommodate a lateral
insertion, placing the lead insertion medially is acceptable.
• For a patient with another neurostimulator already implanted, the neurostimulators should be placed as far away
as practical and separated by a minimum of 20 cm (8 in).
Figure 3: Axonics Neurostimulator Implantation Position.