Do you have a question about the Ayra ERO Micro Beam FX and is the answer not in the manual?
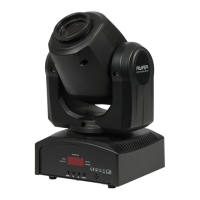
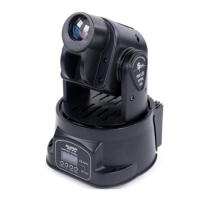
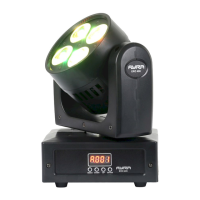
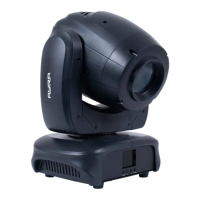
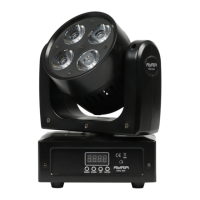
The Ayra ERO Micro Beam FX is a compact and agile LED moving head designed to produce a narrow, intense light beam that projects through an entire space. This device is enhanced with an SMD LED ring, adding an ambient effect to its color-filled light output. It is intended for professional use in various entertainment settings such as stages, theaters, clubs, and similar venues, and is not suitable for household illumination.
Before using the device, it is crucial to read the entire user manual to familiarize yourself with all its functionalities. Upon unpacking, ensure all parts and accessories listed under 'Box Contents' are present. These include the Ayra ERO Micro Beam FX Fixture, a suspension bracket, a connection cable (IEC C13 to Schuko, 1.5 mm²), and a safety-eyelet bolt. If any part is damaged or defective upon arrival, contact your dealer directly. The device should only be connected to a suitable, grounded power socket with the correct voltage to prevent damage, fire, or electric shocks. Avoid moisture, water, and rain to prevent electric shocks.
The device's light source is not replaceable; if it ceases to function, the entire device must be replaced. It contains no user-serviceable parts, and any maintenance or repairs must be handled by a qualified technician. Do not remove any labels or stickers, leave cables lying around, or open the device. Modifications to hardware or software are not permitted. For optimal performance, inputs should not be fed with signals higher than necessary. The device is for indoor use only; avoid contact with water, rain, and moisture. Do not place liquid-containing objects on top of it. Keep it away from flames, heat sources, flammable fluids, gasses, or objects. Disconnect it from the power source when not in use, during maintenance, or cleaning. Avoid pulling on cables to prevent damage. Only use the cables described in the manual and contact your retailer if they are defective.
If the device has been exposed to extreme temperature changes (e.g., moved from a cold outdoor environment to a warm indoor environment), do not turn it on until it reaches room temperature. This prevents moisture condensation, which could lead to electric shocks.
The Ayra ERO Micro Beam FX is designed for mobile use. For transport, always use the original packaging or a flight case with a suitable foam inlay. It is not designed for permanent (24/7) use. Disconnecting or turning off the device when not actively in use will not affect its expected lifespan. For long periods of inactivity, store it disconnected in a dust-free environment and avoid extreme temperature differences.
Regularly inspect the device's housing, especially before each use. Do not operate it if there are large dents, cracks, or missing screws. Contact your dealer or a qualified technician if unsure about its condition. Check for corrosion on the device and screws; if found, contact your dealer or technician. Ensure all power and signal connectors are securely attached.
To activate the device, plug it into a mains socket. It will automatically turn on and begin a start-up process, during which the moving head calibrates its step motors, which may involve alarming movements. Once fully started and at rest, it will revert to the last used mode and setting. The display and menu buttons can then be used to adjust operation modes and other settings. If a DMX signal is detected, the device automatically switches to DMX mode, using the last DMX address (typically 001 for new devices).
The device features an LED display with menu buttons for changing functions, modes, and settings. Press 'Enter' to select a function or confirm a change, 'Up' and 'Down' to adjust values, and 'Menu' to return to the main menu. To expedite returning to the main menu after confirming a setting, hold the 'Menu' button for 2 seconds.
The menu offers several options:
For checking the device, the 'TEST' function runs a continuous program to test the LEDs for deviations or defects. This program repeats until manually interrupted (e.g., by switching to sound control).
When suspending the ERO Micro Beam FX, use the included suspension brackets, tightening knobs, and rubber rings. Place rubber rings between the bracket and the fixture, then tighten the knobs. Pre-drilled holes in the bracket allow for attachment with half-couplers or G-hooks (standard hooks/brackets for 35 or 50 mm tubes are available from local retailers). Mounting hardware for walls, ceilings, or beams is not included; consult a specialist for appropriate hardware. A safety cable (not included, available from local retailers) must be attached to the fixture's attachment point and wrapped around the truss or light stand. The safety cable should have a load capacity 10 times the armature's weight and prevent a fall greater than 30cm. Wrap the cable multiple times to minimize fall distance, reducing damage or injury risk.
The ERO Micro Beam FX uses powerful LED modules with a special lens that focuses the beams. Never look directly into the lens at close range, as the intense brightness can cause temporary blind spots, disorientation, and discomfort, though not permanent damage.
The device is cooled by fins and ventilation slits. Ensure these are never blocked and kept free of dirt and dust.
For DMX mode, a 'terminator' is often used at the end of the DMX circuit. This is a 120 Ohm resistor placed between the second and third pins of a standard male XLR connector, eliminating data reflections that can cause strange behavior in DMX-controlled devices. DMX-terminators are available pre-made or can be soldered.
Regular cleaning and maintenance are essential. Clean the exterior monthly with a dry or slightly damp microfibre cloth, ensuring the device is unplugged. Check all screws for tightness and corrosion; tighten or replace as needed. If corrosion is found, the device requires thorough inspection.
In case of DMX lighting problems, consult the troubleshooting section. Common issues include:
| power supply | 100-240V AC, 50/60 Hz |
|---|---|
| maximum power consumption | 35 Watt |
| power factor | 0.6 @ 220V |
| maximum functioning temperature | 0°C to 40°C |
|---|---|
| maximum housing temperature when in normal use | 42°C |
| fuse | F3AL250V |
| beam angle | 4 Degree beam, 25 Degree ring |
|---|---|
| range of motion | 540 Degree Pan, 270 Degree Tilt |
| red projection | 68-80 Lux at 1m |
| dimensions | 200 x 140 x 240 mm |
|---|---|
| weight | 2.6 kg |