13
Adding More WMB250AC Mesh Nodes (Manually)
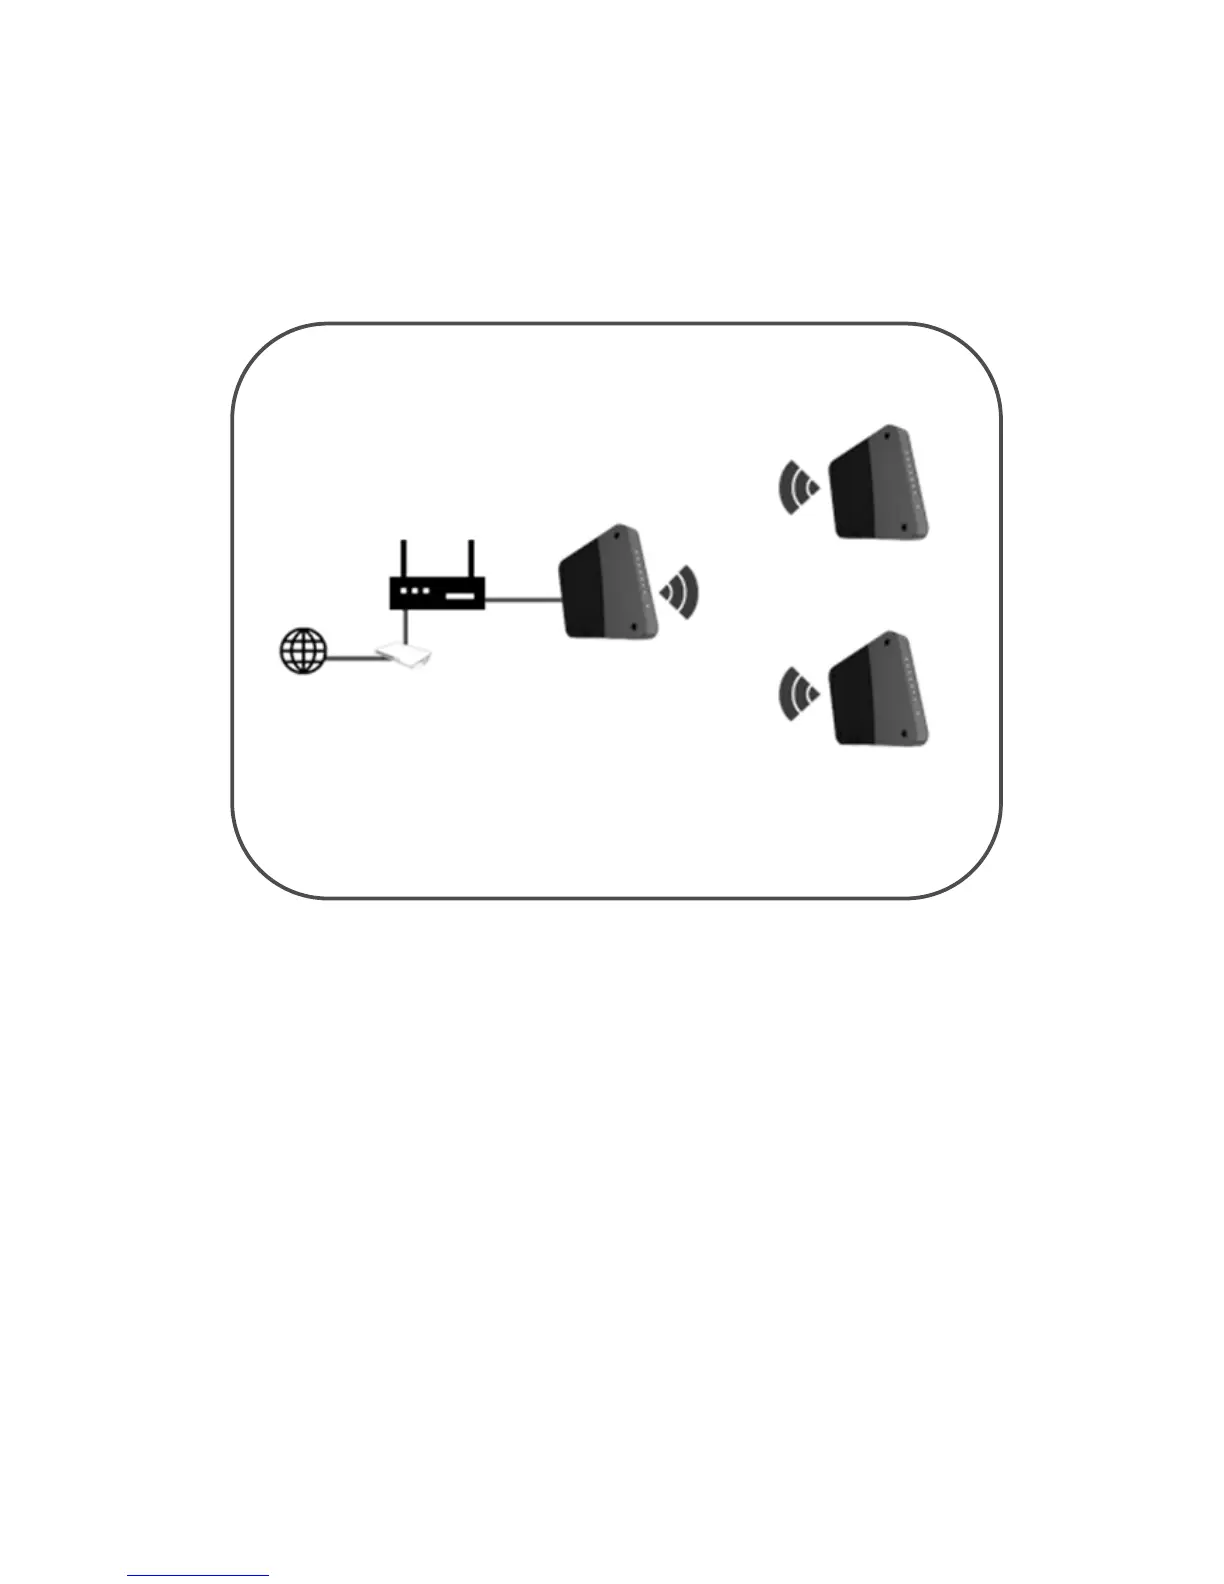
You may add additional WMB250AC to your mesh system as mesh nodes. This will
help increase the coverage of your wireless range capacity as well as you will be
able to roam without disconnection.
To add additional mesh node(s);
1. Position your mesh node near the Main WMB250AC AP Controller and
plug the power adapter to the power socket.
2. Add the Mesh Nodes needed to change the SSID (Wi-Fi Network
Name) and Wi-Fi Password of the second node the same SSID and
Password as your main WMB250AC AP Controller.
3. Reboot your second WMB250AC mesh node.
4. Wait for the Mesh LED of the main AP and mesh node to turn solid
WHITE.
5. When the Mesh LED on both the main AP and mesh node is solid
WHITE, pairing and link is successful and up.
6. The whole pairing process takes up to 5 minutes.
7. You may now move your mesh node.
NOTE: It is recommended to place your mesh nodes between the Mesh Controller
and the place where dead zone is experienced.