5. Operating Instructions
Notes:
Power supply: 1PH 230V 50/60HZ
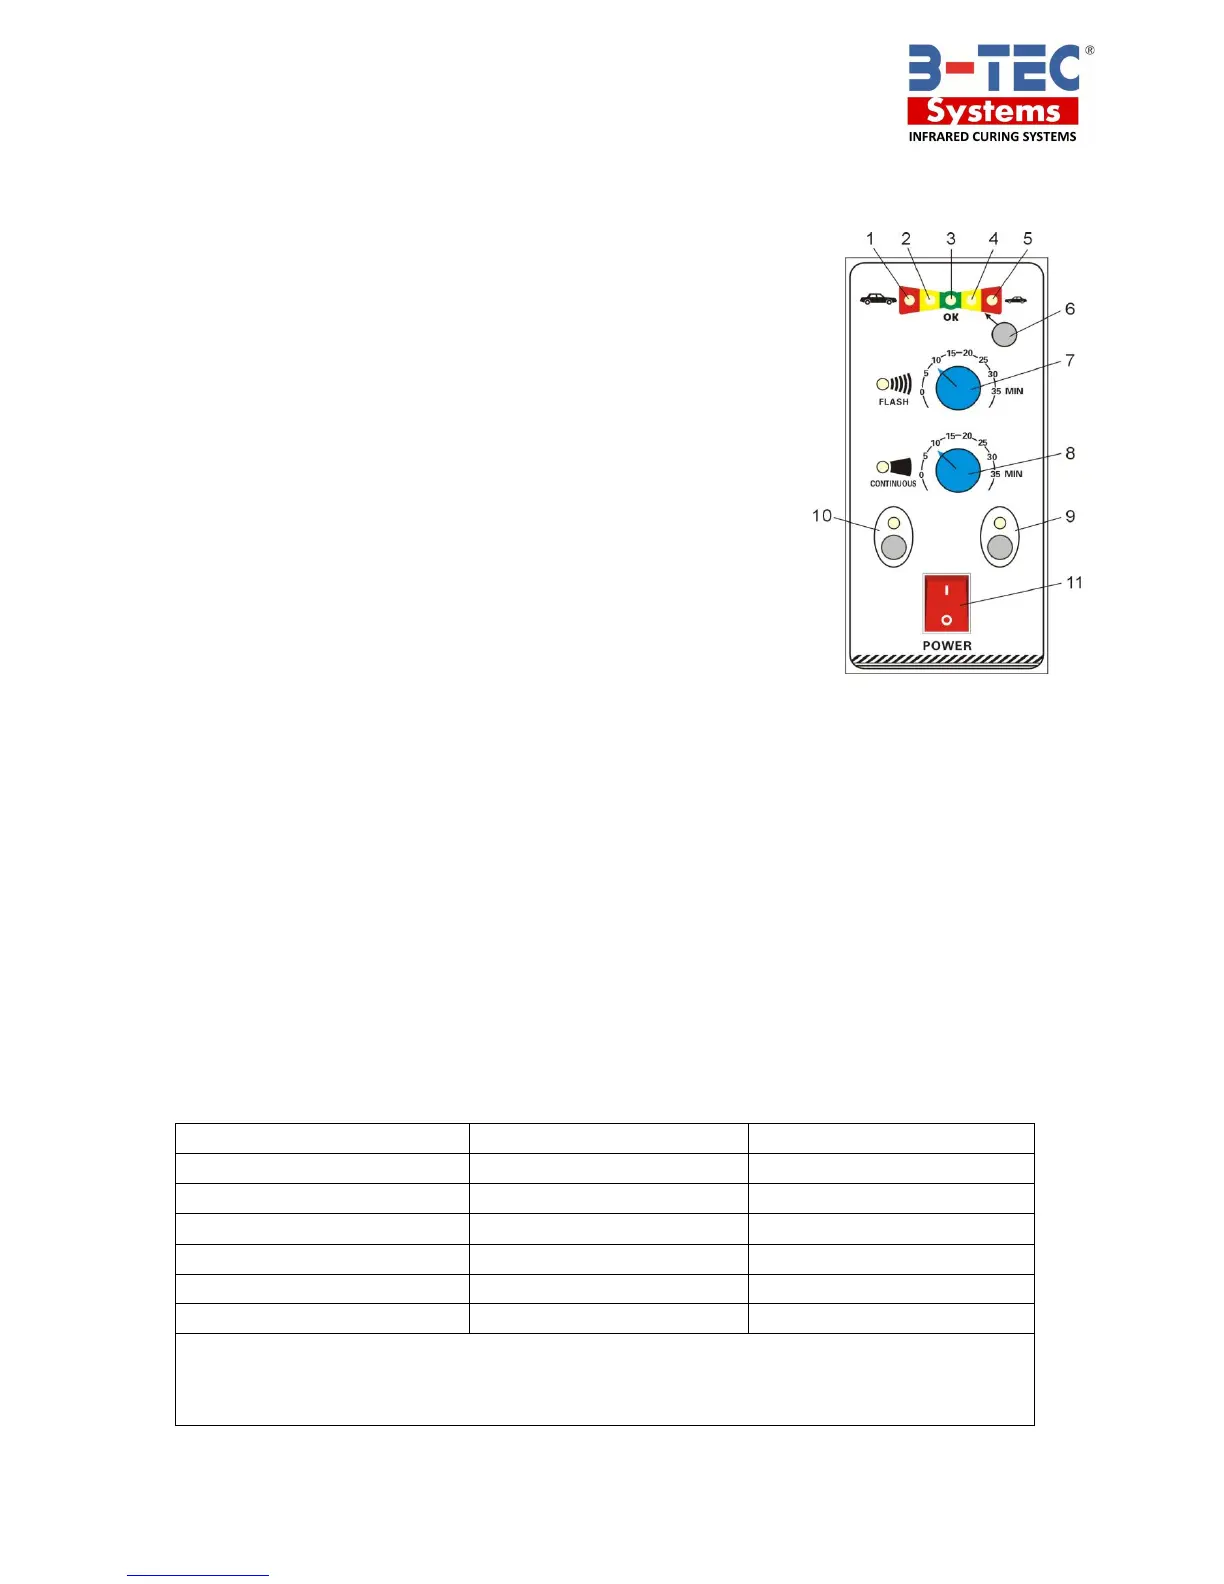
1. Adjust the direction of the emitters. They should be aligned
parallel to the car body.
2. Turn on the switch for ultrasonic distance measuring device (6) The optimal distance
is reached, when the green indicator light illuminates (3). As required, you can also
shut down and ignore this function. The optimal distance is approximately 24”
3. Adjust the timer button (7) to set Pre-heating baking time.
4. Adjust the timer button (8) to set full baking time.
5. Turn on the power switch (11).
6. Turn on the switch for ultrasonic distance measuring device (6) and set the optimal
distance. The optimal distance is reached, when the green indicator lights on (3). As
required, you can also shut down and ignore this function.
7. Select one or both emitters (9 & 10).
8. The machine stops automatically after the cycle is completed. If you want to continue using
the unit, restart the machine after 5 minutes.
Curing Times (The following times are provided as an approximate guide only)
(1) Red light: Distance is too close
(2) Yellow light: Distance is rather close
(3) Green light: Distance is suitable
(4) Yellow light: Distance is rather far
(5) Red light: Distance is too far
(6) Button for ultrasonic distance measuring
(7) Timer for half power / flash time
(8) Timer for full bake / continuous time
(9 & 10) On / off buttons for each cassette
(11) Power switch