EasyManua.ls Logo

Backyard Creations 272-0618 User Manual

Default Icon
2 pages
To Next Page IconTo Next Page
Page #1 background imageLoading...
Page #1 background image
INSTRUCTION MANUAL SKU#272-0618 CLASSIC OUTDOOR BENCH
CAUTION: Read all instructions before assembly. Failure to do so may result in faulty assembly and potential injury.
SPECIAL WARNINGS: Assemble on a soft, non-abrasive surface, such as carpet or cardboard to avoid damaging the item.
Noted: Identify all parts packed in carton against the parts list. Remove all the protective material carefully and DO NOT use
a knife to prevent scratching the surfaces. USE ONLY ON LEVEL SURFACES. INSPECT VISUALLY BEFORE EACH USE AND
ENSURE ALL HARDWARE IS PROPERLY TIGHTENED.
CUSTOMER SERVICE: For questions, assistance or repair parts, please call toll free at: 1-800-505-8305 (M-F
8:00am-8:00pm) or visit us on the web www.americancustomerservice.com 24 hours a day.
PARTS LIST
REF.
PARTS NAME
IMAGE
PART#
QTY
A
Right Leg
53DU-A
1
B
Left Leg
53DU-B
1
C
Back
53DU-C
1
D
Seat Slat
53DU-D
5
E
Side Brace
53DU-E
2
F
Seat Brace
53DU-F
1
G
M6*30mm Screw
53DU-G
14
H
M6*20mm Screw
53DU-H
2
I
M6*12mm Washer
53DU-I
14
J
M6*16mm Washer
53DU-J
2
K
M6 Nut
53DU-K
16
L
M5*15 Screw
53DU-L
7
M
Plastic Cap
53DU-M
4
For missing parts, please call toll free
customer service number for further
assistance.
Question and Answer IconNeed help?

Do you have a question about the Backyard Creations 272-0618 and is the answer not in the manual?

Backyard Creations 272-0618 Specifications

General IconGeneral
BrandBackyard Creations
Model272-0618
CategoryOutdoor Furnishing
LanguageEnglish

Summary

Customer Service

Parts List

Assembly Instructions

Step One: Attaching the Back and Legs

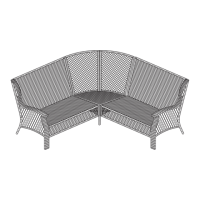
Attach the back to the legs using screws, washers, and nuts, then add plastic caps.

Step Two: Attaching Seat Slats

Secure four seat slats to the legs using screws, washers, and nuts, working from back to front.

Step Three: Attaching Side Braces

Attach side braces to the underside of the legs and seat slats using screws, washers, and nuts.

Step Four: Attaching Seat Brace

Secure the seat brace to the underside of a seat slat using screws.

Step Five: Final Tightening and Uprighting

Ensure all screws are tight, then flip the bench upright to complete assembly.

Manufacturer's Warranty

Related product manuals