1. Press the MENU button on the remote controller to
display the OSD main menu.
2. Press t/u button to select the PICTURE menu.
3. Press the OK button to enter the menu, then you can
use p/qbuttons to select the sub menu options.
4. Press t/ubutton to adjust.
5. Press the MENU or EXIT button to exit from the menu.
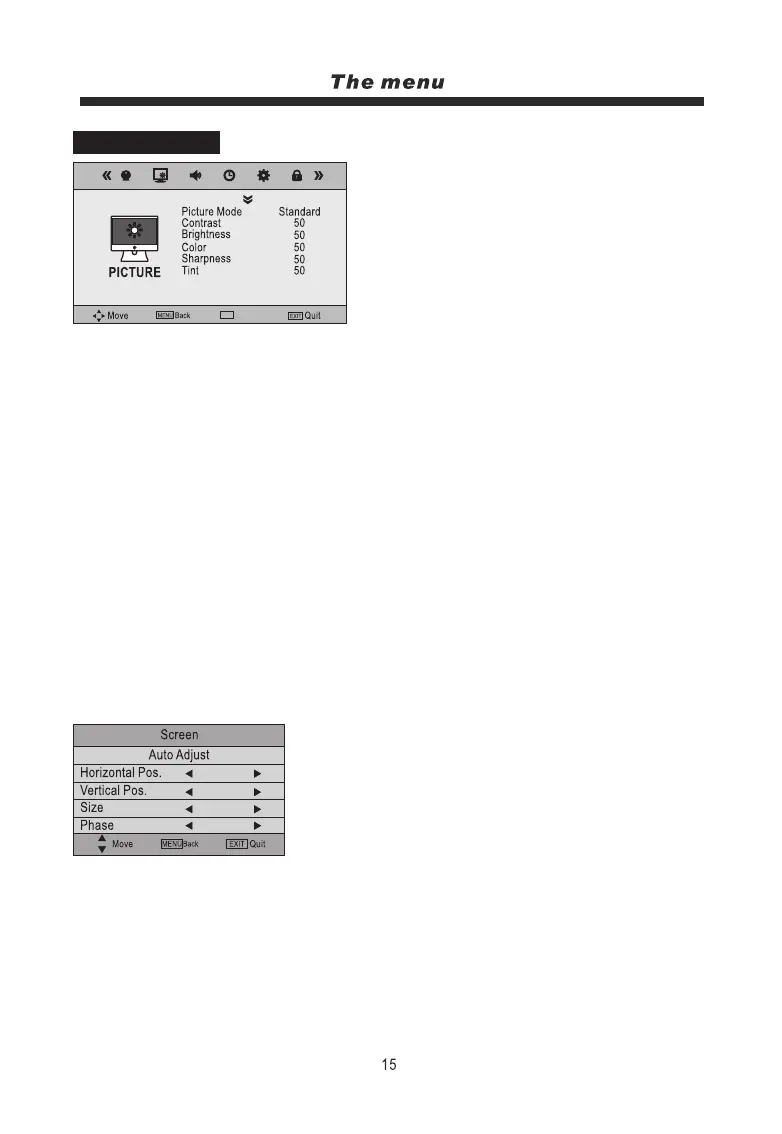
Select
Picture Mode: Choose from Dynamic, Standard, Mild and User.
Note: Contrast, Brightness, Color and sharpness are only available for adjustment in the
Personal mode option in the Picture Mode Settings.
Contrast: Controls the difference between the brightest and darkest regions of the picture.
Brightness: Controls the overall brightness of the picture.
Color:Controls the color.
Sharpness: Increase this setting to see crisp edges in the picture; decrease it for soft edges.
Tint: Controls the tint ( NTSC mode only).
NOTE: When you try to adjust Contrast, Brightness, Color or Sharpness the TV automatically switches
to User mode to allow you to do this.
Colour Temperature: Choose from Cool, Medium, Warm and User.
Red: Controls the red colour of the picture.
Green: Controls the green colour of the picture.
Blue: Controls the blue colour of the picture.
Aspect Ratio: Choose from 4:3, 16:9, Zoom1, Zoom2 and Panorama.
Noise Reduction: Choose interference noise modes from Off, Low, Middle and High.
Screen: Picture menu in VGA input (for setting the PC picture positions)
Auto Adjust:
Adjust screen settings automatically for optimized picture position.
Horizontal Pos.:
Adjust the screen horizontal position.
Vertical Pos.:
Adjust the screen vertical position.
Size:
Remove any vertical interference.
Phase:
Remove any horizontal interference.
NOTE: It is recommended that for best results you use Auto Adjust
wherever possible.
PICTURE MENU
Select
OK
50
73
50
50
OK