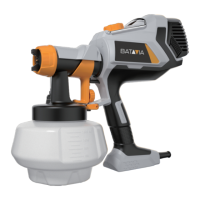
The Batavia Maxspray Plus is a high-speed motor electric spray gun designed for household use, offering efficient and versatile painting capabilities.
Function Description:
The Maxspray Plus is an electric spray gun that atomizes liquid materials for application onto various surfaces. It features a high-speed motor to deliver a consistent spray, making it suitable for a range of painting tasks. The device allows users to adjust the spray pattern and material flow, providing flexibility for different project requirements and material types. It is designed for ease of use, with clear instructions for assembly, material preparation, and operation. The spray gun is equipped with a container for the liquid material and a suction tube that can be oriented for spraying in upward or downward directions, optimizing material usage.
Important Technical Specifications:
- Rated Power: 700W
- Flow Rate: 1100ml/min (38oz/min)
- Max. Viscosity: 150 DIN-s (runout time: 150 seconds)
- Container Capacity: 1200ml
Usage Features:
The Maxspray Plus emphasizes user safety and operational flexibility.
- Safety Guidelines: The manual highlights critical safety warnings, including fire and explosion hazards from flammable solvent and spray material fumes, the risk of hazardous vapors, and electric shock hazards. Users are advised to ensure proper ventilation, avoid ignition sources, wear protective gear (respirator/mask, eyewear, clothing, gloves), and follow material manufacturer's safety instructions. It also warns against using materials with a flashpoint below 21°C (70°F) and incompatible halogenated hydrocarbon solvents with aluminum, which can cause explosions. General safety precautions include not aiming the gun at people or animals, avoiding spraying on windy days, and maintaining effective footing and balance.
- Electrical Safety: The tool is double insulated, eliminating the need for an earth wire. Users must ensure the power supply matches the voltage on the rating plate. Damaged cords should be replaced immediately. When using outdoors, only outdoor-rated extension cables up to 30 meters should be used.
- Extension Cord Usage: A chart provides guidance for extension cord sizes (18AWG for up to 5 meters, 16AWG for 5 to 10 meters) to prevent power loss and overheating.
- Components: Key components include a nut, air cap, nozzles (1.5mm, 2.0mm, 2.5mm, 3.0mm), spray tip, spray unit housing, trigger holder, check valve tube seat, trigger, check valve tube, check valve cap, check valve, check valve seat, suction tube, sealing cup, container, quick release lock, filter cover, filter, power pressure adjust knob, viscosity cup, cleaning needle, and cleaning brush.
- Assembly: The spray gun head attaches to the power unit by aligning unlock signs, pushing the head into the housing, and turning until the lock sign aligns. The quick release lock secures the container.
- Suction Tube Alignment: The suction tube's angled end should point towards the front of the gun for downward spraying and towards the rear for upward spraying, reducing the need for frequent refills.
- Material Preparation: Users must ensure materials can be cleaned with mineral spirits, paint thinner, or warm water and soap. A viscosity cup is provided to determine the "runout time" (up to 150 seconds) for proper thinning. A thinning chart offers recommendations for various materials like oil enamel, latex paint, varnish, and lacquers. Materials should be stirred and strained thoroughly before use to prevent clogging.
- Spray Pattern Adjustment: The spray pattern (round, horizontal, vertical) is adjusted by turning the ears of the air cap.
- Material Flow Adjustment: A regulator on the trigger controls the material volume. Turning towards "+" increases flow, while turning towards "-" decreases it.
- Pressure Control Dial: This dial adjusts air pressure. Lower settings are for thinner materials, higher settings for thicker materials. Decreasing pressure can reduce overspray.
- Spraying Technique: The gun should be held perpendicular to the surface, 50-300mm (2-12 inches) away, with smooth, consistent passes. Triggering should occur after a pass begins and release before it stops. Overlapping passes slightly ensures a consistent finish. Applying thin coats and allowing them to dry before subsequent, slightly heavier coats is recommended. The "crisscross" pattern is suggested for large surfaces.
- Surface and Area Preparation: Surfaces must be clean (free from dust, dirt, rust, grease) and dry. Masking edges and using drop cloths are recommended to protect surrounding areas.
Maintenance Features:
Proper maintenance is crucial for the longevity and performance of the Maxspray Plus.
- Cleanup: After use, the spray gun must be cleaned immediately with the appropriate cleaning solution (warm, soapy water for latex, mineral spirits for oil-based).
- Special Cleanup for Flammable Solvents: If flammable solvents (flashpoint above 70°F/21°C) are used, cleanup must be done outside in a well-ventilated area, free of flammable vapors. The power unit must not be submerged.
- Process: Unplug the gun, loosen the check valve cap, and push the trigger to return material to the container. Unscrew and empty the container. Pour a small amount of cleaning solution into the container, clean the container and pickup tube, and dispose of the solution. Refill with new cleaning solution. Reattach the container, plug in the cord, and spray the solution for 2-3 seconds in a safe area. Turn off the power unit, trigger the gun to return solution to the container, and wipe the exterior.
- Disassembly and Cleaning: Unscrew the tip collar, air cap, nozzle, and pickup tube. Clean the container, pickup tube, air cap, nut, and nozzle with a cleaning brush and appropriate solution. Never use sharp metal objects to clean nozzle or air holes. Avoid solvents or lubricants containing silicone.
- Lubrication: Twist and separate the spray gun from the power unit. Clean the rear of the spray gun and lubricate the O-ring with a thin layer of petroleum jelly.
- Reassembly: Dry all parts thoroughly. Place a drop of household oil inside the sprayer from the hole for assembling the spray tip. Reassemble the spray gun, ensuring the nozzle's notch aligns with the skirt on the spray unit housing and the spray tip's bumps are vertical. Pay special attention to the check valve direction (nipple upward).
- Power Unit Cleaning: Use only mild soap and a damp cloth. Do not allow liquid inside the power unit or immerse it.
- Air Filter Maintenance: The power unit contains a washable/reusable filter (#17). It should be checked before and after each use. If dirty, wash with warm water and air dry, or replace if excessively dirty. The unit should never be operated without the air filter.
- Troubleshooting: A comprehensive troubleshooting guide addresses common issues like material runs/drips, nozzle drips, overspray, little/no material release, splattering, coarse atomization, and sprayer pulsation, offering solutions such as adjusting material flow, cleaning components, checking air filters, and thinning materials.
- Service: For repairs, maintenance, and adjustments beyond those listed in the manual, authorized service centers or qualified personnel should be contacted, using identical replacement parts to ensure product safety and reliability.
- Storage: The unit should be clean and dry before storing indoors in a dry location. The electrical cord should be wrapped to prevent crimping.
- Environmental Protection: The product must be disposed of separately from normal household waste. Users are encouraged to make the product available for separate collection for recycling, which helps prevent environmental pollution and reduces demand for raw materials.