Page 7;&(%$*4.8"4,7%<'*#$"&8#=%/7*,#*%4,77%>?@@@?@AA?BCDC1Item 57241
EF;6GHIJ6KFGLIMNFLMG6MFMO6 E6GPJ
I/*(,$"83%L8#$('4$"&8#
%K*,9%$.*%6MGLK6%LNJIKGFMG%EF;6GH%LM;IKNFGLIM%#*4$"&8%,$%$.*%+*3"88"83%&2%$."#%
5,8',7%"847'9"83%,77%$*Z$%'89*(%#'+.*,9"83#%$.*(*"8%+*2&(*%#*$%'/%&(%'#*%&2%$."#%/(&9'4$1
L8#/*4$%$&&7%+*2&(*%'#*=%7&&X"83%2&(%9,5,3*9=%7&&#*=%,89%5"##"83%
/,($#1%%L2%,8V%/(&+7*5#%,(*%2&'89=%9&%8&$%'#*%$&&7%'8$"7%(*/,"(*91
Q&(X/"*4*%,89%Q&(X%F(*,%E*$%P/
1. Designate a work area that is clean and well lit.
The work area must not allow access by children
or pets to prevent distraction and injury.
2. Secure loose workpieces using a vise or clamps
(not included) to prevent movement while working.
3. There must not be objects, such as utility lines,
nearby that will present a hazard while working.
O.,(3"83%L8#$('4$"&8#
K*,9%$.*%6MGLK6%LNJIKGFMG%EF;6GH%LM;IKNFGLIM%#*4$"&8%,$%$.*%+*3"88"83%&2%$."#%9&4'5*8$%
"847'9"83%,77%$*Z$%'89*(%#'+.*,9"83#%$.*(*"8%+*2&(*%#*$%'/%&(%'#*%&2%$."#%/(&9'4$1
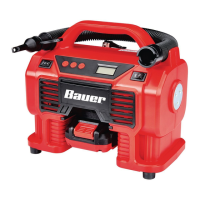
MIG6- Before using Stapler for the first
time, fully charge the Battery.
1. Plug Adaptor into Charge Port on back of Stapler.
2. Plug Adaptor into a grounded 120VAC outlet.
3. The Charge Indicator on the tool will turn Red
during charging. When charging is done,
it will turn Green. Unplug the Adaptor.
MIGLO6- Do not leave the Battery in a discharged
state. Charge the Battery every 3 months if the
Stapler is not in use. This will keep the Battery
from wearing down and add to its life. Do not
charge the Stapler at temperatures below 40° F.
E"837*?E*<'*8$",7%F4$',$"&8%N*4.,8"#5%U*2"8"$"&8
The single-sequential actuation mechanism is designed to allow accurate placement of
fasteners. The tool should only actuate if the Contact Safety is pressed against the workpiece
prior to pulling the Trigger. It should only actuate again if the trigger is released and squeezed
again. The Tool should not actuate if the Contact Safety is not pressed against an object.
E"837*?E*<'*8$",7%F4$',$"&8%N*4.,8"#5%G*#$"83%J(&4*9'(*
GI%JK6!6MG%E6KLIPE%LM_PKH%;KIN%FOOLU6MGFT%ULEO[FKR6-%
65/$V%$.*%$&&7%+*2&(*%$."#%/(&4*9'(*1%J&"8$%$.*%$&&7%,$%,%/"*4*%&2%#4(,/%)&&9%).*8%$*#$"831
1. Turn off the tool.
2. Empty the magazine of fasteners.
3. Check that the Trigger and the Contact
Safety move freely, without sticking.
4. Test the tool by pressing the Contact Safety against
the workpiece without pulling the Trigger.
G.*%$&&7%5'#$%8&$%4V47*%\,4$',$*]1
If it cycles (actuates), stop immediately and have
it repaired by a qualified service technician.
5. Hold the tool away, or off of the workpiece.
The Contact Safety should return to its original
position. Squeeze the Trigger.
G.*%$&&7%5'#$%8&$%4V47*%\,4$',$*]1
If it cycles (actuates), stop immediately and
take the tool to a qualified service technician.
6. Press the Contact Safety against the workpiece
and squeeze the Trigger.
G.*%$&&7%5'#$%4V47*%\,4$',$*]%&87V%&84*1
Release the Trigger, slide the Stapler to a fresh
piece of wood, and squeeze it again.
G.*%$&&7%5'#$%4V47*%\,4$',$*]%,3,"8%&87V%&84*1
With the Trigger held, carefully lift the tool and
press it against the workpiece again.
G.*%$&&7%5'#$%8&$%4V47*%\,4$',$*]1
If it fails to act in the manner explained in bold,
have it repaired by a qualified service technician.