GPT1813G
Owner’s Manual
8
Assembly Instructions
Remove all
contents
from the carton packaging. Make sure all
parts are present before
attempting assembly.
Once
the grill
is fully assembled, go back and check to make certain all the bolts are secure. Tighten again
using the screwdriver
provided if necessary.
Estimated Assembly
Time:
20
minutes.
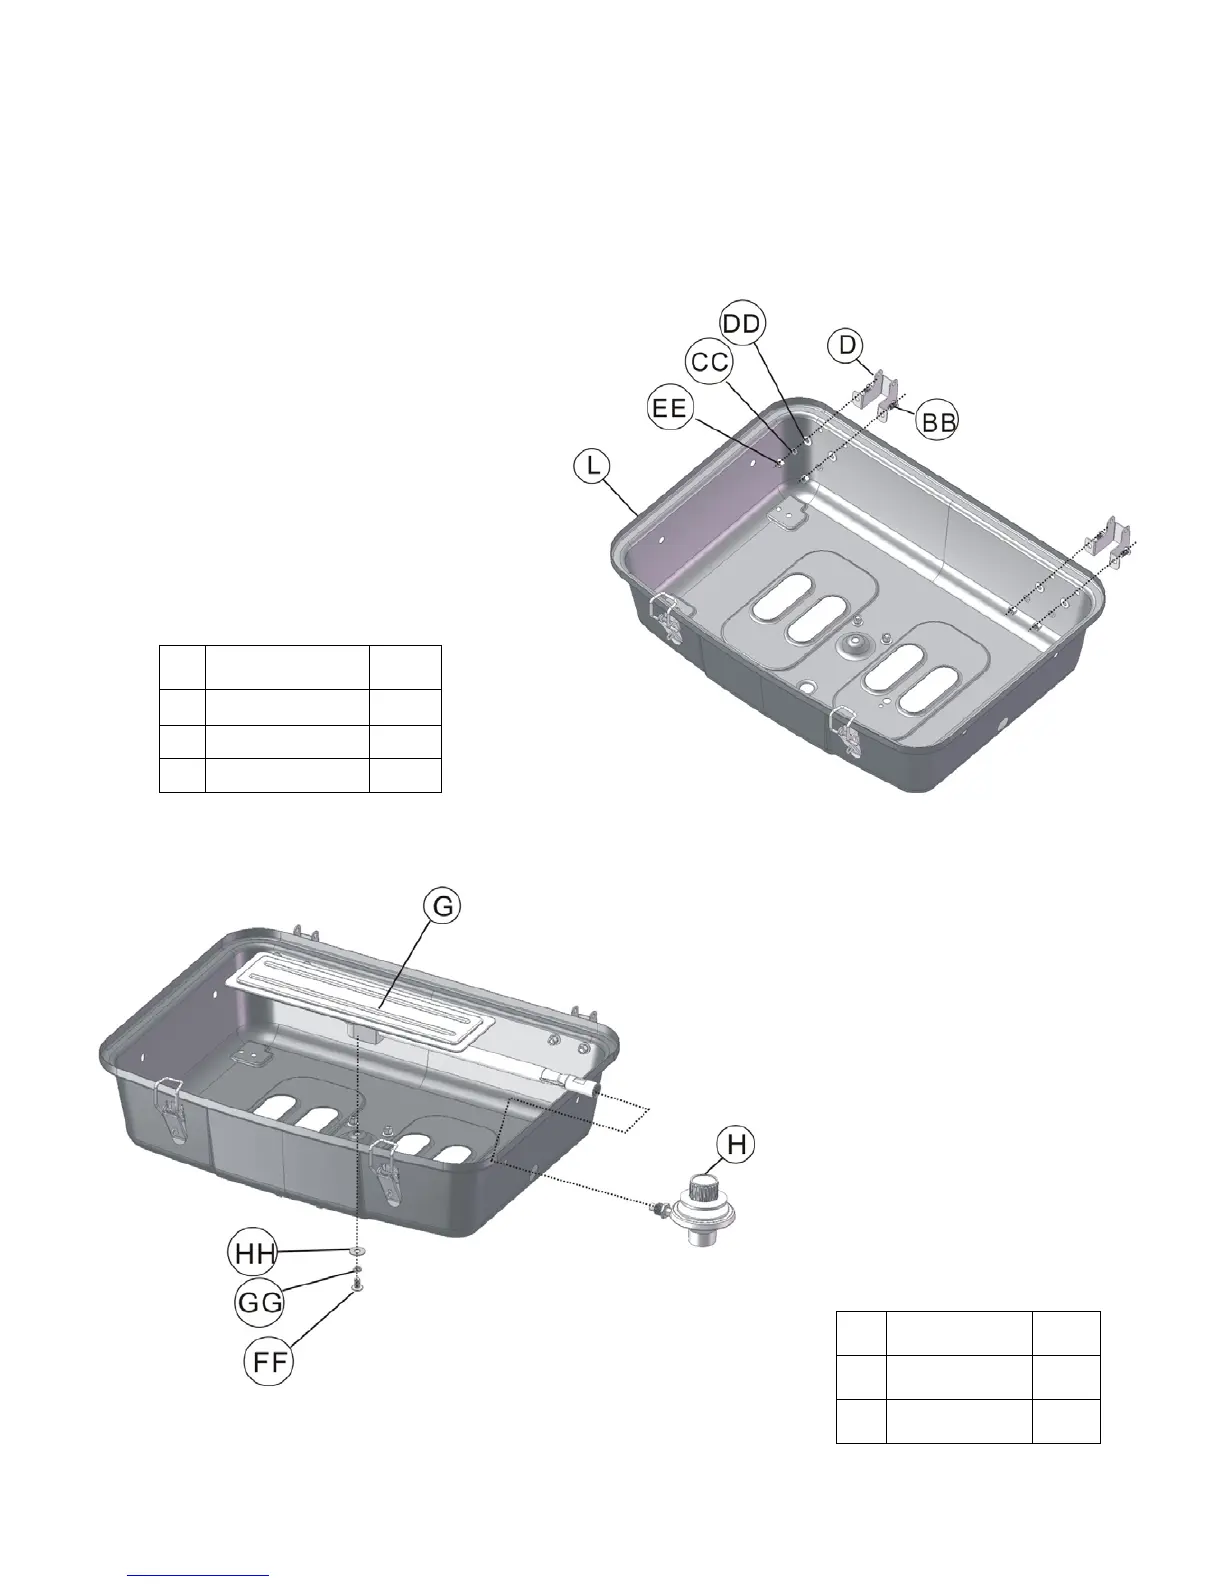
Step 1
a) Align the holes on the right back side of body
assembly (L) with the holes on the lower hinge (D).
b) Insert one bolt (BB) into the pre-drilled hole, sealing it
with one flat washer (DD
) one spring washer (CC) and
one nut (EE).
c) Repeat the procedure for the left back side of body
assembly.
d) Go back and tighten all the bolts using the screwdriver
provided.
BB
M5 × 10 Bolt
4 PCS
DD
Flat washer
4 PCS
CC
M5 Spring washer
4 PCS
EE
M5 Nut
4 PCS
Step 2
a) Insert the venturi side of the burner
(G) through the hole on the right side
of body.
b) Align the pre-drilled hole under the
burner with the hole on the bottom of
body.
c) Insert one flat washer (HH
), one
spring washer (GG)
and one bolt (FF)
into the pre-drilled hole.
d) Tighten the bolt using the screwdriver
provided.
e) Screw the regulator valve (H) into the
threaded venturi tube of the burner.
HH
Flat washer
1 PC
GG
Spring washer 1 PC
FF
M6 × 7 Bolt
1 PC
 Loading...