EasyManua.ls Logo

Be-Tech 3001D Series - User Manual

Be-Tech 3001D Series
12 pages
Print Icon
To Next Page IconTo Next Page
Loading...
0
3001D Smart Safe Manual
For 3001D-1HL/3001D-3HL/3001D-5HL
Question and Answer IconNeed help?

Do you have a question about the Be-Tech 3001D Series and is the answer not in the manual?

Summary

Electronic Parameters

Installation Guide

Installing Batteries

Step-by-step instructions for correctly installing batteries into the safe.

Safe Positioning

Drilling Diagrams for Safe Models

User Operation Instructions

Assigning Owner Code

Procedure for setting the initial owner code for the smart safe.

Changing Owner Code

Steps to modify or update the existing owner code.

Opening Safe with Owner Code

Instructions on how to unlock the safe using the owner code.

Assigning Service Codes

Guide for setting up service codes for additional access.

Advanced User Operations

Using the Mechanical Key

Error List Introduction

Overview

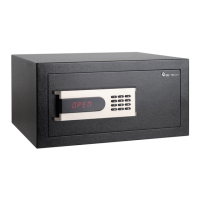
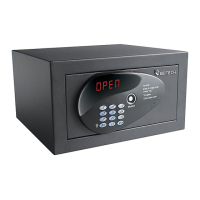
This document is a user manual for the 3001D Smart Safe, available in models 3001D-1HL, 3001D-3HL, and 3001D-5HL. The manual provides essential information for the correct and secure use of the smart safe, highlighting its advantages over general safes in terms of security and convenience.

Function Description

The 3001D Smart Safe is an electronic safe designed for secure storage. It features a numerical keypad, a display, and a lock mechanism for electronic access. In addition to electronic access, it includes a mechanical key for manual override in case of forgotten codes or electronic malfunction. The safe supports both an owner code and multiple service codes, offering flexible access control. It can operate in two modes: Share Mode and Privacy Mode, each with distinct closing and opening procedures.

Important Technical Specifications

The smart safe operates on 4 AA alkaline batteries.

  • Alarm Voltage: DC 4.2V ± 0.2V
  • Static Current: ≤ 30uA
  • Dynamic Current: ≤ 400mA
  • Working Temperature: 0℃ to 55℃
  • Working Humidity: 20% to 93% ± 2RH

Dimensions:

  • 3001D-1HL:
    • Height: 169mm (6.654")
    • Width: 300mm (11.811")
    • Depth: 270mm (10.630")
    • Drilling Diagram: Back wall holes at 200mm (7.874") apart, 50mm (1.969") from the top. Horizontal surface holes at 200mm (7.874") apart, 50mm (1.969") from the front. All holes are 8.5mm (0.335") in diameter.
  • 3001D-3HL:
    • Height: 220mm (8.661")
    • Width: 430mm (16.929")
    • Depth: 350mm (13.780")
    • Drilling Diagram: Back wall holes at 240mm (9.449") apart, 95mm (3.740") from the top. Horizontal surface holes at 175mm (6.890") apart, 95mm (3.740") from the front. All holes are 8.5mm (0.335") in diameter.
  • 3001D-5HL:
    • Height: 220mm (8.661")
    • Width: 495mm (19.488")
    • Depth: 350mm (13.780")
    • Drilling Diagram: Back wall holes at 305mm (12.008") apart, 95mm (3.740") from the top. Horizontal surface holes at 175mm (6.890") apart, 95mm (3.740") from the front. All holes are 8.5mm (0.335") in diameter.

Usage Features

Installation and Positioning: The safe should be placed on a level and covert surface, in a cool and dry place, away from direct sunlight. It can be fastened to furniture or inside a cabinet using the provided wooden screws. There are four pre-drilled holes for mounting: two on the back wall and two on the horizontal surface.

Battery Installation: Batteries are ordered separately. To install, remove the protective lid by unscrewing the screws and fit the 4 AA alkaline batteries into their seats, ensuring correct polarity.

Code Management:

  • Assigning Owner Code:
    1. Ensure the safe is open and initialized.
    2. Press *, 0, #, input the original owner code 123456, then press #.
    3. Within 6 seconds, press *, 0, # again. When "1St" is displayed, input a new owner code (4-9 digits) and press #.
    4. When "2nd" is displayed, re-input the new owner code and press #.
    5. "donE" indicates successful setup. Only one owner code is allowed.
  • Changing Owner Code:
    1. Ensure the safe is open.
    2. Press *, 0, #, input the current owner code, then press #.
    3. When "PrOG" is displayed, press *, 0, #.
    4. When "1St" is displayed, input a new code, then press #.
    5. When "2nd" is displayed, re-input the new code and press #.
    6. "donE" indicates successful change.
  • Assigning Service Code (up to 5 codes):
    1. Ensure the safe is open.
    2. Press *, 0, #, input the owner code, then press #.
    3. When "PrOG" is displayed, press *, 1, #.
    4. When "1St" is displayed, input the 1st service code, then press #.
    5. When "2nd" is displayed, re-input the 1st service code and press #.
    6. "donE" indicates successful setup.
    7. To assign additional service codes (2nd to 5th), after "donE" changes to "PrOG", press *, 2 (or 3, 4, 5), #, input the code, and confirm.
  • Deleting Service Codes:
    • Delete Specific Service Code:
      1. Ensure the safe is open.
      2. Press *, 0, #, input the owner code, then press #.
      3. When "PrOG" is displayed, press *, *, 1 (or 2, 3, 4, 5), #.
      4. When "dEL1" (or dEL2, etc.) is displayed, input the owner code and press #.
      5. "donE" indicates successful deletion.
    • Delete All Service Codes:
      1. Ensure the safe is open.
      2. Press *, 0, #, input the owner code, then press #.
      3. When "PrOG" is displayed, press *, *, *, #.
      4. When "dEL ALL" is displayed, input the owner code and press #.
      5. "donE" indicates successful deletion of all service codes.

Opening the Safe:

  • By Owner Code: Press *, 0, #, input the owner code, then press #. "OPEn" will be displayed.
  • By Service Code: Press *, 1 (to 5), #, input the corresponding service code, then press #. "OPEn" will be displayed.

Operating Modes:

  • Share Mode:
    • Switching to Share Mode: Press the Reset button for one second. Release when you hear a "Beep". Continuous "Beep" indicates Share Mode is activated.
    • Closing: Press the door, key in a 4-9 digit code on the keypad, then press #. "CLSd" will be displayed.
    • Opening: Key in the same code. Press * to delete wrong digits. One-Time Codes can be changed during any closing/opening cycle.
  • Privacy Mode:
    • Switching to Privacy Mode: Press the Reset button for three seconds. Release when you hear "Beep Beep". Continuous "Beep" indicates Privacy Mode is activated.
    • Closing: Press the door, then press #. "CLSd" will be displayed.
    • Opening: Key in the Owner Code (without *, 0, # prefix). For Service Codes, you must key in *, 1 (to 5), # before inputting the service code. One-Time Codes are not available in Privacy Mode.

Security Features:

  • Security Mode: For public areas, double-press * before inputting the secret code. The LED screen will not display code numbers, showing "-" instead.
  • Keypad Lockout: If an incorrect password is entered more than 5 times, the keypad will lock, and "HOLd" will be displayed. It will become available again after 5 minutes.
  • Low Battery Warning: "P_Lo" will be displayed when batteries are low.

Mechanical Key Override: In case of forgotten owner or service codes, the safe can be opened manually. Remove the front adhesive from the door, insert the mechanical key (provided with the product) into the lock, and turn to open.

Universal Socket (Optional): An optional universal power socket can be provided inside the door. This allows connecting various devices (e.g., PC, phone charger) to the power mains. The power supply cable exits from the back of the safe with three small cables (phase, neutral, earth) for direct connection to a wiring system or a normal plug. If directly connected, the wiring system must have a complete line cut-off device with a contact opening distance of at least 3.5mm. If using a normal plug, it must be easily accessible.

Maintenance Features

General Notices:

  • Do not dismantle the smart safe privately.
  • Do not tread on the smart safe.
  • Do not mix different types of batteries or new and old batteries.
  • Ensure positive and negative electrodes are connected correctly.
  • Man-made destruction is not covered under warranty.

Error Messages: The display shows various error codes to assist with troubleshooting:

  • Err0: Inputted code is less than 4 digits or more than 9 digits, or incorrect code.
  • Err2: Latch bolt didn't reach corresponding places.
  • P_Lo: Battery low voltage.
  • HOLd: Keypad locked down.
  • OPEn: Success to open.
  • CLSd: Success to close.
  • PrOG: Entered into programming mode.
  • 1St: Please input code once.
  • 2nd: Please input code again.
  • dEL*: Delete service code (where * displays 1 to 5 for corresponding service code groups).
  • dEL ALL: Delete all service codes.
  • Id_*: Please input your own code (where * displays 0 for Owner Code, 1-5 for Service Code groups).
  • dOnE: Setup success.

Power Supply Cable: If the power supply cable is damaged, disconnect it from the power supply system and contact sales service.

Important Warning: Never leave the mechanical key or the hand terminal inside the safe.

Be-Tech 3001D Series Specifications

General IconGeneral
BrandBe-Tech
Model3001D Series
CategorySafes
LanguageEnglish

Related product manuals