6 7
INSTRUCTIONS D’ASSEMBLAGE
Assemblage de l’appareil
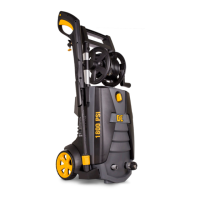
Installez la poignée (B) sur la
laveuse à pression (C).
Fixez-la à l’aide des vis (AA).
Remarque: N’UTILISEZ PAS un
tournevis électrique. Une fois la
vis complètement serrée, vis-
sez-la encore de quelques degrés
dans le sens horaire. NE SERREZ
PAS à l’excès.
x 2
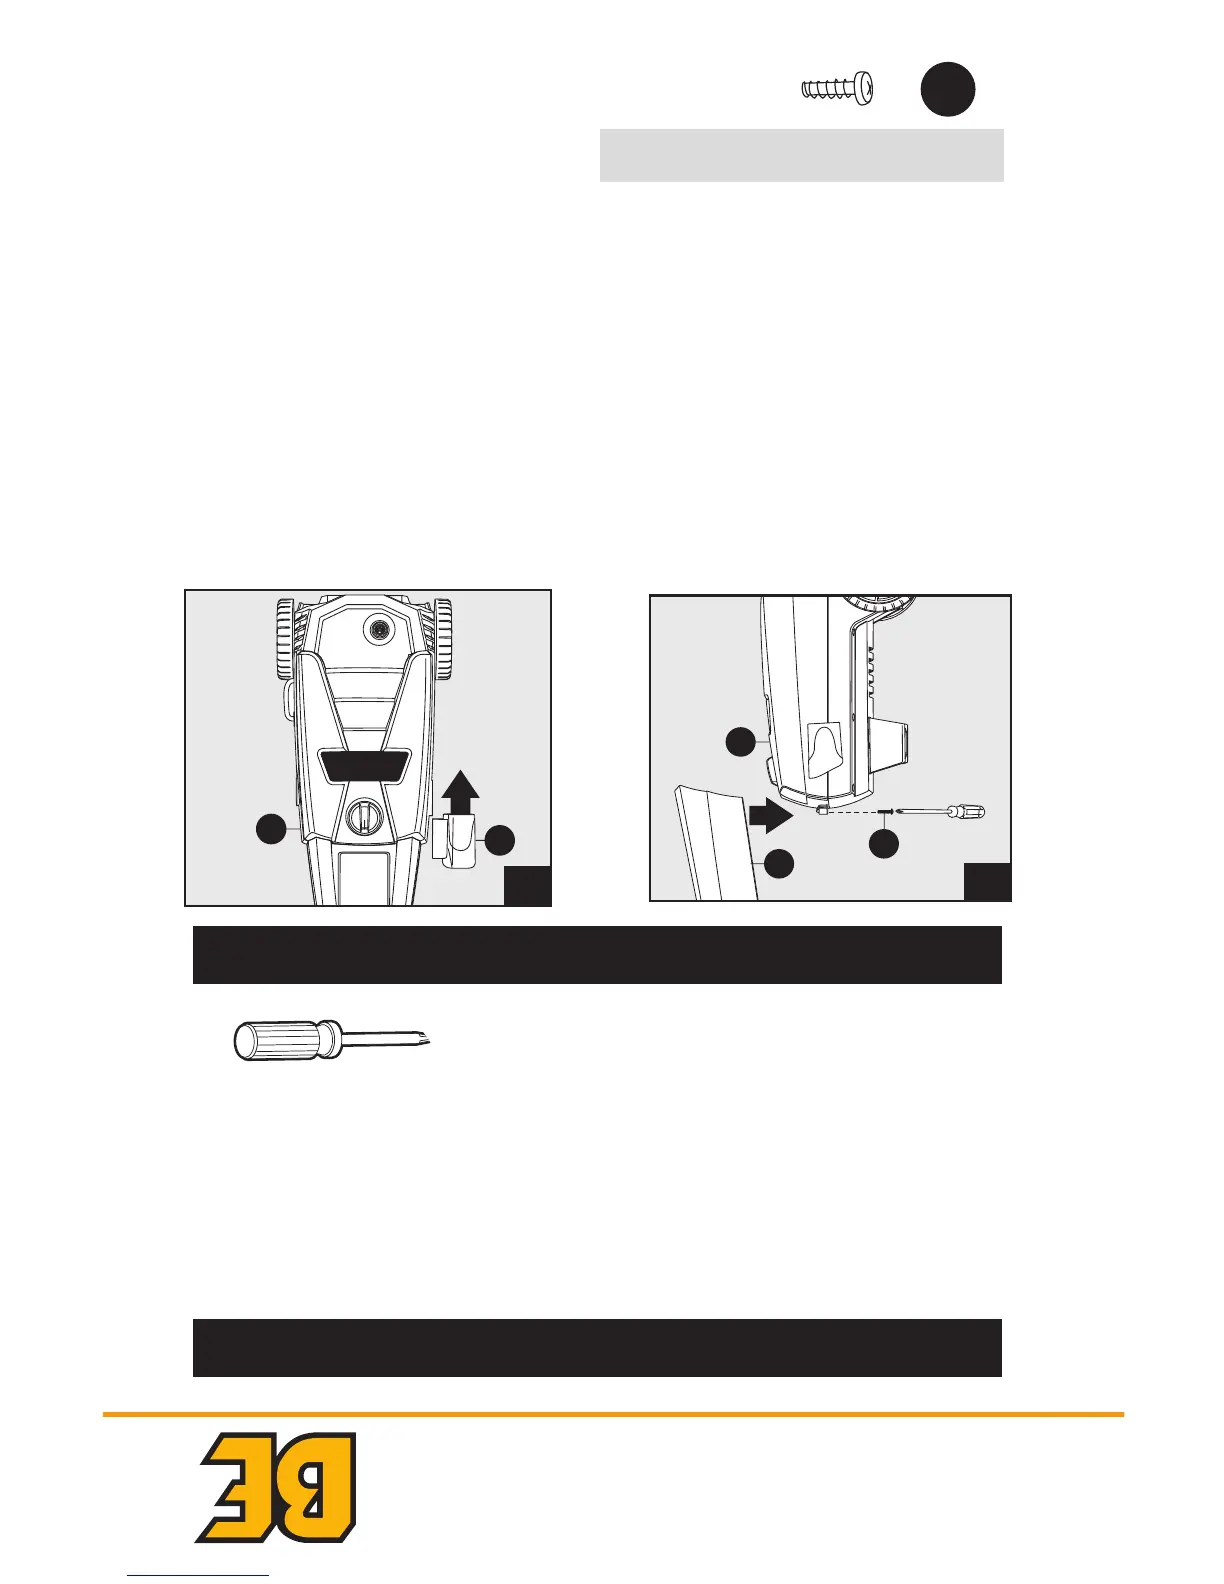
Placez l’appareil face contre
vous, puis faites glisser l’étui à
pistolet (A) sur le côté gauche
de l’appareil (C)
tel qu’illustré.
Remarque: L’étape suivante
ne nécessite aucune vis.
Avant de commencer
l’assemblage de l’appareil,
assurez-vous que toutes les
pièces sont dans l’emballage.
Comparez les pièces à la liste
des pièces et du matériel.
Dans le cas où une pièce est
manquante ou endommagée,
N’ESSAYEZ PAS d’assembler
l’appareil.
Temps d’assemblage
approximatif: 5 minutes
Outil nécessaire pour
l’assemblage (non compris):
Tournevis cruciforme
Matériel utilisé:
PRÉPARATION
VIS
3
PACKAGE CONTENTS
HARDWARE CONTENTS
PART DESCRIPTION QUANTITY
H Detergent Bottle 1
I Variable Spray Nozzle Lance 1
J Extension Lance 1
K Nozzle Cleaning Wire 1
L O-Ring Kit 1
AA Screws 2
PART DESCRIPTION QUANTITY
A Spray Gun Holster 1
B Handle 1
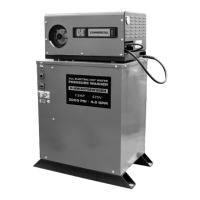
C Power Washer Unit 1
D Cord Hook 1
E Soft PVC High Pressure Hose 1
F Spray Gun 1
G Spray Gun Lock/Unlock 1
OFF/O
ON/I
E
H
B
C
K
A
D
L
AA
PW909112S
J
I
F
G
AA
Screw
Qty. 2
Note: Screws are located in
manual package
15ANR009 AR112S_1500PSI ENG-FR-SP.indd 3 16/12/17 下午12:38
3
PACKAGE CONTENTS
HARDWARE CONTENTS
PART DESCRIPTION QUANTITY
H Detergent Bottle 1
I Variable Spray Nozzle Lance 1
J Extension Lance 1
K Nozzle Cleaning Wire 1
L O-Ring Kit 1
AA Screws 2
PART DESCRIPTION QUANTITY
A Spray Gun Holster 1
B Handle 1
C Power Washer Unit 1
D Cord Hook 1
E Soft PVC High Pressure Hose 1
F Spray Gun 1
G Spray Gun Lock/Unlock 1
OFF/O
ON/I
E
H
B
C
K
A
D
L
AA
PW909112S
J
I
F
G
Note: Screws are located in
manual package
15ANR009 AR112S_1500PSI ENG-FR-SP.indd 3 16/12/17 下午12:38
6
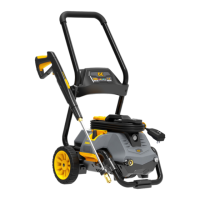
ASSEMBLY INSTRUCTIONS
Power Unit Assembly
Install handle (B) to power washer unit (C).
Secure with screws (AA).
Note: DO NOT use a power screwdriver. When the
screw is completely tight, give a small nal clockwise
twist of the screwdriver. DO NOT overtighten.
1
C
B
AA
Screw x 2
AA
OFF/O
ON/I
2
C
A
Slide spray gun holster (A) onto left side,when facing unit,
of power washer unit (C) as shown.
Note: This step does not require any screws.
Hardware Used:
PREPARATION
Before beginning assembly of product, make sure all
parts are present. Compare parts with package contents
list and hardware contents list. If any part is missing or
damaged, DO NOT attempt to assemble the product.
Estimated Assembly Time: 5 minutes
Tools Required for Assembly (not included): Phillips
screwdriver
PREPARATION
15ANR009 AR112S_1500PSI ENG-FR-SP.indd 6
16/12/17 下午12:38