26
PC Menu Adjustments
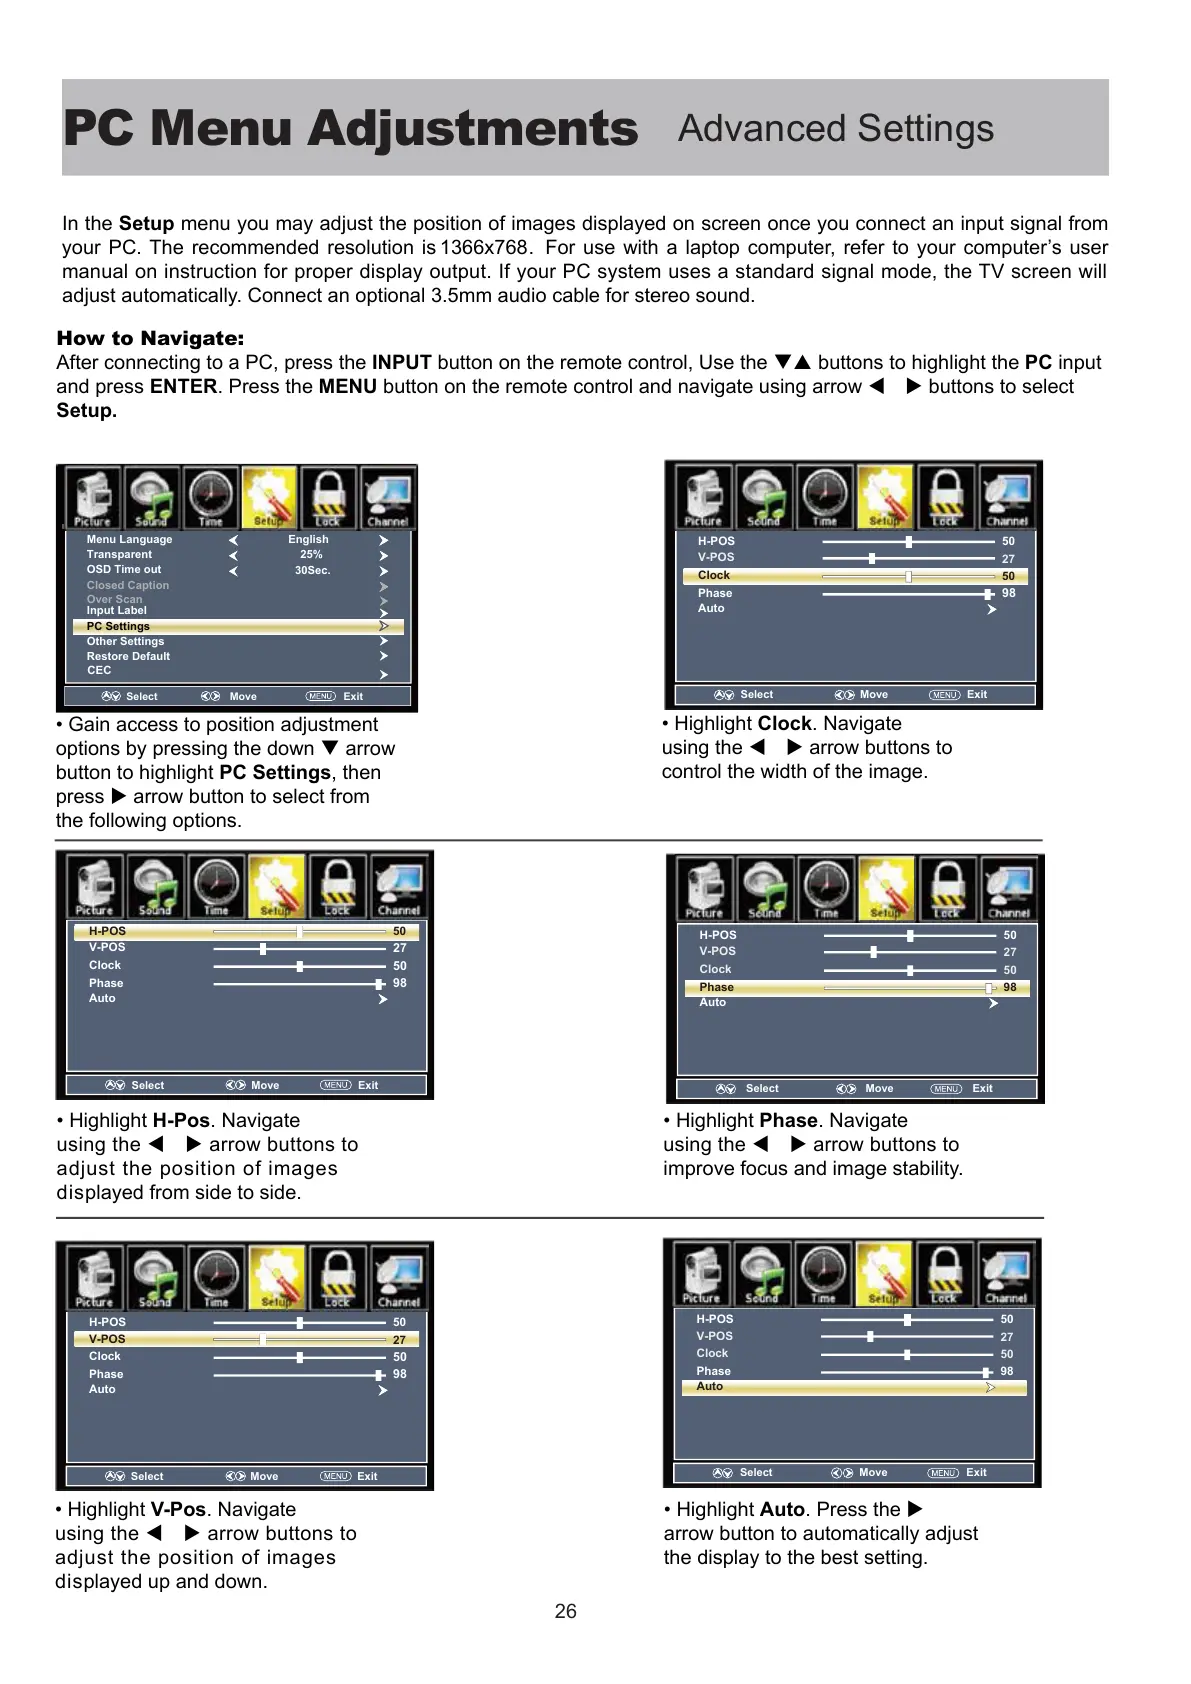
In the Setup menu you may adjust the position of images displayed on screen once you connect an input signal from
your PC. The recommended resolution is 1366x768. For use with a laptop computer, refer to your computer’s user
manual on instruction for proper display output. If your PC system uses a standard signal mode, the TV screen will
adjust automatically. Connect an optional 3.5mm audio cable for stereo sound.
Advanced Settings
How to Navigate:
After connecting to a PC, press the INPUT button on the remote control, Use the buttons to highlight the PC input
and press ENTER. Press the MENU button on the remote control and navigate using arrow buttons to select
Setup.
ain access to position adjustent
options by pressing the down arrow
button to highlight PC Settings, then
press arrow button to select from
the following options.
ihiht H-Pos. Navigate
using the arrow buttons to
adjust the position of images
displayed from side to side.
ihiht V-Pos. Navigate
using the arrow buttons to
adjust the position of images
displayed up and down.
ihiht Clock. Navigate
using the arrow buttons to
control the width of the image.
ihiht Phase
. Navigate
using the arrow buttons to
improve focus and image stability.
ihiht Auto. Press the
arrow button to automatically adjust
the display to the best setting.
Select Move tixE
Menu Language
Transparent
Closed Caption
Over Scan
OSD Time out
Other Settings
Input Label
Restore Default
English
25%
30Sec.
PC Settings
CEC
50
27
H-POS
V-POS
Phase
Auto
98
Clock
50
Select
Move
Exit
50
27
H-POS
V-POS
Phase
Auto
98
Clock
50
Select Move Exit
50
27
H-POS
V-POS
Phase
Auto
98
Clock
50
Select Move Exit
50
27
H-POS
V-POS
Phase
Auto
98
Clock
50
Select Move Exit
50
27
H-POS
V-POS
Phase
Auto
98
Clock
50
Select Move Exit