6 | DOC-701-INTBM_EN
ORIGINAL INSTRUCTIONS
Planning
If your home already has a system of plastic pipes and inlet valves,
you are ready to install the power unit. If not, you can contract a profes-
sional to have the central vacuum system installed. Contact your local
authorized dealer/distributor if you have any questions.
Central Vacuum Location
The central vacuum should be located away from the general living
area, yet accessible so you can remove the dirt bucket and inspect the
vacuum. A typical location would be in a garage or utility area where
emptying the dirt bucket would be more convenient. Other suitable
locations are in the basement, laundry room or a ventilated storage room.
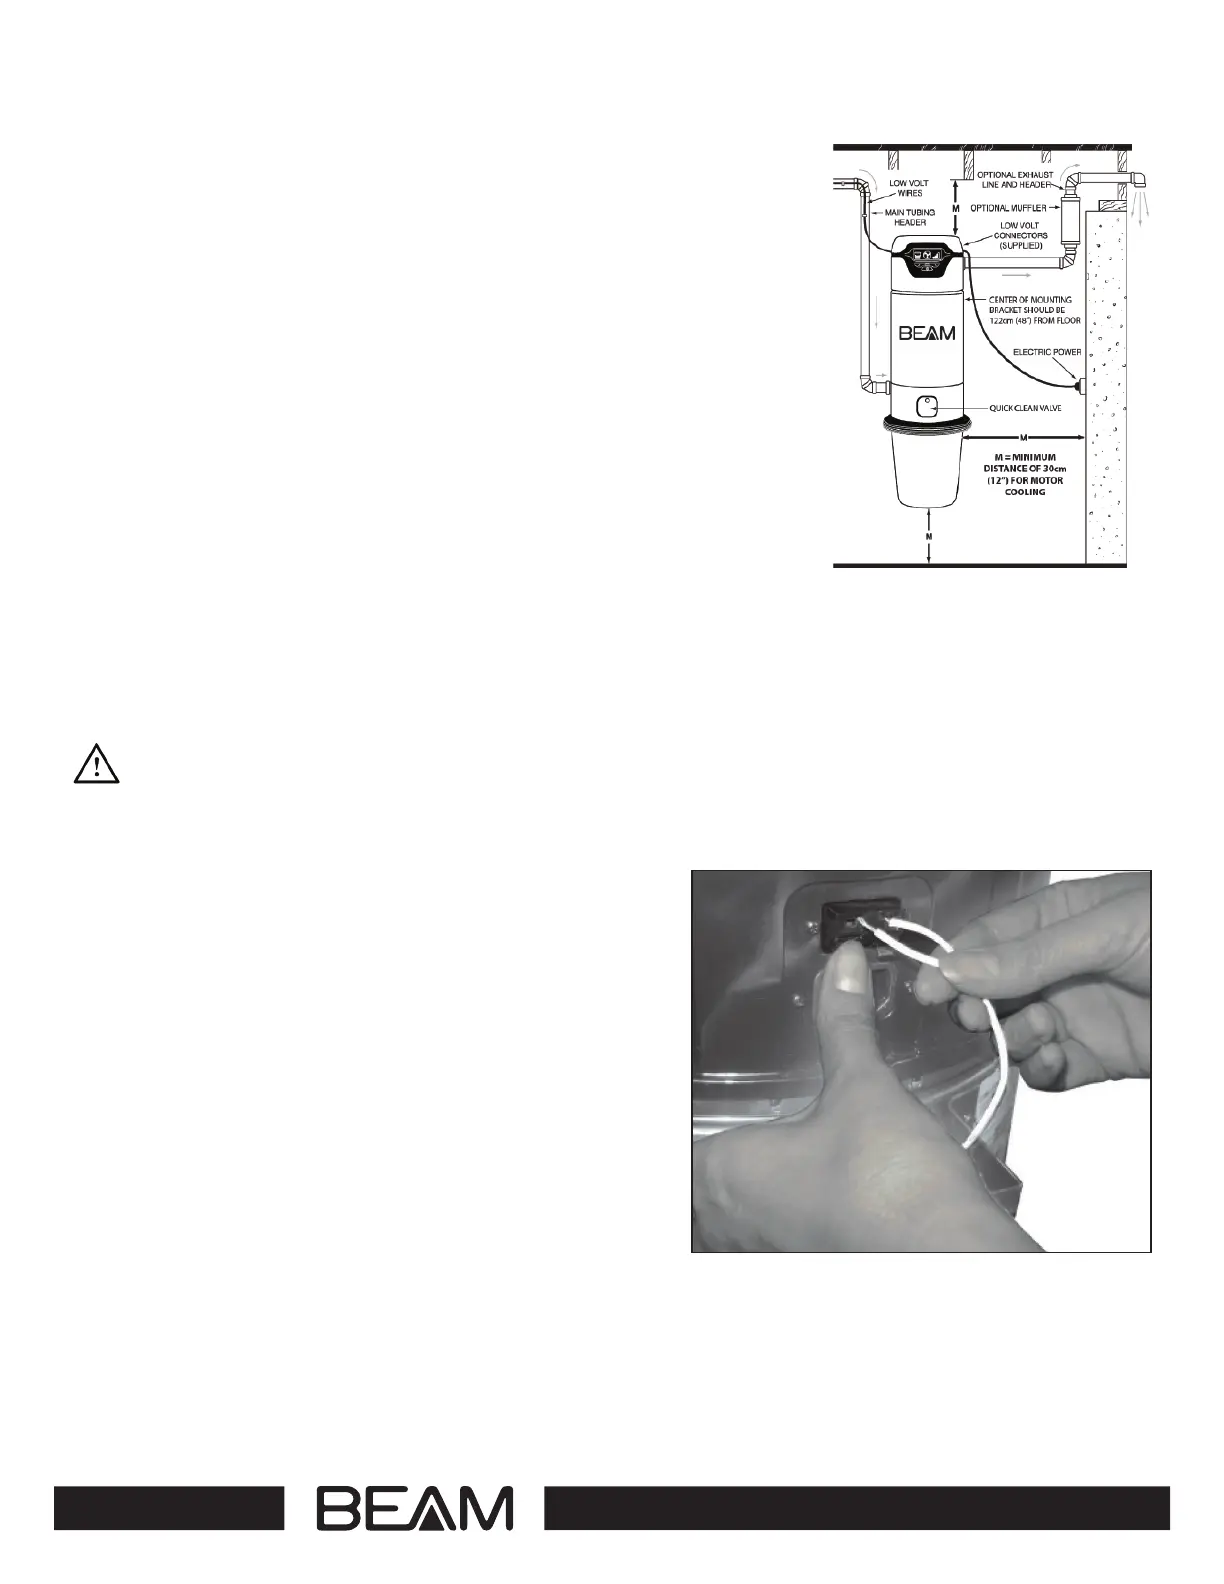
Central Vacuum Installation
The vacuum hangs on the mounting bracket which is screwed to the wall.
The center of the mounting bracket should be about 122 cm (48 inches)
from the floor to allow convenient removal of the dirt bucket. Mount unit
at least 30 cm (12 inches)
from the floor, ceiling and corner sidewall to ensure adequate ventilation for the motor. If mounting on
plaster or panel walls, ensure screws enter studs. If mounting on a concrete wall, drill the wall with a ma-
sonry
bit and insert the appropriate wall anchors (refer to Figure 2).
INSTALLATION
Figure 2
WARNING
Do not block the exhaust pipe. Lack of ventilation will cause the motor to overheat. Do not locate
the power unit in a high temperature area where it is inaccessible for example, an attic or crawl
space.
Before hanging the power unit on the wall ensure that
the intake flange on the power unit is positioned in the
correct direction; the muer is installed correctly, the op-
tional HEPA filter is installed correctly and the optional bag
adaptor is installed correctly.
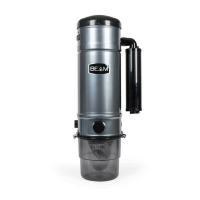
Strip the low-voltage wires that were installed with the
main trunk line. Connect the wires to the spring-loaded
connectors on the back of the power unit
(refer to Figure 3).
Hang the power unit on the bracket. Connect the main
tube line to the intake flange of the vacuum with the
connector and clamp provided.
DO NOT glue the main tube line to the power unit
so that the power unit may be removed for future
maintenance or service.
Figure 3