ORIGINAL INSTRUCTIONS
DOC-701-INTBM_EN | 7
INSTALLATION
Figure 5
Intake Flange
Your power unit has been designed
for either a left or right pipe intake.
If the pipe from your house is located
on the right side of the power unit,
you will need to change the direction
of the intake flange. To do this,
remove the two Torx 20 screws
located on the intake flange and turn
the intake flange 180°. Secure the
intake flange with the same two
Torx 20 screws previously removed
(refer to Figure 4).
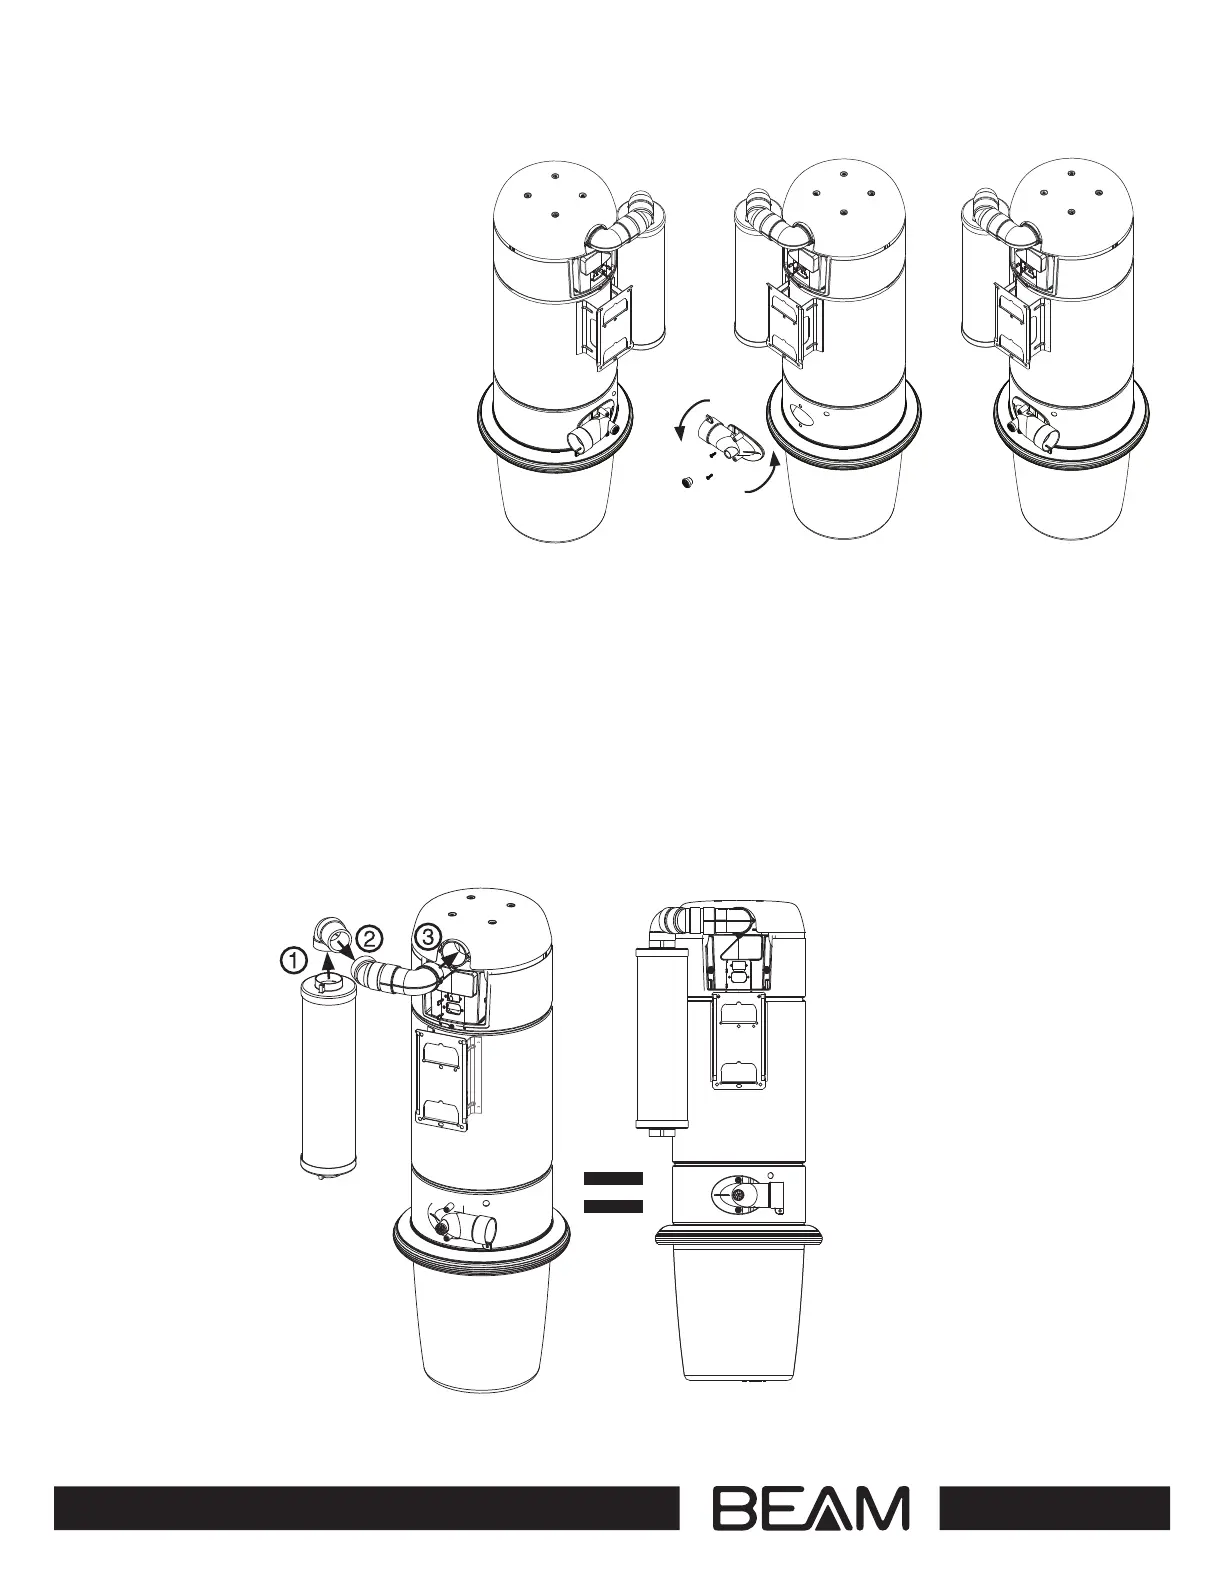
1.5 Muer Installation
1. To install the muer on the power
unit, connect one end of the short
90° elbow to the muer as indicated in Figure 5.
2. Glue the opposite end of the short 90° elbow to the WIDE open end of the long pipe adaptor. Before
connecting the short 90° elbows and long pipe adaptor, confirm the direction of the intake flange
located on the bottom, back of the power unit. Ensure the muer is located on the opposite, OPEN end,
of the intake flange as illustrated in Figure 5. Otherwise, the muer will interfere with the pipe intake.
3. Connect both the long pipe adaptor and muer assembly to the back of the power unit, securing
the muer with the Torx 20 screws provided.
NOTE: DO NOT glue the muer pipe adaptor to the central vacuum unit.
Figure 4