8 | DOC-701-INTBM_EN
ORIGINAL INSTRUCTIONS
INSTALLATION
Optional HEPA Filter Installation
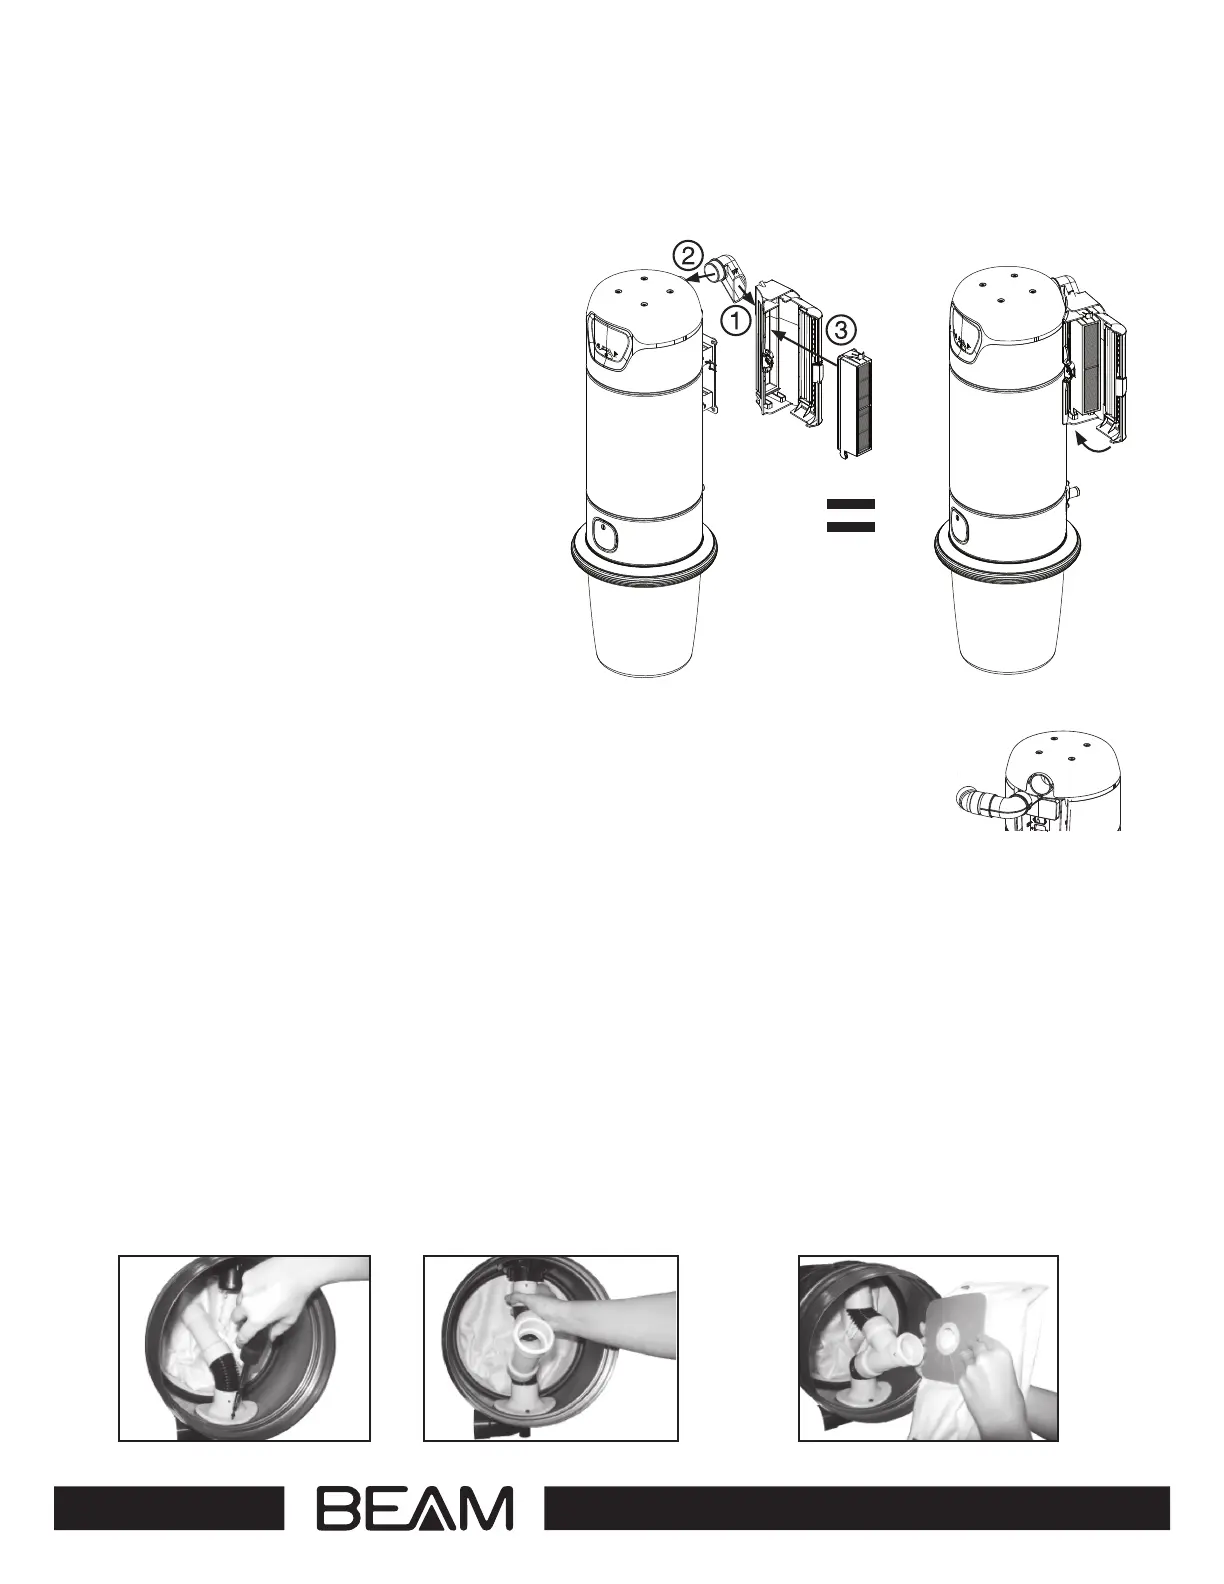
1. To properly install the optional HEPA
filter, secure the 90° elbow to the body
of the HEPA filter with
the Torx 20 screw provided.
2. Secure both the 90° elbow and HEPA
filter to the back of the power unit using
the second Torx 20 screw provided.
3. Insert the HEPA filter with its two
plastic tabs on the bottom of the filter
cartridge into the cavity of the HEPA fil
-
ter and snap into place. Close the HEPA
door gently. If the door does not close
easily, remove and reinsert the filter.
The HEPA filter can only be installed on
the right side of the power unit and will
not interfere with the intake pipe on either
side of the unit (refer to Figure 6a).
Exhaust
If the optional muer or the HEPA filter
is not utilized and the power unit is ex-
hausted to the outside, the long muer
pipe adaptor must be installed directly to the exhaust pipe away from the wall.
Do not operate the vacuum vented directly into the wall as it could cause damage
to the wall and/or vacuum. See Section 1.5 for adaptor instructions.
NOTE: One elbow must be installed if the muer or the HEPA filter is not used
(refer to Figure 6b).
Optional Bag Adaptor
The optional bag adaptor is easy to install prior to placing the central vacuum unit on the wall with the dirt
bucket removed. The bag adaptor has three unique ends, each connecting to a specific component.
1. Using the two Torx 20 screws, secure end “A” to the intake flange on the back inside the body of the
central vacuum unit (refer to Figure 7A).
2. Secure end “B” to the Quick Clean Valve from the inside of the central vacuum unit by aligning
and locking the tabs into place (refer to Figure 7B).
3. Push the cardboard collar from the filter bag on to the open hanging end “C” of the bag adaptor
(refer to Figure 7C).
4. Reconnect the dirt bucket to the central vacuum unit and ensure the filter bag is completely sealed
in both the central vacuum unit and dirt bucket.
Figure 6a
Figure 6b
Figure 7
A B C