ORIGINAL INSTRUCTIONS
DOC-701-INTBM_EN | 9
INSTALLATION
System Test / Operation
Be certain to comply with local electrical codes and regulations. Plug the unit into an electrical outlet.
You are now ready to check the vacuum installation:
• Be sure the dirt bucket is properly secured to the vacuum.
• Plug the hose into each inlet valve and turn on the central vacuum system with the power button
on the handle ensuring the electrical contacts operate properly.
• The central vacuum system can also be turned on/tested by pressing the power button on the power unit.
• Check each inlet valve for air leaks.
• Check each pipe connection for air leaks.
WARNING: Do not use extension cords or outlets with inadequate current carrying capacity. Connect the
power cord to a dedicated branch circuit. Before hanging the power unit on the wall, install either the muer
or the HEPA filter supplied with the unit.
CARE AND MAINTENANCE
Instructions in this book serve as a guide to routine maintenance. Proper airflow and suction are
maintained by keeping the dirt bucket and filter clean, plastic tubing and hose free from clogs.
Motor
The BEAM Alliance central vacuum system is equipped with a flow-thru motor and will never need
lubrication. Should you experience any motor problems, please contact your local authorized
dealer/distributor.
Dirt Bucket and Bag Adaptor
Reduced airflow or suction indicates the central vacuum
system is not operating at maximum eciency.
If the dirt bucket is full and the filter is clogged, air cannot pass
through the unit limiting performance.
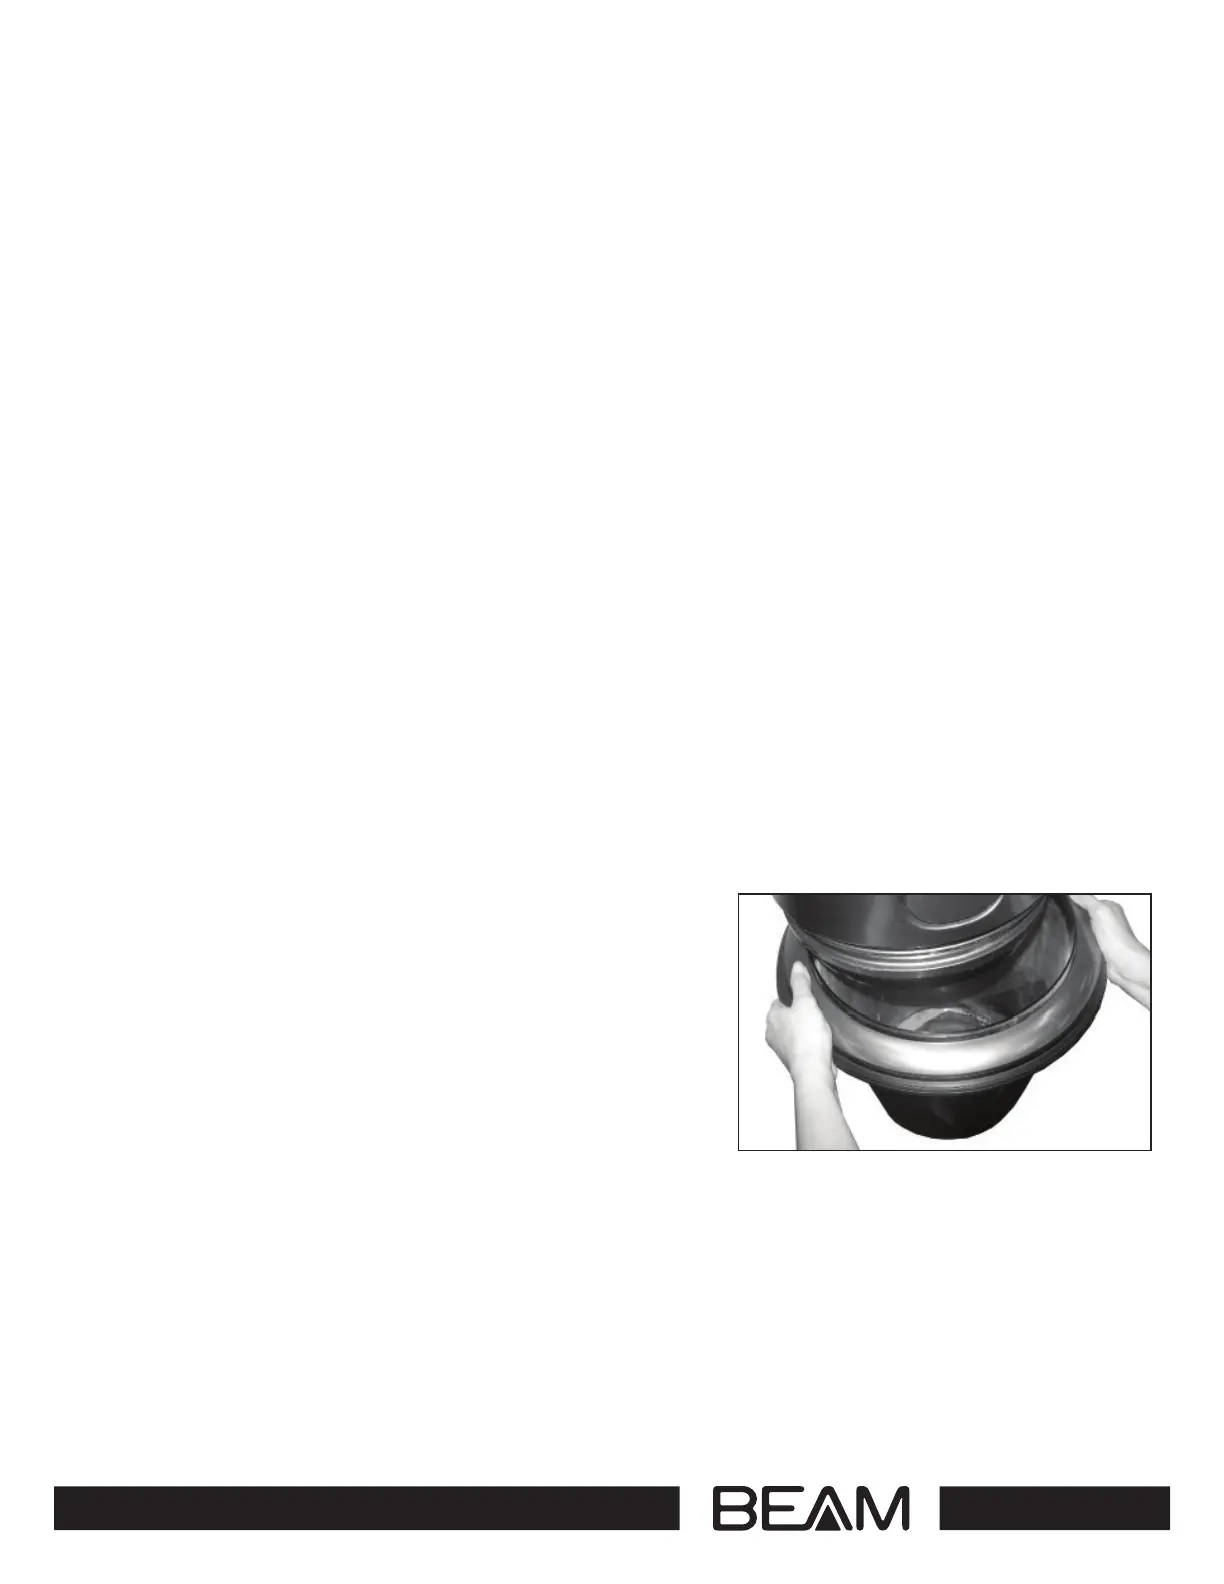
To remove the Press & Release Bucket, clasp opposing
positions on the bucket ring, press with thumbs and pull
down to remove bucket and empty contents. (refer to Figure 8).
To reinstall the dirt bucket, lift the bucket back into place until
you hear a “click”. The central vacuum system will not operate
properly if the dirt bucket is not installed correctly.
Figure 8