EN 30
5. Use the H (23) and M (21) buttons to set the start time you want (see the “Handling and
Operation” chapter – “Time”).
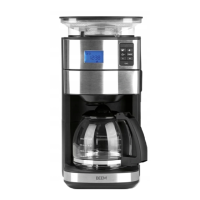
For making coffee with coffee beans, use the
button (19) to set the coffee strength
you want.
6. To activate the preset time, press the TIMER button again. The
symbol (15) appears
on the display. The preset time is activated.
Once the preset time is reached, the device switches on automatically. The operating lamp
lights up and the
(17) symbol fl ashes on the display.
If the indicator on the display should stop fl ashing even though the setting has not yet
been completed, press the TIMER button again for around 3 seconds. The indicator on
the display fl ashes again and the settings can be resumed.
Deactivating the Preset Time
To deactivate the preset time setting, press the TIMER button (20). The symbol (15)
goes out and the programming is deactivated. However, the preset time is retained and can
be reactivated at any time until a new preset time is programmed in or the device has been
disconnected from the power supply.
Cleaning and Care
NOTICES
• Do not use any toxic, corrosive or abrasive cleaning agents or scouring sponges to
clean the device. These can damage the surface.
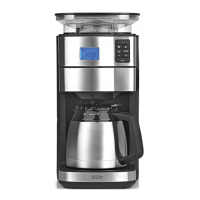
1. Clean the permanent fi lter, the fi lter insert and the glass jug (6) after every use with mild
detergent and warm water or in the dishwasher.
2. Clean the thermal jug after every use with mild detergent and warm water. It is not suitable
for the dishwasher!
3. If necessary, wipe down the coffee bean compartment (2) and the lid (1) with a damp cloth.
4. Wipe down the housing with a damp cloth. If necessary, use a little mild detergent to
remove more intense soiling.
5. Check the mains cable regularly for any damage.
Cleaning the Grinder Shaft
1. Remove the coffee beans from the coffee bean compartment (2). (Apart from the few
beans that you cannot reach by hand.)
2. Insert the permanent fi lter into the fi lter insert.
3. Press the
button (18) to switch on the device. The grinding process will start.