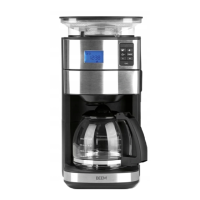
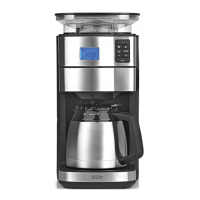
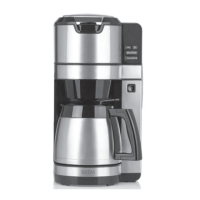
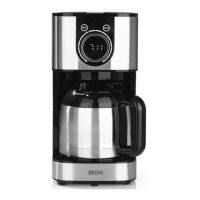
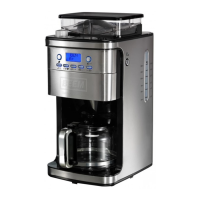
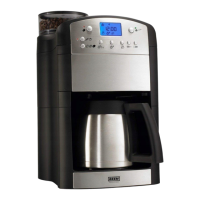
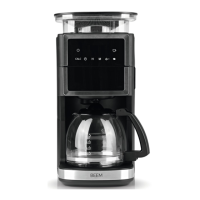
This document describes a coffee machine available in three versions: 02576 (Glass jug), 04233 (Thermal jug), and 04260 (Glass and thermal jug). The model numbers are 380401, 380402, and 380403 respectively. It operates on a voltage supply of 220-240 V ~ 50-60 Hz with a power of 1000 W. The water tank capacity ranges from 0.25 to 1.25 litres (2-10 cups), and the coffee bean compartment has a capacity of 180 g.
Function Description:
The coffee machine is designed for preparing coffee using either coffee powder or whole coffee beans. Key functions include:
- Grinding: It features an integrated grinder (3) with a grinding fineness dial (7) that can be adjusted to fine, medium, or coarse settings.
- Brewing: The device brews coffee by transporting freshly ground coffee or pre-ground coffee powder into a permanent filter and then pouring hot water over it.
- Keep-Warm Function: An automatic keep-warm function maintains coffee temperature for approximately 40 minutes after brewing. This function can be manually switched off, especially when using the thermal jug, to save energy.
- Drip Stop: A drip stop mechanism prevents water from dripping from the permanent filter when the coffee jug is removed.
- Preset Time Function: Users can set a specific time for the coffee machine to start brewing automatically. The clock needs to be set beforehand for this function to work.
- Aroma-Plus Function: This feature allows for an extended brewing time when using coffee powder, resulting in a more intense coffee flavour. It is recommended for 2 or 4 cups to avoid overly bitter coffee.
Important Technical Specifications:
- Article Numbers: 02576 (Glass jug), 04233 (Thermal jug), 04260 (Glass and thermal jug)
- Model Numbers: 380401, 380402, 380403
- Voltage Supply: 220-240 V ~ 50-60 Hz
- Power: 1000 W
- Water Tank Capacity: 0.25 to 1.25 litres (2-10 cups)
- Coffee Bean Compartment Capacity: 180 g
- Display: Features an operation indicator (11), time indicator (12), coffee strength/Aroma-Plus indicator (13), number of cups field (15), hotplate on indicator (18), coffee powder indicator (20), timer indicator (22), and descaling programme indicator (24).
- Control Panel Fields: M (19) for minutes, H (21) for hours, (14) for setting number of cups, (16) for setting coffee strength/Aroma-Plus, (17) for coffee powder preparation, (23) for setting preset time, CALC (25) for starting descaling, and (26) for start/stop.
Usage Features:
- Initial Setup: Before first use, the device and accessories should be wiped clean and rinsed. A trial run with coffee beans is recommended to remove any production residues.
- Time Setting: The 24-hour clock can be set using the H (21) and M (19) fields.
- Adding Coffee Beans: Remove the lid (I) and fill the coffee bean compartment (2). Ensure the water tank (10) is closed to prevent beans from falling in.
- Water Filling: Open the water tank lid (8) and fill the water tank (10) with water only, up to the desired number of cups (max 10 cups). The device uses all water in the tank regardless of cup setting.
- Filter Insertion: Open the filter compartment (5), place the filter insert, and then the permanent filter (G). Close the compartment until it engages.
- Setting Number of Cups: Touch field (14) repeatedly until the desired number of cups (15) is displayed.
- Setting Coffee Strength: Touch field (16) repeatedly to select mild, medium, or strong coffee (indicated by 13).
- Brewing Process: Touch field (26) to start brewing. For coffee beans, the grinder activates first. For coffee powder, touch field (17) first, then (26).
- Stopping Brewing: Touch field (26) to prematurely stop the brewing process.
- Preset Time Activation: After preparing the machine and setting the time, touch field (23) to make the clock (12) and timer indicator (22) flash. Set the desired start time using H (21) and M (19), then touch (23) again to activate.
Maintenance Features:
- Cleaning:
- The permanent filter, filter insert, and coffee jug should be cleaned after each use with mild detergent and warm water, or in a dishwasher (glass jug only). The thermal jug should be cleaned with mild detergent and warm water but not in a dishwasher.
- The coffee bean compartment (2) and lid (I) should be wiped with a damp cloth.
- The housing should be wiped with a damp cloth, using mild detergent for stubborn dirt.
- All parts must be thoroughly dried before reassembly.
- Grinder Shaft Cleaning:
- Remove coffee beans from the compartment (2).
- Insert the permanent filter and close the filter compartment (5).
- Turn on the device by touching (26) to grind remaining beans. Stop by touching (26) again.
- Remove the coffee bean compartment by turning it anticlockwise (H).
- Set the grinding fineness dial (7) to "Release".
- Pull out the top part of the grinder (3) by its handle (I).
- Clean the grinder shaft and grinder with the supplied cleaning brush.
- Reinsert the grinder top part, ensuring correct position (arrow marking), and fold the handle down.
- Return the grinding fineness dial to a grinding setting to lock the grinder.
- Reattach the coffee bean compartment by turning it clockwise until it engages.
- Thermal Jug Cleaning (04233, 04260): Use BEEM Premium Cleaning Tablets dissolved in 60-70°C hot water. Pour the solution into the jug, close, shake, let it soak, then empty and rinse thoroughly. Note: Cleaning tablets do not descale.
- Descaling: Limescale deposits should be removed regularly (every 2-6 weeks) using a descaling agent like BEEM Premium Descaler Concentrate.
- Fill the water tank (10) up to the 8-cup mark with a 1:20 concentrate/water solution.
- Touch CALC (25) to start descaling. The CALC indicator (24) will flash.
- After the process, the device enters standby mode.
- Rinse the device by running two full tankfuls (10 cups) of clear water through it.
Safety Notices:
- Always read and follow all safety instructions to prevent electric shock, fire, or injury.
- The device is not a toy and must be kept away from children and animals.
- Hot surfaces: Only touch handles, control panel, and dial during operation. Allow to cool completely before cleaning.
- Never overfill the water tank (max 10 cups).
- Do not immerse the device or connecting cable in water or other liquids.
- Disconnect from mains when unattended, before assembly/disassembly, filling/emptying water tank, or cleaning.
- Do not modify the device or replace the connecting cable yourself. Damaged parts must be replaced by the manufacturer or authorised service.
- Use only in closed rooms and avoid high humidity.
- Do not connect to multiple sockets with other high-wattage devices.
- Keep away from combustible materials and do not cover during operation.
- Avoid contact with rising steam; do not open water tank lid or filter compartment during brewing.
- Allow filter insert and permanent filter to cool before removal/cleaning.
- Do not move the device during brewing.
- Keep clothing, jewellery, and long hair away from the coffee bean compartment and grinder shaft.
- Use only original accessories.
Troubleshooting:
A table is provided for common issues, possible causes, and fixes, such as:
- No display: Check mains plug, socket, and fuse.
- Fuse triggered: Reduce devices on the circuit.
- Water leakage: Do not overfill water tank.
- Slow coffee flow: Clean drip stop, descale device.
- Weak coffee: Adjust water/coffee quantity.
- Ground coffee not dropping: Clean grinder shaft.
- Excessive steam: Descale device.
- Unpleasant smell: Normal for first use, rinse with clear water if previously descaled.
- Error E09: Coffee bean compartment (2) not inserted correctly (place at an angle and turn clockwise until it engages).
Warranty and Limitations of Liability:
The warranty excludes faults from improper handling, calcification, damage, or attempted repairs, as well as normal wear and tear. Liability is not accepted for damages resulting from non-compliance with instructions, non-designated use, improper handling, unauthorised repairs/modifications, or use of non-original parts/accessories. Keep original packaging for returns.
Disposal:
Packaging materials should be recycled. The device itself falls under European Directive 2012/19/EU (WEEE) and must be disposed of environmentally friendly via an approved waste disposal company, not with normal household waste.