EasyManuals Logo

Behringer PRO-1 Quick Start Guide

Behringer PRO-1
6 pages
To Next Page IconTo Next Page
To Previous Page IconTo Previous Page
Page #5 background imageLoading...
Page #5 background image
page 5 of 6
985-40000-01090 Rev.A
2021-02-16
Condential, for internal use only. Not to be reproduced.
page 5 of 6
Synthesizers and Samplers
PRO -1
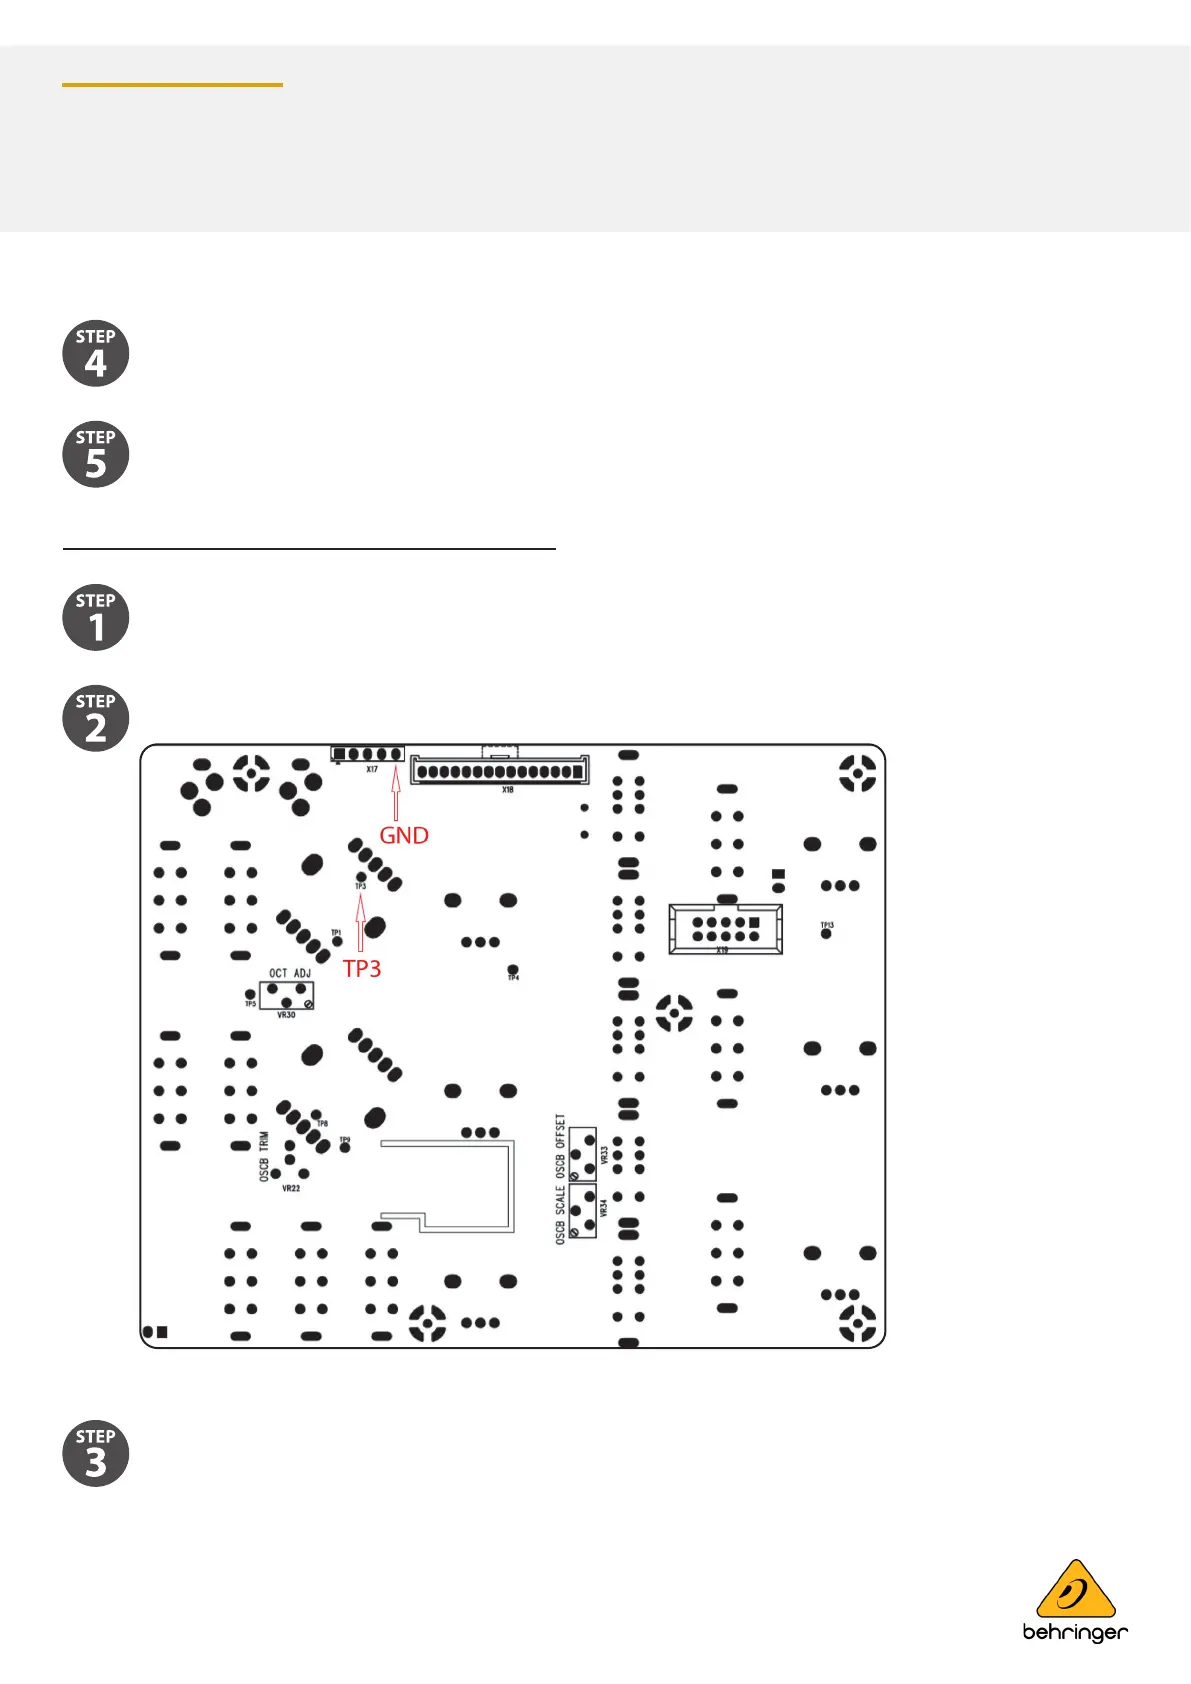
Connect the positive probe of your Voltmeter to TP3.
OCTAVE Calibration (factory mode)
Set the Digital Voltmeter to measure a range below 10 VDC.
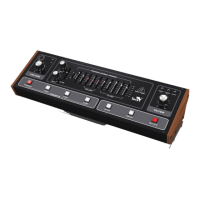
Locate the Test Points OCTAVE CV TP3 and ground (the red arrow in Figure 2) on the bottom surface of
the main PCB.
Figure 2
Repeat the same steps as oscillator A but using OSCB SCALE and OSCB OFFSET trimmers.
On your external keyboard, press the A7 key and adjust the OSCB TRIM trimmer while observing the tuner display.

Other manuals for Behringer PRO-1

Questions and Answers:

Question and Answer IconNeed help?

Do you have a question about the Behringer PRO-1 and is the answer not in the manual?

Behringer PRO-1 Specifications

General IconGeneral
TypeAnalog
PolyphonyMonophonic
Oscillators2 VCOs
LFO1 LFO
SequencerNo
ArpeggiatorNo
CV/GateYes
USBYes
WaveformsPulse
KeyboardNo
MIDIIn/Out/Thru
Filter24 dB/oct 4-Pole Low-Pass Filter

Related product manuals